Add Row
Add Element
UPDATE
Add Element

Your guide to modern living—every day.

  • Home
  • Categories
    • Wellness
    • Home and Garden
    • Work and Life
    • Travel
    • People and Style
    • Living Spaces
January 18.2026
1 Minute Read

Why the Importance of Tanking in the Bathroom Wet Areas Can't Be Ignored

Did you know? Up to 80% of water damage in homes starts in poorly tanked wet areas—making proper tanking the unsung hero of bathroom safety

A Startling Truth: The Importance of Tanking in the Bathroom Wet Areas

Throughout the UK and beyond, water damage is one of the most expensive and disruptive issues homeowners can face. More often than not, the root cause is poor or missing tanking systems in bathroom wet areas. It isn’t just about aesthetics; even a tiny leak behind a shower tray or beneath tile can turn into structural damage, black mold, and rot that pose health risks and lower the value of your property. That’s why proper tanking—a comprehensive, water-tight membrane that guards against leaks—is considered the professional hallmark of bathroom installation. Plumbrite’s expert team knows this firsthand: every year, they’re called to fix problems that could have been prevented with the right tanking kit or waterproofing system. Let’s kick off your learning journey with some stunning statistics:

"Up to 80% of water damage in homes starts in poorly tanked wet areas—making proper tanking the unsung hero of bathroom safety."

  • Nearly 1 in 3 bathrooms suffer from hidden water leaks due to inadequate waterproofing systems.

  • The cost to repair water damage from leaks in bathrooms and wet rooms is, on average, 3 times greater than the cost of initial proper tanking installation.

  • Shower trays and wet room floors are the wet areas most likely to fail without a reliable tanking system.

Bright, modern bathroom wet area with confident homeowner inspecting shower walls, tanking systems emphasized, photorealistic, contemporary clean tiles and glass, subtle reflections and fresh atmosphere, aquatic blue palette, under gentle daylight.

What You'll Learn About the Importance of Tanking in the Bathroom Wet Areas

  • What tanking and waterproofing systems are

  • Why tanking in wet rooms and wet areas is vital for every bathroom

  • How to choose the right tanking kit and tanking system

  • Common mistakes and best practices for installing wet area tanking systems

  • Expert advice from Plumbrite on long-term bathroom protection

Defining Tanking: What is a Tanking System in Bathroom Wet Areas?

Tanking in a bathroom means creating a watertight, waterproof layer that prevents water from reaching the underlying structure. In all wet areas, such as shower trays, wet rooms, and around bath surrounds, a tanking system acts as the last line of defense against leaks and water ingress. This invisible but vital protection ensures your home’s walls and floors remain safe from the constant threat of water damage—a risk that grows with every shower, bath, or spill. Plumbrite’s experience shows that when homeowners invest in a proper tanking system, they vastly increase the longevity and durability of their bathrooms and wet rooms.

Understanding Tanking System: The Basics

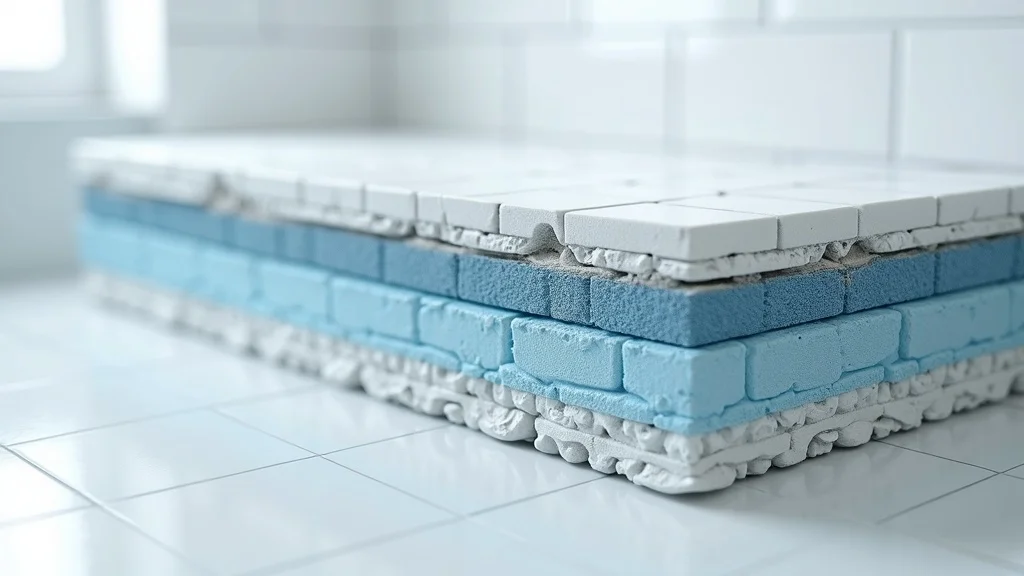
Let’s break this down further. A tanking kit typically includes waterproof membranes (like liquid or sheet membranes), adhesives, and sealing tapes for joints and corners. These work together to form a complete seal under your tiles and fixtures, blocking water from sneaking into the structure of your home. The best tanking systems also incorporate flexible cement boards and other compatible materials for maximum leak protection in all wet areas, creating peace of mind for homeowners. While tanking is sometimes compared to general waterproofing, the main difference is the comprehensive, continuous barrier it forms under the whole wet zone rather than only select spots.

  • Up to 25% of all insurance claims for property damage are linked to water leaks in bathrooms and wet rooms.

  • Modern tanking kits can be retrofitted during renovations or used in entirely new builds.

  • Even a tiny penetration below the tile layer—a missed joint or tape—can cause water to travel meters from the original wet area.

Detailed cross-section of a bathroom floor and wall, showing tanking membrane layers, adhesive, and tile surface, illustrating a bathroom wet area

Comparison: Waterproofing Systems & Tanking Kits for Wet Areas

System/Product

Main Material

Application Area

Drying Time

Longevity

DIY Friendly?

Liquid Tanking Kit

Liquid Membrane

Wet rooms, shower trays, bathroom floors/walls

6–12 hours

10+ years

Yes, with care

Sheet Membrane

Plastic/Polymer Sheet

Wet area floors, critical wall zones

Immediate (after adhesion)

20+ years

Yes, with training

Cement Board + Sealing Tape

Cement Board, Waterproof Tape

Behind tiles, high-stress wet zones

24 hours

15+ years

Professional install advised

Tanking vs. Waterproofing Systems: Are They the Same?

Although people often use the terms tanking and waterproofing interchangeably, there are important distinctions. Waterproofing systems may only protect key spots like joints and seams. In contrast, tanking is a complete approach—ensuring every inch of the wet area, from the floor to halfway up the walls, is covered in a water-repellent membrane. This thorough approach blocks seepage, provides reliable room waterproofing, and complies with strict building regulations. That’s why bathroom experts recommend tanking systems for every wet room and shower zone.

How a Tanking Kit Works in Wet Rooms and Wet Areas

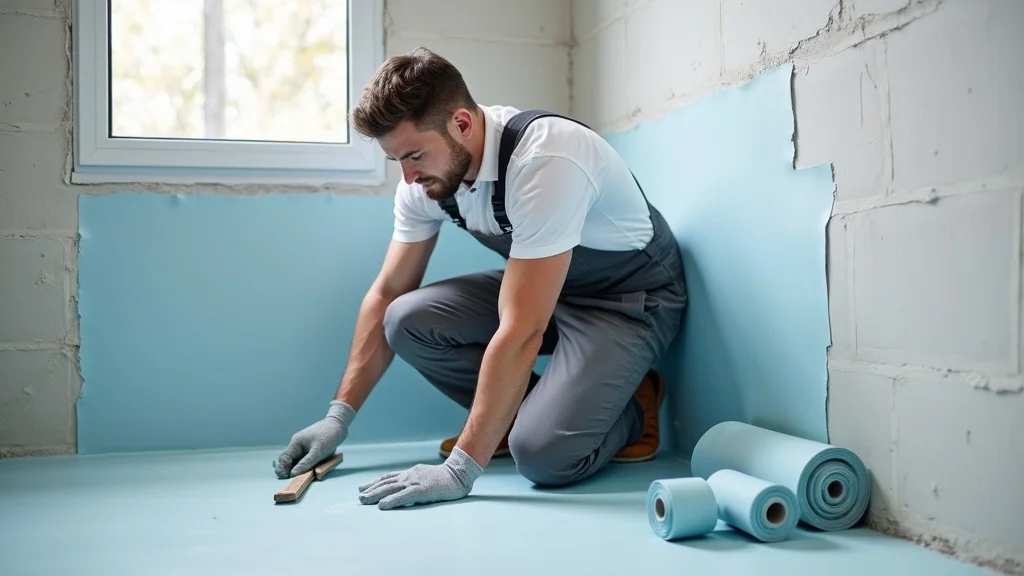
A tanking kit works by forming a continuous, watertight envelope before tiles or final surfaces are installed. The installer applies either a liquid membrane or fits sheet material neatly over all surfaces. Corners and edges are reinforced with special sealing tape or bands. When dry, the membrane forms a waterproof layer that is flexible enough to withstand movement (essential with temperature and humidity changes). This barrier stops moisture from reaching timber, plaster, or subfloors—the real cause of long-term structural damage in bathrooms and wet rooms.

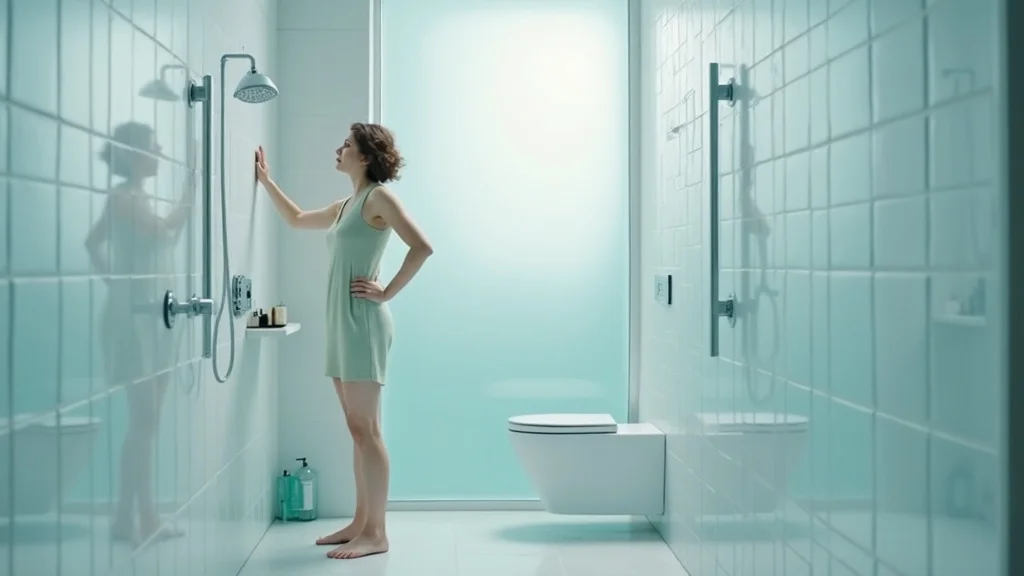
Why Wet Areas Like Shower Trays and Wet Rooms Rely on Proper Tanking

If you’re planning a new wet room or modern shower tray installation, the importance of tanking in the bathroom wet areas cannot be overstated. Water exposure in these spaces is continuous. Without a proper tanking system, leaks often go undetected until visible signs like mold, damp spots, or even peeling paint surface. By that point, extensive (and expensive) fixes may already be needed. Plumbrite recommends installing robust tanking products during every renovation to protect both your investment and your peace of mind.

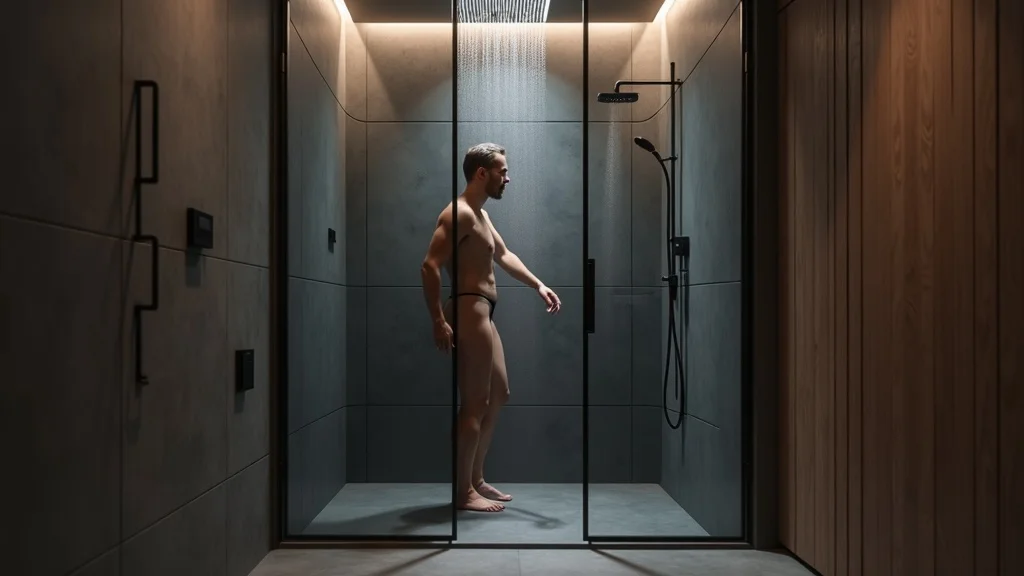
The Role of Tanking Systems in Wet Room Design

Modern wet rooms are designed for ultimate convenience and luxury. But behind the sleek surfaces lies a complex web of waterproofing, with tanking kits as the backbone. A well-designed tanking system ensures that both the shower tray and adjacent wet areas remain completely leak-proof, even with daily use, hot water, and steam. Tanking makes design flexibility—like walk-in showers, flush floors, and expansive glass dividers—possible by providing complete moisture control. A professional tanking job is what separates DIY attempts from truly reliable, durable wet zone construction.

Inviting modern wet room shower with satisfied user stepping onto shower tray, tanking system protecting wet area, photorealistic with matte black fixtures and large tiles, ambient lighting, earth tones and slate blue streaks.

Tanking Product Innovations: What Sets Modern Waterproofing Systems Apart?

Modern tanking products have evolved far beyond old-school tar, paints, or glue. Today’s top tanking systems feature quick-drying, crack-bridging, and even antimicrobial membranes—some in easy-to-roll or brush-on liquid format, while others use easy-to-fit sheet materials. These current-generation waterproofing systems are designed for minimum fuss, maximum strength, and compatibility with a wide range of substrates (Gyprock, cement board, plywood, and more). High-performance tanking kits are now formulated for speedy installation, short drying times, and long-term reliability—a win for both DIYers and professionals like Plumbrite.

Building Regulations and Tanking: What Every Homeowner Must Know

According to building regulations in the UK, all new or renovated bathrooms and wet rooms must include adequate waterproofing (tanking) in designated wet areas. These rules exist for a reason: they prevent costly water and structural damage, and protect future homeowners. Ignoring tanking can put insurance claims and property values at risk. Professional installers like Plumbrite are always up to date with code requirements and know how to install a tanking system that meets or exceeds standards. Proper tanking is more than just a recommendation—it’s a legal and financial safeguard.

"A properly tanked wet area not only preserves your bathroom but can increase your property value." —Plumbrite Expert

Consequences of Ignoring the Importance of Tanking in the Bathroom Wet Areas

If you skip tanking or waterproofing in your wet area, serious problems are almost certain to appear down the road. At first, the issues may be subtle—discoloration in tile grout, musty smells, or minor water stains. But left unchecked, these can escalate into rotten floorboards, warped walls, peeling paint, and even black mold that’s hazardous to health.

The Dangers of Water Damage: Hidden Costs and Structural Risks

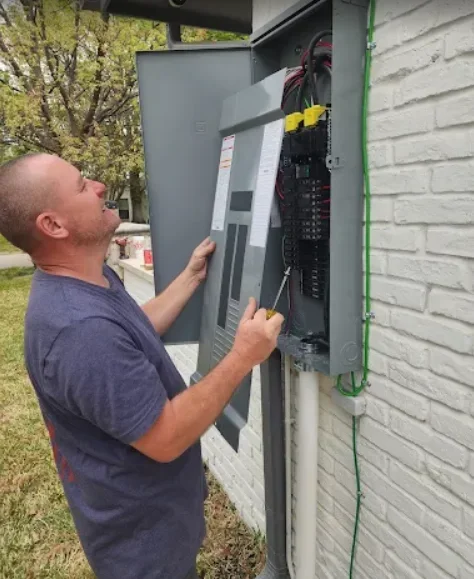
Water damage is insidious and expensive. Leaking water from a poorly tanked shower tray or wet room penetrates into floors and walls, weakening the structure beneath. Timber may rot, masonry may crumble, and hidden leaks can travel to lower floors, damaging ceilings and even electrics. In extreme cases, home occupants may need to relocate while remedial work is carried out—at huge cost and inconvenience. The bottom line: investing in proper tanking is far cheaper (and much less stressful) than paying for structural repairs and mold removal.

Distressed homeowner in older bathroom, examining water stains on ceiling caused by neglected wet area tanking, visible mold, peeling paint, photorealistic with muted greens and greys, damp effects, harsh lighting.

Case Studies: Wet Room and Shower Tray Failures Without Proper Waterproofing

Real-world examples highlight the importance of tanking in the bathroom wet areas. Plumbrite was once called to a renovated wet room where no tanking kit had been used under the shower tray. Two years later, the homeowner noticed damp carpets in the adjacent bedroom. On inspection, water had migrated through the subfloor and triggered black mold growth across three rooms. In another case, cracked grout in a shower area without a waterproofing kit led to thousands of pounds in repairs—not to mention weeks of disruption while the entire bathroom was rebuilt from the joists up. Don’t learn the hard way: tanking is always the better investment!

  • Top Five Signs Your Bathroom Wet Area May Need New Tanking or Waterproofing:

    • Mold or mildew smell in your bathroom, even after cleaning

    • Bubbling or peeling paint near bathroom floors or walls

    • Persistent wet patches or discolored grout in tiled areas

    • Visible water stains on ceilings below bathrooms or wet rooms

    • Soft spots, movement, or creaking in shower tray or floor tiles

How to Choose the Right Tanking System for Your Wet Room or Wet Area

Selecting the correct tanking system is critical for long-term durability. Not all wet rooms or bathrooms have the same requirements. The choice depends on your floor type, substructure, tile material, and even how much traffic the room gets. Plumbrite recommends assessing the intended use, looking for certified products, and considering drying time and ease of application when choosing any kit or waterproofing system. Sometimes, you may also need eco-friendly tanking solutions or systems compatible with underfloor heating or special substrate boards.

Identifying the Best Tanking Kits and Waterproofing Systems

The best tanking kits are those that offer full coverage, fast drying time, strong adhesion, and compatibility with a range of surfaces such as cement boards, timber, or plaster. Look for kits from reputable brands recommended by professionals. Plumbrite’s team prefers products with included sealing tapes, brushes, and easy-to-follow instructions—saving you time and hassle. Always check for quality assurance marks or building regulation compliance. Don’t forget: the right tanking system will extend the lifespan of your wet area by years, keeping expensive water damage at bay.

Selection of premium tanking kits and waterproofing products for wet areas, displayed in a modern workbench setting, product clarity and clean arrangement emphasized, strong blues, whites, and yellows.

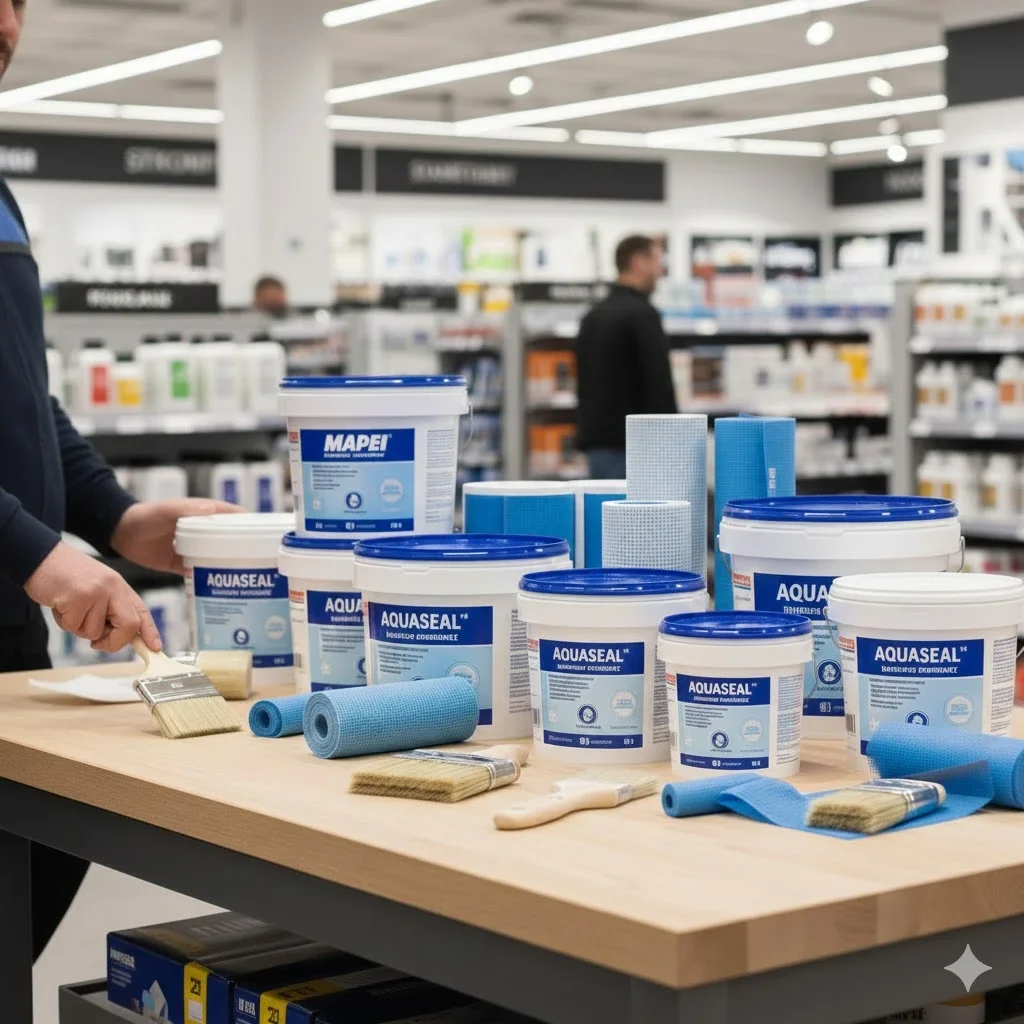
Top Tanking Products Recommended by Plumbrite

Plumbrite’s experts stand by tested brands like Aquaseal, Ardex, and Mapei for both liquid membrane and sheet membrane tanking. These kits have a proven record of creating reliable waterproof layers in bathrooms and wet rooms—even those with unusual layouts or high usage. Key features Plumbrite looks for include adaptability to complex shapes, inclusion of all necessary accessories, and clear step-by-step guides. By using these professional-grade products, the risk of leaks or future repairs is minimized.

Drying Time and Application Tips for Wet Area Tanking

Drying time for tanking kits can range from just a few hours to a full day, depending on humidity, product type, and application thickness. Always follow manufacturer instructions: rushing through can create weak spots or incomplete waterproofing. For best results, allow each membrane layer to cure properly before tiling or fitting fixtures. Keep the room well-ventilated and at a stable temperature during application and drying. If unsure, consult with Plumbrite or another professional—especially for tricky jobs or unusual wet rooms where a perfect seal is vital.

  • Factors to Consider When Selecting a Tanking System:

    • Type of material covering your wet area (tile, stone, vinyl, etc.)

    • Compatibility with existing subfloor or wall material (cement board, plaster, plywood)

    • Size and complexity of the bathroom or wet room design

    • Drying/cure time required and project timeline

    • Certification, warranty, and compliance with building regulations

Installation Process: Achieving Proper Tanking in Wet Areas

A correctly installed tanking system is the difference between a bathroom that lasts decades and one that fosters leaks after only a few years. The process often looks simple, but the devil is in the details. Plumbrite recommends careful preparation—cleaning and priming surfaces, following application sequences, and using every supplied tape or membrane to seal gaps and transitions. Even small mistakes can have big consequences, so don’t cut corners if you want peace of mind.

Step-by-Step Guide: Installing a Tanking Kit in a Wet Room

1. **Surface Preparation:** Clean and dry all wet area surfaces, ensuring that subfloors and walls are stable and free from dust or grease. Patch holes or cracks and check for levelness.

2. **Priming:** Apply the provided primer (from your tanking kit) to ensure maximum adhesion of the subsequent membrane. Allow it to dry according to manufacturer guidelines.

3. **Membrane Application:** Apply the first layer of liquid or sheet membrane to all wet areas, focusing on critical junctions where floors meet walls, and around drains or pipes. Use the supplied brush or roller for liquids; carefully press and smooth out wrinkles for sheet material.

4. **Corners & Joints:** Reinforce all corners and movement joints with specialized sealing tape or reinforcing bands from your kit, ensuring no gaps are left.

5. **Additional Coats:** If required, apply a second coat after the first has dried, making sure each layer is even and continuous.

6. **Drying Time:** Allow the membrane to thoroughly cure before laying any tiles or covering with final surfaces.

7. **Inspection:** Examine for bubbles or missed spots, touching up as needed.

Common DIY Mistakes and When to Call Plumbrite Experts

A few common mistakes include skipping the primer, failing to overlap sealing tape, not allowing enough drying time, or leaving small unprotected gaps. Overconfidence can result in shortcuts, which virtually guarantee future leaks. If you’re not confident or have an unusually shaped wet room, it’s always best to call in professional help. Plumbrite’s experience, product knowledge, and attention to detail mean a tanking system is installed right the first time—guaranteeing lasting protection and building regulation compliance.

  • Checklist: Essential Steps for Proper Tanking and Waterproofing

    • Prep and clean all surfaces

    • Prime with appropriate solution

    • Install membrane (liquid or sheet) over all wet areas

    • Apply sealing tape at joints, corners, and pipe entries

    • Allow for full drying/curing before tiling or installing fixtures

    • Inspect thoroughly—patch any missed spots

Professional installer applying tanking membrane to bathroom wall in wet area, showing step-by-step waterproofing, photorealistic, neutral palette with pops of blue, crisp focus on membrane and tools.

"Proper tanking is a professional’s hallmark—never underestimate its importance!"

In this exclusive video, Plumbrite experts walk you through why tanking matters for your wet room or bathroom. See before-and-after footage, real-life examples, and close-ups of today’s most reliable waterproofing systems. Learn how tanking kits protect your investment, and discover animated statistics that drive home the true cost of ignoring wet area protection.

Watch: Explainer video from Plumbrite — professional advice, visual demonstrations, and expert commentary on the significance of proper tanking in bathroom wet areas. Includes before/after visuals, close-ups of waterproofing systems, and animated statistics.

People Also Ask: The Importance of Tanking in the Bathroom Wet Areas

Does a wet room need tanking?

Yes, all wet rooms require comprehensive tanking systems to prevent water leaks and ensure a fully waterproofed bathroom environment. Without tanking, even small leaks can lead to extensive water damage and structural concerns.

What happens if you don't waterproof the bathroom?

Failure to waterproof a bathroom—especially key wet areas such as shower trays or wet rooms—can result in mold growth, rotting timber, weakened foundations, expensive repairs, and jeopardized safety.

What is the purpose of waterproofing wet areas?

Waterproofing wet areas protects your home from moisture ingress, prevents mold and fungal growth, and prolongs the lifespan of your bathroom surfaces and structures.

Is waterproofing necessary for a bathroom?

Yes, waterproofing is a critical requirement for all bathrooms to comply with building regulations and to protect property from water damage. Tanking is a foundational part of this process.

See how a Plumbrite professional applies a tanking system from start to finish. From prepping the wet area, applying primer and membrane, to finishing up with perfect waterproof protection. Ideal for DIYers seeking step-by-step guidance and those considering professional help. Watch for essential application tips and real-world troubleshooting insights.

FAQs: The Importance of Tanking in Bathroom Wet Areas

  • What is tanking in a wet room?
    Tanking is the process of applying a waterproof barrier to all wet areas of a wet room, ensuring that water does not penetrate the underlying structure.

  • How do I maintain a tanked wet area?
    Regularly check for cracks, peeling, or damp odors. Keep grout lines sealed, and inspect sealants or membranes annually or after heavy use.

  • Are there eco-friendly tanking products available?
    Yes, there are tanking kits made from low-VOC materials and recyclable packaging. Seek brands and products with green certifications.

  • Should I use a professional for tanking systems installation?
    For best and guaranteed results, especially in large or complex wet zones, hiring an experienced installer like Plumbrite is strongly recommended.

  • How often should tanking systems be replaced or inspected?
    Inspect every 3–5 years or after any signs of water leakage or damage. Replacing may be necessary during major renovations or if original tanking is compromised.

Key Takeaways: Why the Importance of Tanking in the Bathroom Wet Areas Can't Be Ignored

  • Tanking is essential for every wet area to prevent water damage and structural risks

  • Proper waterproofing systems increase property value and bathroom durability

  • Expert advice and installation are crucial—trust Plumbrite for the best outcomes

Secure Your Wet Area with the Ultimate Tanking System—Contact Plumbrite Today

Call Plumbrite today on 07933830316 or email: sales@plumbrite.org.uk to protect your bathroom from costly water damage and ensure peace of mind.

Home and Garden

0 Comments

Write A Comment

*
*
Please complete the captcha to submit your comment.
Related Posts All Posts
04.16.2026

Overhaul Required: 7 Low-Effort Decluttering Routines for People Who Hate Cleaning

Feeling swamped by clutter can crush your peace of mind. You’re not alone—many struggle with how to declutter when overwhelmed. The chaos of a messy living room or a cluttered kitchen table doesn’t just impact your space; it can seriously undermine your sense of calm, focus, and even happiness at home.But here’s the good news: You don’t need to overhaul your entire room in one exhausting sweep. The simple steps and quick win routines in this article offer straightforward, low-effort ways to reclaim any cluttered house—no marathon cleaning sessions required, making it easier to feel less overwhelmed. Ready to feel less overwhelmed and finally breathe easy at home? Let’s dive in.Feeling Overwhelmed by Clutter? You’re Not AloneClutter overwhelm isn’t just a buzzword. According to the National Association of Productivity & Organizing Professionals, more than 54% of Americans report feeling overwhelmed by the amount of clutter in their home. This sense of being “stuck” makes it tough to even start decluttering, let alone finish.If feeling overwhelmed is your starting point, know that this is a common pain point—one shared by families, family members, busy professionals, and even those who generally enjoy a tidy space. The typical home piles up items—magazines on the coffee table, laundry at the end of the day, dishes on the dining table—not because people are lazy, but because busy lives and limited energy make it easy for clutter to gain the upper hand.The real hurdle isn’t the stuff itself; it’s the emotional weight of where and how to start decluttering. The following routines were designed with your mental and physical limits in mind, providing time management strategies, quick win tasks, and simple steps for families and family members or even solo declutterers to take back their homes—one low-effort routine at a time."Clutter can cause instant overwhelm—studies link it to rising stress and anxiety. But even small steps can create real impact." – Dr. Maggie Chaudry, Clinical PsychologistWhy We Feel Overwhelmed by ClutterOur brains are wired to seek order. So when you’re surrounded by stacks of mail, a stuffed home office drawer, or an overflowing kitchen table, it’s no wonder an overwhelming feeling takes over. Many mental health professionals explain that clutter bombardment activates your natural stress response, causing racing thoughts or even decision paralysis. It’s not about laziness or a lack of motivation—science is clear that excessive clutter forces your brain to work harder just to process what’s physically in front of you.On top of that, most people feel guilt about the things they own—gifts not used, “maybe one day” items, and so on. The result? You dread the time to complete even small steps toward organization and wonder if you’ll ever actually declutter an entire room. Recognizing these psychological triggers is the first step to tackling them for good, and it’s a top tip from nearly every professional organizer you’ll meet.The Impact of Clutter on Your WellbeingNumerous studies confirm that physical clutter in your home can lead to mental clutter, making it nearly impossible to focus, relax, or even sleep well. Stress hormones rise when you walk through a cluttered house at the end of the day, causing you to feel even more overwhelmed. People often underestimate how closely the two are linked; however, the impact spans from anxiety and irritability to decreased productivity and general dissatisfaction with your space.Taking action—even if it’s a quick win or small step—gives a sense of accomplishment that’s vital for breaking cycles of procrastination. The key is making decluttering routines feel accessible and realistic, not another chore on an endless to-do list."Physical mess often translates to mental chaos. Reducing clutter is a proven way to protect your peace of mind." – Dr. Isaac Bell, Mental Health SpecialistHow to Start Decluttering When Feeling OverwhelmedIf the weight of clutter seems insurmountable, the best way to start is with ultra-easy wins. You don’t need to sort large items across multiple rooms or clear out your attic overnight. Begin with low-effort actions and simple steps that create visual progress, which is motivating and helps boost your decluttering muscle for bigger projects later. Start by choosing one small area—a single nightstand, shelf, coffee table, or even just a corner of the kitchen table. The right routines make it possible to start decluttering today, no matter how swamped you feel.Remember, it takes time to create lasting change. The amount of time needed for results is less important than showing up—whether that means five minutes before work, after dinner, or whenever you notice mental gridlock from too much stuff. Use timers, checklists, or a supportive family member to help you keep pace. Let’s break the cycle together, one simple step at a time.For those who find that clutter is affecting their mood or motivation, it can be helpful to explore additional strategies for supporting your mental health during challenging times. You might find practical advice in these quick tips for overcoming feeling blue, which offer actionable steps to boost your emotional well-being alongside your decluttering journey.Simple Steps to Break the Cycle of Feeling OverwhelmedPick one area: Focus only on one small zone—like a nightstand or shelf.Set a timer: Try five or ten minutes to start. Quick wins matter.Remove obvious trash: Discard items you know are unwanted.Celebrate any progress, however small.Low-Effort Decluttering Routine #1: The 5 5 5 RuleThe 5 5 5 rule is a favorite quick win routine of both professional organizers and busy families. It’s simple: Find five items to throw away, five to donate, and five to put away. This method helps circumvent the overwhelming feeling of looking at an entire room, and instead builds a routine of quick wins and simple steps every day. If you’re struggling to start—just tackle your coffee table, a nightstand, or a visible shelf for instant gratification.Using the 5 5 5 rule only takes about ten minutes and makes it easier to involve other family members in quick win decluttering tasks. Over time, these small steps add up, making it possible to declutter an entire home without feeling swamped.What is the 5 5 5 Rule and Why Does It Work?StepActionFind 5 items to throw awayQuick decisions help momentumFind 5 items to donateShare with family members or charitiesFind 5 items to put awayReturn things to proper placesThis rule works because it limits the amount of time and effort asked of you—just 5 items—and uses clear categories for decision-making. It also reminds you to focus on visible progress, which is a top tip for overcoming inertia. Plus, when you make decluttering a habit with these small steps, the task becomes far less intimidating going forward.Low-Effort Decluttering Routine #2: The 90-90 RuleThe 90-90 rule is all about purposeful evaluation. Instead of fretting about every item, you ask two questions: Have I used this in the last 90 days? Will I need it in the next 90 days? If the answer is no, it’s a prime candidate to leave your home. This rule is especially useful for anyone who feels guilt about letting go—because it adds objectivity to tough calls, removing some of the emotional pain points.Set aside ten minutes with family members and start with obvious zones like a crowded shelf, a kitchen drawer, or baskets near your entryway. This technique not only eases decluttering overwhelm but keeps you focused on what adds value, not just what’s taking up space.Using the 90-90 Rule When You Feel OverwhelmedAsk: Have I used this item in the last 90 days?Will I need it in the next 90 days?If not, consider letting it go."Rules like the 90-90 simplify tough decisions, easing the stress of decluttering for those feeling overwhelmed." – Amelia Hart, Professional OrganizerLow-Effort Decluttering Routine #3: The 20 RuleIf you’re held hostage by “just in case” clutter—think random cables, cheap kitchen gadgets, or extra toiletries—the 20 Rule is refreshingly practical. Simply decide: Can I replace this item for less than $20 and in less than 20 minutes? If yes, it doesn’t need to stay in your house “just in case. ” By using this cut-and-dry filter, you sidestep the guilt and second-guessing that often triggers overwhelm and stall-outs.This approach is a top tip from minimalist experts and is especially liberating for digital clutter or household extras stored “just in case. ” Try applying this rule to desk drawers, bathroom baskets, or the infamous junk drawer.What Is the 20 Rule for Getting Rid of Clutter?Any item you can replace for less than $20 and in less than 20 minutes is a candidate for donation or tossing.Perfect for reducing just-in-case clutter.Low-Effort Decluttering Routine #4: The Family Member SweepDecluttering isn’t a punishment. It’s an act of teamwork, especially when involving a family member or all family members. Instituting a ten-minute sweep—with each person responsible for a different area—can transform an overwhelming project into a fun, quick win. Choose zones: perhaps one takes the dining table, another the entryway, and a third sorts the bookshelf.This method doesn’t just speed up the process; it builds habits and accountability, making it easier to maintain a calm, clutter-free home going forward. Even younger kids love the sense of accomplishment from a measured, visible result—especially if you celebrate every step as a family.How Family Members Can Help When You’re Feeling OverwhelmedEnlist family members for a 10-minute tidy together.Assign each person a zone or room.Celebrate everyone’s small wins.Low-Effort Decluttering Routine #5: The One-Minute Quick WinQuick win routines are a lifesaver when you feel overwhelmed by the size of a decluttering task. These are actions that take 60 seconds or less to complete—but make a visible difference. Reclaim your kitchen table, put away stray shoes, re-stack the mail, or wipe down a counter. Instead of waiting for a free afternoon that never arrives, chip away at your pain points in tiny, frequent bursts.Make a list of the most visible spots in your home. When you pass by, claim one quick win. This method resets your momentum, reinforces the habit, and keeps energy levels high so you won’t feel defeated when tackling larger tasks.How One-Minute Tasks Can Reduce OverwhelmPut away stray shoes or mail.Wipe down a counter.Refold visible piles of clothing.Low-Effort Decluttering Routine #6: The Simple Steps ChallengeThe Simple Steps Challenge focuses on daily micro-actions and simple steps to help you feel less overwhelmed while decluttering. For a week, commit to one decluttering task each day—a drawer, a digital file folder, the expired food shelf, or even a single cabinet. Track each win in a notebook or on your phone. Over time, these actions not only reduce clutter but transform the habit of avoidance into “I can do this!” energy.Documenting your progress is a top tip from organizing experts—it amplifies motivation and makes it easier to continue once the week is up. If you have a family member or friend join you, challenge each other and swap successes for extra encouragement.Try Simple Steps Daily for Lasting ResultsDo one thing each day for a week: throw out expired food, delete digital clutter, sort a drawer.Log your progress for motivation.Low-Effort Decluttering Routine #7: The Five-Minute Check-InThe Five-Minute Check-In routine is a powerhouse for maintaining progress and preventing overwhelm from returning. Simply set a timer for five minutes and declutter whatever is the most visible pain point at the time. This could be the coffee table, entryway, or even your nightstand. The end goal isn’t perfection, but maintaining a calm baseline day in and day out—which is especially helpful for busy households or those struggling with time management.Once complete, be sure to reward yourself. Even a small cup of tea or a quick walk can reinforce the habit and turn low-effort decluttering into an opportunity for daily self-care.Quick Wins to Stay Ahead of Clutter and Feeling OverwhelmedSet a timer and tackle whatever’s most visible for five minutes.Reward yourself—even a cup of tea counts!Real Voices: Quotes on How to Declutter When Overwhelmed"Decluttering is an act of self-care. Every item you release is a gift you give your future self." – Dr. Lila Morgan, PsychiatristPeople Also Ask: Expert AnswersHow to start decluttering when feeling overwhelmed?The best way to start is by focusing on a single spot—a drawer, countertop, or shelf. Set a timer for five minutes and remove obvious trash and out-of-place items. Celebrate small steps and don’t try to overhaul an entire room in one go. If available, enlist a supportive family member to help keep you accountable. Remember, progress—not perfection—is the goal.What is the 5 5 5 rule for decluttering?The 5 5 5 rule is a simple, low-effort system: Find 5 items to throw away, 5 to donate, and 5 to put away in their designated place. This routine is perfect for achieving quick wins, especially when time or motivation is low. It’s highly recommended by professional organizers to break through clutter overwhelm and build daily momentum.What's the 90-90 rule for decluttering?The 90-90 rule asks: Have you used the item in the last 90 days? Will you need it in the next 90 days? If you answer “no” to both, it’s a candidate to leave your home. This rule helps make decisions easier, especially when feeling overwhelmed by sentimental or just-in-case items. It’s straightforward and minimizes second-guessing.What is the 20 rule for getting rid of clutter?According to the 20 rule, any item you can replace for under $20 and in less than 20 minutes should be considered for donation or trash. Best for tackling “just in case” clutter (like extra cords or cheap kitchen gadgets), this rule lets you quickly make decisions about what stays and what goes, without complications.FAQs about How to Declutter When OverwhelmedWhat are the top three signs clutter is impacting mental health?Rising anxiety at home, trouble focusing, and avoiding certain rooms are clear signs.Are quick win routines effective for families with kids?Yes, kids love the fast results and routines that include celebration or visual tracking (like checklists or sticker charts). These simple steps build lifelong organizational skills across all family members.How often should I do a five-minute check-in?Daily or a few times a week can keep clutter at bay and avoid overwhelming buildup. Many experts recommend attaching the check-in to another daily habit—like after dinner or before bed—for best results.Is professional help necessary when feeling completely overwhelmed?If clutter causes significant stress or disrupts daily life, consulting a professional organizer or mental health expert is a good choice. Sometimes, outside support helps break through emotional blocks and customizes routines that fit your exact needs.What if a family member does not want to declutter?Start with your own space, and lead by example. Openly communicate how clutter affects your peace of mind. Sometimes, seeing positive results is enough to encourage participation—otherwise, focus on shared or communal zones and respect personal boundaries.Expert-Approved Table: Decluttering Routines for Overwhelmed PeopleRoutine NameTime RequiredBest For5 5 5 Rule10 minutesQuick wins90-90 RuleDecision-basedMinimalists20 RuleAs neededReducing extrasFamily Sweep10 minutesHouseholdsOne-Minute1 minute/taskBusy individualsKey Takeaways for Anyone Feeling OverwhelmedFocus on routines that offer simple steps and quick win results.Overwhelm is normal—start small and use checklists.Decluttering can be a shared family member effort.Using rules like 5 5 5 and 90-90 make decisions easier.Final Thoughts: How to Declutter When Overwhelmed—Make Peace, Not PerfectionDecluttering isn’t about having a perfect home; it’s about creating peace and reclaiming space, one simple step at a time. Celebrate each small victory, and remember that consistency—however imperfect—wins over the long haul.If you’re inspired to keep building healthier habits beyond your home, consider how your physical environment and daily routines can impact your overall well-being. For a deeper dive into holistic self-care and proactive health strategies, explore how lifestyle choices influence long-term health. Taking charge of your space is just the beginning—empower yourself with knowledge that supports both your mind and body for lasting change.Discover More Trusted Tips on How to Declutter When OverwhelmedStay curious and informed—discover more trusted information like this at: NCWellnessHub. comSourcesNational Association of Productivity & Organizing Professionals – https://www.napo.net/page/clutter-statsAmerican Psychological Association – https://www.apa.org/monitor/2019/09/cover-clutterThe New York Times – https://www.nytimes.com/guides/smarterliving/how-to-declutter-your-homeInsider – https://www.insider.com/why-clutter-hurts-your-brain-2018-3To further enhance your decluttering journey, consider exploring the following resources:“How to Start Decluttering Even When You’re Overwhelmed”: This video by Dana K White offers practical advice on overcoming the paralysis that often accompanies clutter, providing actionable steps to initiate the decluttering process.“How to Clean House When You Are Completely Overwhelmed by Clutter”: In this video, Dee Middleton shares strategies to tackle overwhelming clutter, emphasizing manageable tasks and maintaining motivation throughout the cleaning process.These resources offer additional strategies and insights to help you manage and reduce clutter effectively.Find more great info like this on NCWellnessHub.com

04.14.2026

Electrical Panel Upgrades in North Texas: Answers to the Questions Homeowners Are Actually Asking

Real homeowners are asking the same questions on Reddit and neighborhood forums — about price shock, safety fears, hidden costs, and whether they're being upsold. This guide answers all of it, straight from what DFW homeowners are actually dealing with.Why are quotes ranging from $2,000 to $13,000 for the same job?This is hands-down the most common frustration we see — homeowners getting three quotes and wondering if one electrician is ripping them off or another is cutting corners. The confusion is completely valid.Quotes vary because "panel upgrade" can mean very different things depending on what your home actually needs. A clean, straight-swap 200A upgrade in a newer home with accessible service entrance and no code violations is genuinely less work than a job in a 1985 home that needs grounding upgrades, utility coordination, and a permit inspection.Is $4000 for new electrical panel a good deal?"   "The quote to replace the panel was 5k in Phoenix. Is that reasonable?"   "Nearly $10k for a panel upgrade? Feels pretty high."— Real posts from r/homeowners, r/electrical, r/AskElectricians"On average a typical panel upgrade is going to cost about $6,000 to $8,000, including the 200-amp panel, feeder upgrade, whole-home surge protector, permit, and inspection. If people are quoting you $10,000 to $15,000, you should definitely get a second opinion."— Nathan Tiner, ABR Electric ABR Electric.Do you really need a panel upgrade, or are you being upsold?This is a legitimate concern. Some homeowners are told their "functional" panel is dangerous when it might just be old. Others have genuinely hazardous panels and don't know it. Here's how to tell the difference.Certain panel brands have a documented history of dangerous failures — not just "outdated" labeling. Federal Pacific (Stab-Lok), Zinsco, Challenger, and old Bulldog Pushmatic breakers have been shown to fail to trip during overloads, which is exactly when you need them to. That's not an upsell. That's a documented fire hazard that insurance companies take seriously enough to deny coverage over.My house has an outdated Zinsco... should be replaced, but hasn't been."   "Panel upgrade — worth it if already 200amp in a 46-year-old house?"— r/electrical, r/AskElectricians"If you have a 40 or 50 year old panel — Federal Pacific, Zinsco, Bulldog Pushmatic — they all need to go. If your panel is humming or if you touch the outside and it's hot, it needs to go."— James Adams, ABR ElectricIf your panel brand is not on that list and it's a 200A panel installed in the last 15–20 years with no signs of trouble, you may genuinely not need an upgrade yet — though the 2026 NEC changes (effective September 1 in Texas) may require AFCI/GFCI additions or a whole-home surge protector to be installed alongside.Panel is Federal Pacific, Zinsco, Challenger, or Bulldog Pushmatic → replace nowPanel is humming, buzzing, or warm to the touch → get assessed immediatelyBreakers trip frequently or won't reset → call a licensed electricianPanel is 100A or 150A and you want an EV charger, solar, or heat pump → upgrade neededPanel is a modern 200A with no symptoms → ask specifically what code items are needed, not a full replacementUtility company delays, permits, and the approval mazeOne of the most frustrating surprises in an otherwise straightforward panel job is finding out it involves a multi-week back-and-forth with your utility company — plus permits, inspections, and a day or more without power.In North Texas, most panel upgrade work goes through Oncor (or TXU in some areas) for service reconnection. Your electrician pulls the permit with your city, schedules an inspection, and coordinates the utility disconnect and reconnect. A well-organized contractor manages this for you. A disorganized one leaves you waiting."PWP is charging us $1k for 'OH - Reconnect.' Is this ridiculous?"   "This replacement requires a permit and PG&E approval... cost up to $9k."— r/pasadena, r/bayareaWhat to ask your electrician upfrontUtility, permit, and inspection questions to ask before you signIs the permit fee included in your quote, or is it extra?Do you handle Oncor/utility coordination, or do I need to call them?How long will power be off, and can you minimize that window?What happens if inspection finds additional code items?Is the utility reconnect fee included in the quote?.““The key is getting the meter release inspection on the front end. So that basically allows us to get the power turned back on for the client as soon as possible. Of course, now when we’re doing this, working with both Oncor and the city, we have to bring everything up to current code and take care of that permit and inspection for you.”.” — Nathan Tiner, ABR ElectricHidden scope: why did the quote suddenly jump to $13,000?The most common source of sticker shock isn't the panel itself — it's the surprises discovered once work begins. Panel relocation, grounding wire upgrades, and aluminum wiring correction are the three biggest culprits."Electrical main panel upgrade and relocation cost $7,740. Is this normal?"   "$13k aluminum wiring correction and service panel replacement."— r/homeowners, r/electricalThe three most common hidden scope itemsWhy your quote can grow — and when it's legitimatePanel relocation: The 2026 NEC (and current code in most Texas cities) doesn't allow panels inside closets, bathrooms, or certain utility spaces. If your panel is in a non-compliant location, moving it isn't optional — it's a code requirement. Relocation typically adds $1,500 to $3,000.Grounding upgrades: Older homes often have inadequate grounding. When a new panel is installed, code requires all grounding to be brought up to current standards — including cold water bond and intersystem bonding. This is safety-critical, not a upsell.Aluminum wiring correction: Homes built in the 1960s–70s sometimes have aluminum branch circuit wiring that requires remediation before a new panel can be safely connected. This is a significant job — up to $8,000+ depending on scope."When we're doing a panel upgrade, we have to bring everything up to current code — the primary grounding method, cold water bond, intersystem bonding termination. All those things are part of the current requirements to make sure the entire home is properly grounded and protected."— Nathan Tiner, ABR ElectricUnderstanding the 2026 Electrical Panel Upgrade Process for Home SafetyA 2026-compliant electrical panel upgrade is straightforward—but must be performed by a licensed electrician to guarantee code compliance, insurance eligibility, and lasting home safety. The process typically starts with a detailed assessment and load calculation, ensuring your new panel is sized correctly for your home’s needs (especially with EV chargers and high-demand appliances). Next comes the formal permitting phase, coordinated with your city and utility company, followed by the physical swap or relocation of your panel—which usually takes one to two days. Every job concludes with an official inspection and power restoration. Local specialists, like ABR Electric in the Allen/McKinney area, can walk you through each step neutrally and professionally.“On average a typical panel upgrade is going to cost about $6,000 to $8,000, including the 200-amp panel, feeder upgrade, whole-home surge protector, permit, and inspection. If people are quoting you $10,000 to $15,000, you should definitely get a second opinion.” — Nathan Tiner, ABR ElectricInitial assessment by a licensed electricianLoad calculation and system design for new electrical panelPermit application and utility shut-off coordinationPanel removal and replacement (1–2 days typical)Inspection and power restorationCost, Value, and Warranty When Upgrading for 2026 Electrical Panel Changes Home SafetyUpgrading an electrical panel is a significant investment in your home, but it’s one that delivers long-term safety, insurance savings, and future-ready capability. Costs vary by panel size, required circuits, relocation needs, and parts quality, with a typical range for North Texas being $1,500 to $4,000 for a standard, straight-swap 200-amp upgrade with new surge protection. Always request details about parts and labor warranties; premium products like Eaton CH and Square D QO often come with transferable lifetime coverage, building extra peace of mind into your investment. Remember, bids wildly above market rate may not reflect real value, and as one professional puts it: “Always get second, third, fourth opinions. ”In an era where homeowners are self-educating on Reddit before they even pick up the phone, the "black box" method of electrical bidding is dead. As the data from DFW forums suggests, the frustration isn't necessarily the price tag—it’s the variance. When a homeowner sees a $9,000 gap between quotes, they don’t see "expertise"; they see a lack of industry standards.

04.12.2026

Unlocking Efficiency: How to Choose the Right Size Tractor for Your Needs

Update Understanding Tractor Sizing Basics Choosing the right size tractor is akin to selecting the perfect tool for a job; it can significantly impact efficiency and effectiveness. Whether you're a professional farmer or embarking on a new homeowner project, selecting the appropriate tractor can streamline your workload and save time. Assessing Your Property: Size and Terrain Matter The first step in choosing the right tractor is evaluating your property. The size and layout play a crucial role. For small residential areas, a compact or subcompact tractor is often ideal. These models are easier to maneuver around tight spaces, fences, and landscaping features. On the other hand, larger properties may demand tractors with more horsepower and greater capacity. If your land includes hills or uneven ground, a heavier tractor will provide better traction and stability. Not all terrains are the same, so assessing the specific conditions of your property is vital for optimal tractor selection. Evaluate Your Workload: Match Horsepower to Tasks Horsepower is not just a number; it dictates what a tractor can do. For light duties like mowing and snow removal, a smaller tractor often suffices. However, more demanding tasks such as tilling, planting, and heavy lifting require greater power. It's wise to consider your immediate needs and potential future demands. If you anticipate expanding your workload, investing in a slightly larger tractor can save you from outgrowing your equipment. Attachments and Versatility: Planning for the Future The ability to attach implements is what makes tractors versatile. Each attachment—from front-end loaders to box blades—can significantly influence your tractor's performance. Choosing a model that can handle multiple attachments will ensure you can adapt as your tasks evolve. As your projects gain complexity, having a robust tractor to support various tools will prove invaluable. Finding the Right Balance: Maneuverability versus Power While large tractors boast horsepower and productivity, they also require more space and can be less maneuverable. Conversely, smaller tractors offer the agility needed for tight spaces but may struggle with heavier tasks. Balancing these two characteristics is essential and often calls for professional advice. A trusted dealer can help guide your decision by analyzing your specific requirements and suggesting models that fit your needs. New vs. Used: How to Make the Right Choice Your budget will significantly influence your decision to purchase new or used tractors. New tractors come equipped with the latest technology, reliability, and warranties, but they can incur a higher cost upfront. Used tractors present a smart alternative, offering dependable performance at a more accessible price. Responsible buyers can find quality used tractors that have been inspected and serviced, ensuring they make a sound investment. Conclusion: Empower Your Work with the Right Tractor The correct tractor size can simplify tasks, improve productivity, and enhance safety. Evaluating your property size, workload, and potential for future tasks is critical in your decision-making process. Investing in the right tractor ensures you have the necessary capacity to handle your needs effectively. So, whether you're managing a farm or simply tackling home improvement projects, understanding your tractor options will empower you to work smarter, not harder. For anyone considering a tractor purchase, seeking professional guidance can make all the difference. Explore your local dealer options, and make an informed choice that caters to both your immediate and long-term expectations.

Terms of Service

Privacy Policy

Core Modal Title

Sorry, no results found

You Might Find These Articles Interesting

T
Please Check Your Email
We Will Be Following Up Shortly
*
*
*