Add Row
Add Element
UPDATE
Add Element

Your guide to modern living—every day.

  • Home
  • Categories
    • Wellness
    • Home and Garden
    • Work and Life
    • Travel
    • People and Style
    • Living Spaces
August 07.2025
1 Minute Read

Struggling with Gutters Salt Lake? Fix Your Drainage Fast

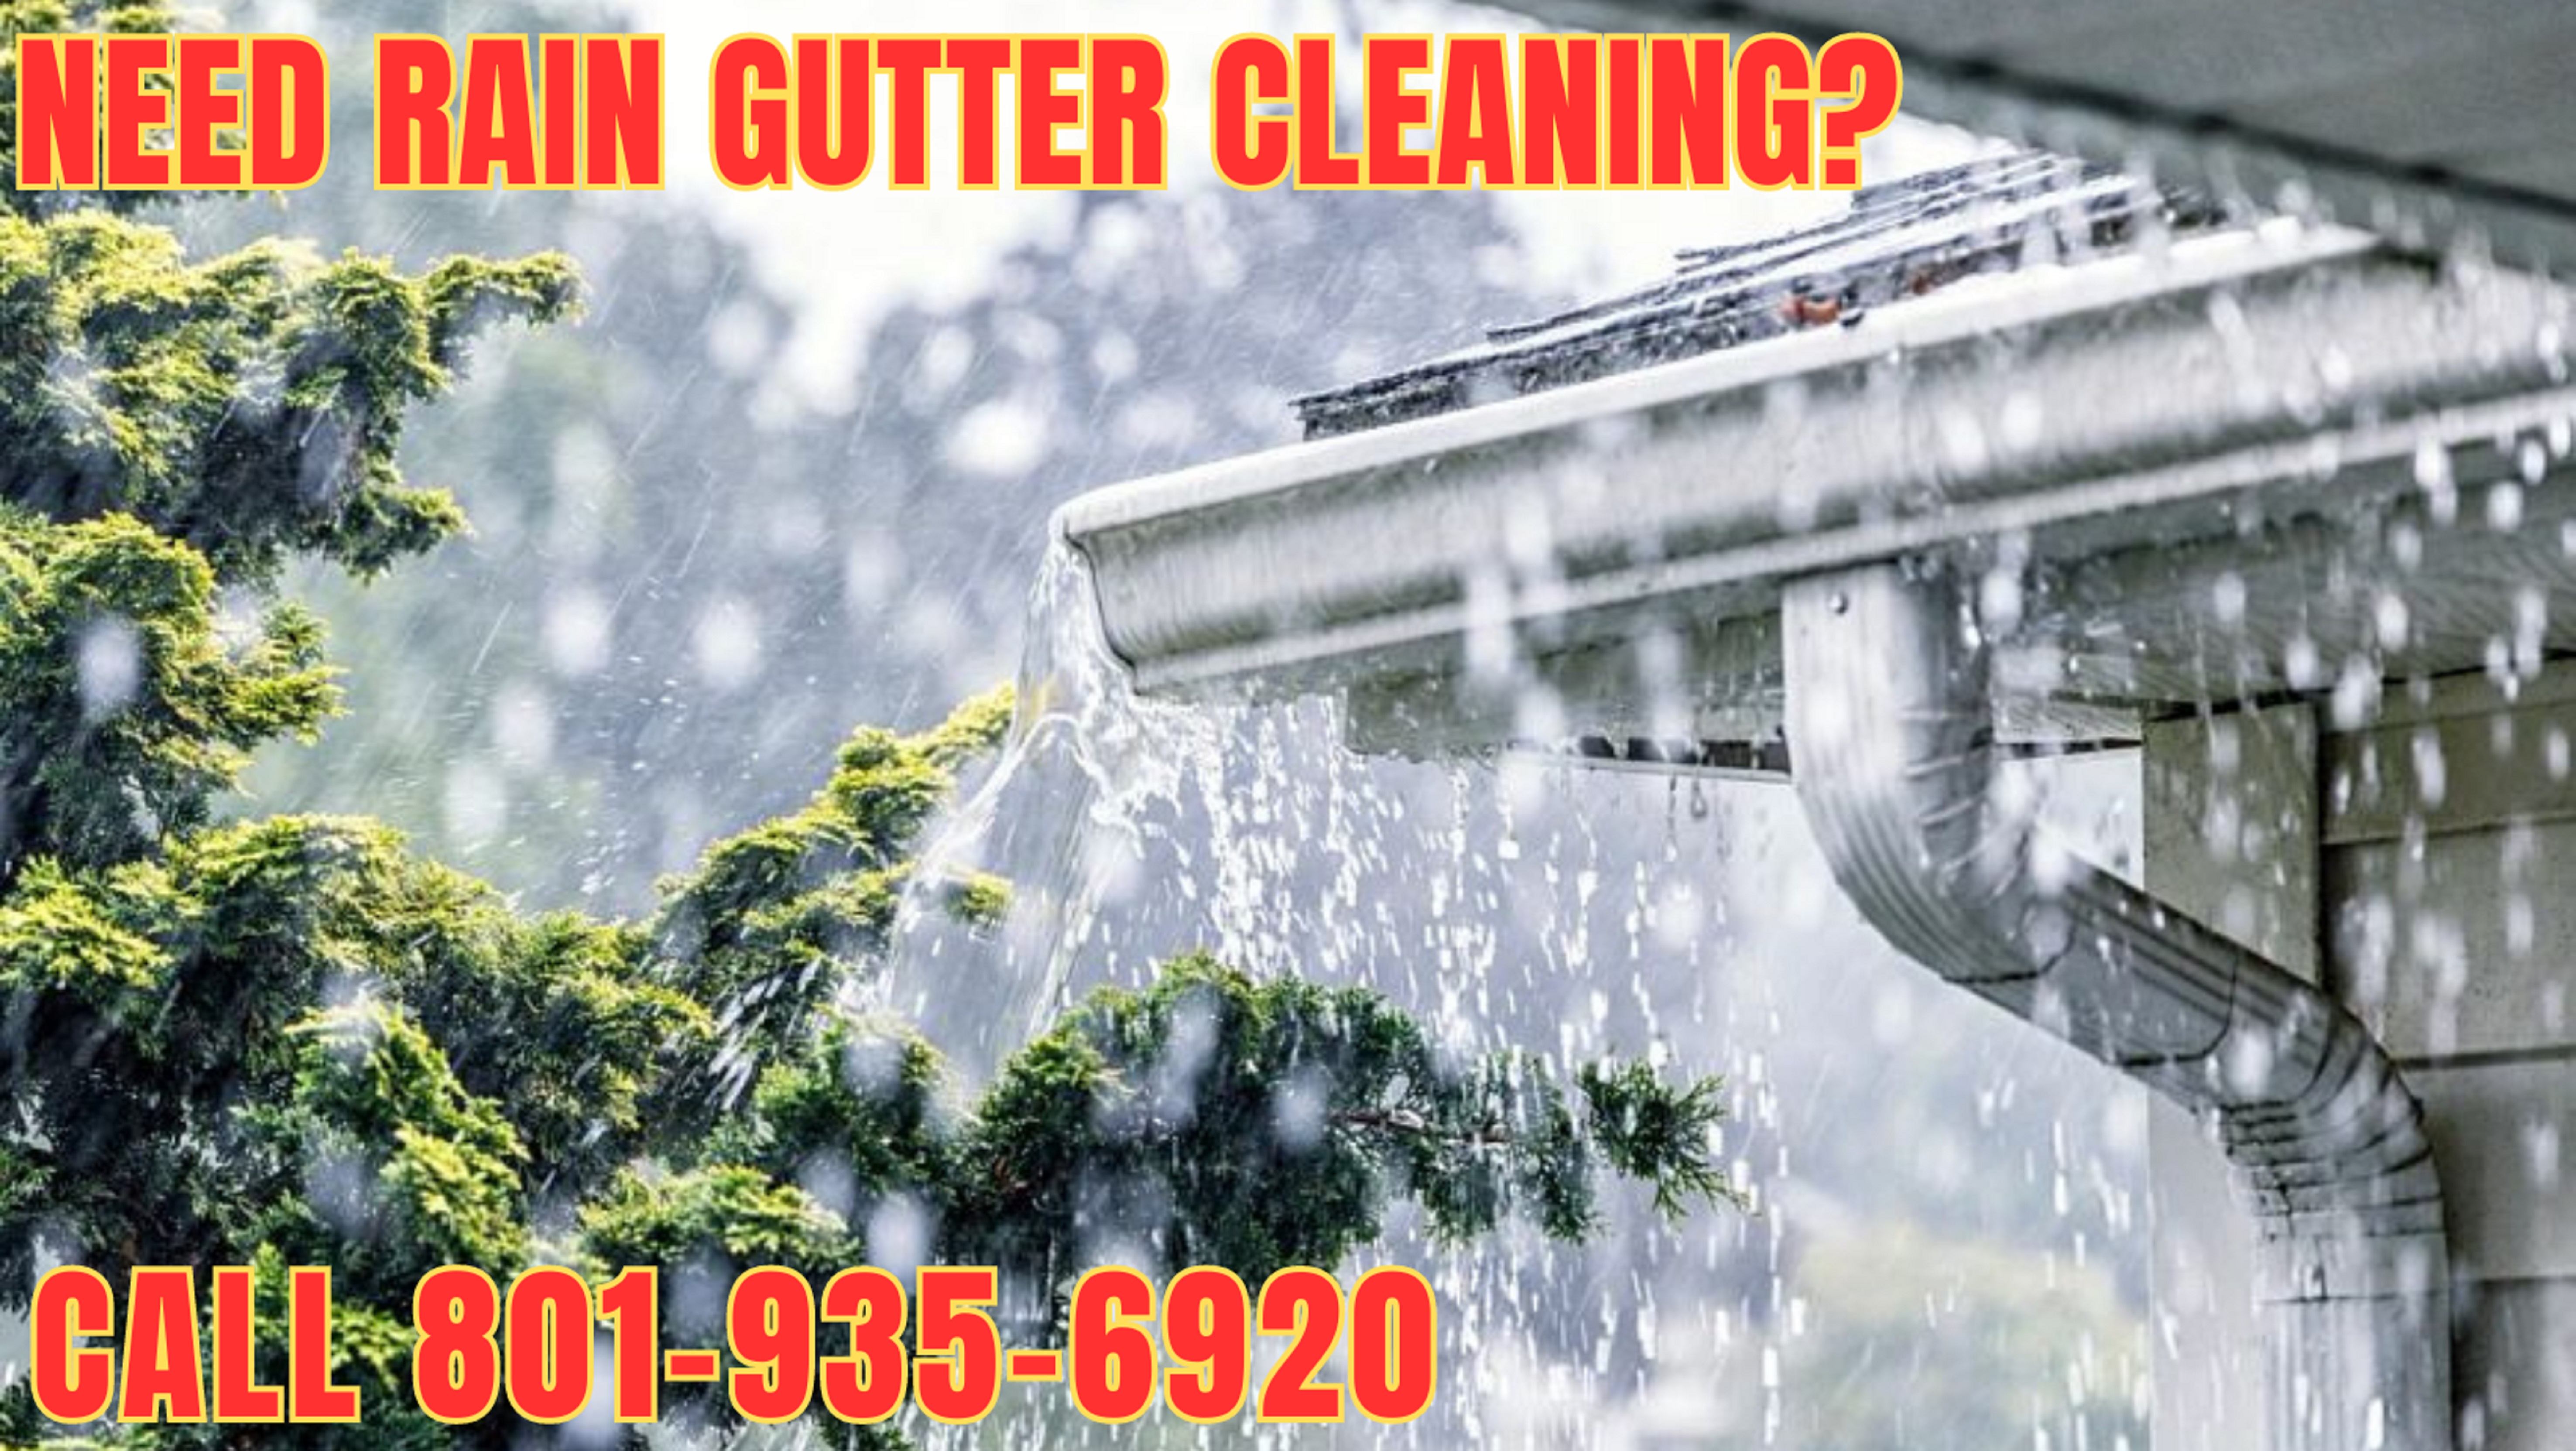
Last spring, a sudden storm flooded my basement, all because my gutters in Salt Lake were clogged. It was a wake-up call. Understanding and fixing gutter issues quickly can save your home from costly water damage and peace of mind. Here’s how you can do it fast.

Don’t Let Gutters Salt Lake Issues Cost You—What Every Homeowner in Salt Lake City Must Know

In Salt Lake City, gutter problems are more than just an inconvenience—they’re a threat to your home’s structure, landscaping, and even basement safety. Many homeowners realize too late that their rain gutter system isn’t doing its job. Gutters salt lake clogs, sagging sections, or unnoticed leaks often lead to flooded crawl spaces, rotten siding, or damaged foundations. The consequences can be expensive and stressful, but they’re entirely preventable with a bit of knowledge and decisive action.

Practical example: when a sudden spring rainstorm hits, clean and well-installed rain gutters will channel water safely away from your property. If not, pooling and overflow can cause thousands in repairs—just ask anyone who’s dealt with a flooded basement! Take control by learning the signs of trouble and knowing when it’s time for professional gutter services. This small step will help protect your home from costly damage and unnecessary headaches.

Last spring, a sudden storm caused my basement to flood because my gutters in Salt Lake City were clogged. This experience underscored the value of professional gutter installation and the use of leaf guard products. Timely gutter cleaning and maintenance can protect your home and enhance your exterior remodeling efforts. Here’s how to quickly fix your rain gutter system and avoid future damage.

Why Gutters Salt Lake Matter for Your Home or Business

Gutters salt lake are the first line of defense against water intrusion for every home or business in the city area. They divert rainwater and melting snow away from your foundation, roof, and landscaping. Without a reliable rain gutter system, Salt Lake City’s variable climate can quickly transform small leaks into serious property damage. Whether you own a classic craftsman bungalow or manage a modern office, keeping gutters in peak condition protects your home or business for years to come.

Reliable gutters aren’t just about protection—they boost curb appeal and long-term property value. Quality gutter installation services are an essential part of any smart maintenance plan, ensuring water damage doesn’t erode your investment. In commercial settings, clogged or broken gutters can violate safety codes and lead to costly business interruptions. That’s why taking gutters seriously in Salt Lake is one of the smartest decisions property owners can make.

Salt Lake City home with newly installed seamless gutters, homeowner inspecting gutter work, lush spring neighborhood, mountains in background, rain drops on clean gutters

Gutters Salt Lake Quick Assessment: Spotting the Signs of Trouble

Spotting gutter problems before they spiral is the smartest way to save money and headaches. Look for overflowing water, sagging sections, visible rust, peeling paint beneath gutters, or plants growing in the troughs—these are classic red flags. If you see gutters pulling away from the house, or pooling water near the foundation, don’t delay. These warning signs mean your gutters salt lake may already be failing and in need of fast service or replacement.

Proactive gutter inspections ensure you stay ahead of major repairs. If your home is surrounded by mature trees (as many are in the lake city area), leaves, twigs, and debris can quickly fill gutters, causing hidden blockages. Snow and ice buildup in winter further strain your gutter system. Acting quickly when you notice any issues will help avoid water infiltration, mold growth, or worse.

Common Problems with Gutters Salt Lake City Homes Face

Salt Lake City’s unique climate brings several challenges for gutters: heavy spring runoff, summer downpours, and winter freeze-thaw cycles. Clogged gutters are the most common problem, often causing water to spill over and damage siding or foundations. Frequently, homeowners also deal with leaks at the seams (especially on older systems), sagging sections that no longer channel water effectively, and gutters that detach from the fascia.

Rusting, bent or dented gutters, and the growth of plants or moss signal ongoing moisture issues. Animals can sometimes nest in gutters, creating blockages or gnawing damage. When left unresolved, these issues can escalate, resulting in costly repairs not only to the gutter system but also to your property’s structure. Regular checks ensure minor issues never have a chance to become major headaches.

Lake City Gutter Installation: When Do You Need a Pro?

Sometimes, a simple cleaning or minor patch will suffice, but many gutter installation concerns require a professional’s touch. If you notice repeated overflows, extensive rust, or gutters pulling away from your home, it’s time to call a contractor in Salt Lake. Professionals have specialized equipment and expertise to replace damaged sections, install new downspouts, or upgrade your system to seamless gutters or gutter guards for year-round protection.

DIY repairs can work for basic maintenance. However, improper installations often lead to water channeling the wrong way, causing more harm than good. Experienced technicians assess your home’s slope, roofline, and landscaping, customizing solutions like rain gutter installation or upgrades to gutter guards. This ensures efficient drainage and makes your gutter system stand the test of time —even during Salt Lake’s harshest storms.

Essential Guide to Gutters Salt Lake Solutions and Services

Protecting your Salt Lake property means choosing the right gutter solution for your unique needs. Gutter installation, replacement, cleaning, and enhancements like seamless gutter and gutter guard upgrades are all options worth considering. The right combination will keep your home or business dry, safe, and attractive—no matter the weather. But how do you know what service is right for you?

This guide breaks down the differences between cleaning and installation, explains the benefits of modern gutter materials, and helps you navigate decisions that maximize both protection and curb appeal. Get peace of mind by understanding exactly what's involved in every step of gutter care in Salt Lake City.

Rain Gutter Installation vs. Gutter Cleaning in Salt Lake

Both rain gutter installation and gutter cleaning play vital roles in maintaining your property. Cleaning removes debris, preventing blockage and overflow—a must every spring and fall, especially in tree-lined neighborhoods of Lake City. Professional cleaning ensures water flows smoothly and extends your system’s lifespan. It’s recommended at least twice a year or more if you notice frequent overflowing or see leaves and debris collecting quickly.

In contrast, gutter installation becomes necessary when existing gutters are beyond repair, frequently leak, or have visible sagging and rust. New seamless gutters dramatically reduce leak risks because they have fewer joints. Installing upgraded materials or adding gutter guards protects against recurring clogs and boosts your home’s resilience to Salt Lake’s notorious weather. Don’t wait for obvious failure—replace aging or problematic gutters for lasting peace of mind.

Choosing Seamless Gutters or Gutter Guards for Salt Lake Weather

Seamless gutters are the top choice for Salt Lake City’s shifting weather, as they eliminate most of the leaks and maintenance headaches associated with traditional sectional systems. Custom-fitted to your home, they’re made from sturdy materials like aluminum or steel—resisting rust, sagging, and harsh winter weather. Seamless gutter installation will keep your investment looking great and working perfectly for years.

Gutter guards or leaf guard systems are invaluable in treed neighborhoods, where falling debris is a constant concern. These covers prevent leaves, twigs, and nests from clogging your gutters, slashing cleaning needs and protecting your home year-round. Both solutions are a wise investment for homeowners and businesses seeking to reduce seasonal labor and unexpected repairs while enhancing their property’s value.

Finding the Right Gutter Installation Services in Salt Lake City

Your choice of gutter installation services can mean the difference between years of trouble-free protection or constant headaches and repairs. The top contractors in Salt Lake City area are known for their prompt service, skilled teams, and commitment to quality materials. It’s critical to choose providers who use the best materials, offer strong warranties, and understand local weather challenges.

When researching options, seek out companies with positive reviews, transparent pricing, and a portfolio of completed jobs. Ask about their experience with installation and repairs, particularly with seamless gutter systems and gutter guards. The right contractor will explain your options clearly, give detailed estimates, and help you make an informed decision for your property’s needs.

What Makes a Contractor in Salt Lake Stand Out?

Outstanding gutter contractors in Salt Lake offer years of experience, ongoing training, and a strong reputation backed by real customer feedback. Their crews are prompt, tidy, and genuinely care about doing the job right the first time, using only quality materials that stand up to Lake City’s climate. A reputable contractor will also provide clear, written estimates and stand behind their work with generous satisfaction guarantees.

Look for companies that specialize in seamless gutter installation, have a proven track record with gutter guard upgrades, and can handle both residential and commercial projects. An excellent contractor in Salt Lake will not only install new rain gutters but also offer regular cleaning, inspection, and maintenance plans. This full-service approach ensures you have a partner in protecting your home for the long haul.

Professional gutter installation team fitting white seamless gutters on Salt Lake City home, blue skies and Utah landscape, team in crisp navy uniforms, clean dynamic work

Exterior Remodeling and Gutter Solutions: Enhancing Value in Lake City

Exterior remodeling projects that include new gutter solutions yield a powerful return on investment for Salt Lake City homeowners. Not only do updated gutters protect your home from water damage, they also refresh your curb appeal, often increasing property value and buyer interest. The best exterior remodel contractors recommend pairing gutter upgrades with roof, flashing, and siding updates to ensure your entire envelope is secure against the elements.

Well-chosen seamless gutters and gutter guards complement your exterior style, helping your property shine. They’re integral to a worry-free “set-and-forget” remodeling plan, drastically reducing ongoing maintenance. For many, exterior updates offer both beauty and practical protection—making them a top priority in every Lake City neighborhood.

People Also Ask About Gutters Salt Lake

How much should a gutter job cost?

The cost of a gutter job in Salt Lake City typically ranges between $800 to $2,500 for an average home, depending on the materials, linear footage, and complexity. Seamless gutter installations and premium gutter guard upgrades can be on the higher end of this spectrum. It’s always best to get a free written estimate from trusted local installation services to understand your specific needs and options.

How much does it cost to put up new guttering?

Installing new guttering in Lake City usually costs between $4 to $12 per linear foot. Costs rise for copper or premium seamless gutters and when additional downspouts, corners, or gutter guards are included in the installation. Professional contractors can provide detailed quotes based on your home’s roofline and choice of quality materials.

What does the average gutter cleaning cost?

The average gutter cleaning cost for homes in Salt Lake City is typically $100 to $250 per session. Pricing depends on the size of your home, number of stories, and level of debris. Regular cleaning saves on extensive repairs later and is more affordable when done preventively. Many local companies offer seasonal cleaning packages for extra savings.

How much are gutters for a $1000 sq ft house?

On a 1,000 sq ft home in Salt Lake City, expect to invest between $750 and $1,500 for full gutter installation, with higher-end seamless or specialty gutter guard systems adding to the cost. Investing in professional installation and periodic maintenance is the surest way to protect your home and preserve its value over time.

Gutters Salt Lake Video Library: Installation and Cleaning Demo

Rain gutter installation and gutter cleaning time-lapse demo with professional technicians working on a Salt Lake City suburban home. Includes close-up and wide shots and narrated tips for homeowners.

Get Your Gutters Salt Lake Service Now—Fast, Reliable & Affordable

For immediate, expert help with your rain gutters, seamless gutters, or gutter guards, call our Salt Lake City team today. We offer fast, affordable estimates and same-week service for residential and commercial clients. Don’t wait for water damage—let us provide the quick solution so you can focus on what matters most.

Why Choose Us for Rain Gutters and Gutter Guards in Salt Lake?

We’re the local leaders in gutter installation services for Salt Lake City. Our technicians have years of experience installing, cleaning, and maintaining rain gutters using only the best quality materials. We specialize in seamless gutter systems, gutter guard solutions, and exterior remodeling that enhances both function and curb appeal. With a rock-solid commitment to quality , prompt customer service, and satisfaction guarantees, you can trust us to protect your home or business in any weather.

Whether you need emergency repairs, full gutter replacements, seasonal gutter cleaning, or a full exterior remodel with custom gutter solutions, our team is here for you. Every project is tailored to your needs and budget, ensuring you get the best value and peace of mind.

Ready to Solve Your Gutters Salt Lake Issues?

There’s no reason to put off gutter repairs any longer. Take the first step to protect your investment today—call for a free consultation and estimate. We’ll come to your location, assess your current system, and give honest, affordable recommendations for cleaning, repairs, or brand new seamless gutter installation. Fast turnaround, superior workmanship, and flexible options to fit your needs are just a call away.

Don’t gamble with your home’s value or safety! Trust our Salt Lake gutter professionals for a solution that stands the test of time. Call now and experience why more property owners rely on us for their gutter installation and cleaning needs in Lake City and beyond.

Frequently Asked Questions About Gutters Salt Lake

Can I install seamless gutters myself or do I need a contractor in Salt Lake?

Installing seamless gutters is a job best left to an experienced contractor in Salt Lake. The process requires specialized machinery, precise measurements, and expertise to ensure proper slope and secure fitting. A professional installation guarantees that your seamless gutters channel water efficiently away from your home, minimizing the risk of leaks and future repairs.

Do gutter guards work with Utah’s climate?

Yes, gutter guards are highly effective in Utah’s climate. They prevent debris from clogging your gutters—especially during spring and fall—reduce maintenance, and help protect your home from water overflow during storms. Choose guards designed for heavy rainfall and snowmelt for best year-round protection in Salt Lake City.

How often should gutters salt lake cleaning be done?

For most homes in Salt Lake City, gutter cleaning should be performed at least twice a year—once in spring and once in fall. Properties surrounded by trees may need more frequent cleaning. Regular maintenance prevents blockages, extends the life of your gutter system, and ensures your rain gutters work efficiently through every season.

Key Points for Gutters Salt Lake Success

1. Act Early: Spot gutter issues before they escalate.
2. Insist on Quality: Choose seamless gutters and guards to withstand Salt Lake City’s weather.
3. Use Local Experts: Hire experienced contractors for installations, upgrades, and exterior remodeling.
4. Maintain Regularly: Schedule cleaning and inspection twice a year.
5. Invest Wisely: Exterior gutter solutions enhance property value and protect your home or business for the long haul.

Take the First Step to Gutters Salt Lake Protection Today

www.BettysRainGutters.com

Don’t wait for the next storm to reveal hidden damage. Call Us At (801) 935-6920 For Your Rain Gutters Solutions. FREE Consultation & Estimate.

Home and Garden

0 Comments

Write A Comment

*
*
Please complete the captcha to submit your comment.
Related Posts All Posts
03.13.2026

How to Pigtail Electrical Wires: Step-by-Step Guide for Safe Home Wiring

Opening Inquiry: Why Is Knowing How to Pigtail Electrical Wires Crucial for Homeowners?Have you ever flicked a light switch and noticed the lights flicker—or worse, lost power to half your room when an outlet failed? Electrical issues often hide behind the walls, but one essential skill—knowing how to pigtail electrical wires—can help prevent these problems from spiraling into hazards. Whether you’re renovating, upgrading outlets or switches, or simply ensuring your home wiring is up to code, mastering the electrical pigtail process brings safety, reliability, and peace of mind that every homeowner needs."Hey good morning and hey howdy we're here today and we're going to do some pigtailing." – James Adams, Master ElectricianWhat You'll Learn in This Guide on How to Pigtail Electrical WiresDefinition and basics of electrical pigtail connectionsWhy you should make an electrical pigtail for outlets or switchesPreparation, tools, and essential safety checksStep-by-step instructions for making an electrical pigtailCommon mistakes and code compliance tips from a master electricianHow pigtailing ensures safety, longevity, and reliability in home wiringWhat Is an Electrical Pigtail? Understanding How to Pigtail Electrical Wires"So pig tailing is when we have a device and... we're adding another set of wires and... not enough spaces to add all those wires." – James Adams, Master ElectricianAn electrical pigtail is a fundamental wiring technique used when you need to connect several wires to a single outlet or switch, but the device’s terminals don't allow for multiple conductors. The process involves taking short lengths of wire—called pigtails—and using a wire nut to join them with the existing grouped wires in the electrical box. The pigtail then connects individually to the device. This method is common in both new construction and when repairing older homes, helping distribute power safely and ensuring each connection remains secure and code-compliant.If, for example, you’re adding a device to your electrical circuit and quickly discover that there aren’t enough terminal screws on the outlet or switch, or if you notice doubled or overloaded terminals while replacing an outlet, pigtailing is the right solution. James Adams explains, "You'll see wires doubled up under screws, which is wrong. . . stuff forced into the back end that’s too large. " By creating an electrical pigtail, you bypass these common mistakes—making your wiring safer and easier for future troubleshooting.Why and When to Make an Electrical PigtailUse pigtails when outlets or switches have more wires than their terminals can safely handle.Address overloaded terminals or multiple conductors under a single screw—a violation of the National Electrical Code (NEC).Examples include adding a new device, correcting doubled wires under screws, or ensuring circuit continuity in older wiring.Pigtailing is not just a matter of convenience—it’s about code compliance and safety. The electrical code prohibits attaching more than one wire to a single terminal, and using wire nuts to make fresh connections with short pigtail wires ensures nothing gets crowded. This is especially important when you upgrade an outlet or switch (like installing a GFCI), or when previous DIY repairs leave tangled or doubled-up black or white wires. The result is a tidy, professional installation that enhances circuit reliability throughout your home.How Does Making an Electrical Pigtail Work?Short pigtail wires are twisted together with existing black, white, or ground conductors using a new wire nut, then attached as single wires to device screws.Pigtails allow circuits to remain continuous—if the outlet or switch fails, power still flows on to other outlets or switches downstream.Pigtail connections prevent voltage drop and loose connections that can cause flickering lights or dangerous overheating.When you make an electrical pigtail, you effectively give each device its own dedicated connection to the shared black (hot), white (neutral), or green/bare (ground) wires. This avoids the risk of loose connections that can occur if too many wires are backstabbed or doubled under one screw. With exposed copper strands properly twisted and secured under a quality wire nut, you get a fail-safe junction that’s easy to check, retighten, or replace as needed. Properly made pigtails ensure that when you push the grouped wires back into the electrical box and later need to install a new outlet or switch, everything stays organized and safe.Benefits of Pigtailing Outlets or Switches"If you have an older house a lot of times pig tailing will get rid of loose connections and voltage drop." – James Adams, Master ElectricianEliminates flickering or intermittent power caused by loose connections in outlets or switchesMeets NEC and local electrical code requirements by separating conductors and ensuring safe, single-wire connectionsPrevents a single failed outlet from cutting off power to devices downstream in the circuitProper pigtailing means fewer flickering lights and surprise outages. As Adams describes, “When you use the plug to hold the wires, if the plug fails then everything that's going out of this box will drop. . . [but with] pigtails with wire nuts, even if this plug fails the worst that's going to happen is this plug will go dead but everything that goes out of here will stay on. ” This alone makes it invaluable for both older homes and new installations—ensuring not just code compliance but peace of mind for every homeowner.Preparation and Essential Safety: How to Pigtail Electrical Wires Safely"I advise you... once you take off your plug... take a meter and let's make sure we have no power." – James Adams, Master ElectricianTurn off power to the circuit at the breaker panel; always verify with a voltage tester.Use a multimeter or non-contact voltage tester to check for live wires before touching anything.Gather all necessary tools: wire strippers, pliers, wire nuts, voltage tester, and correctly sized wires for your pigtails.Cut your pigtail wires to the recommended length (typically 6” or longer) and ensure they match the existing wiring’s gauge and insulation.Trim, strip back the ends, and align all wires evenly for a neat, safe connection.Safety cannot be overstated when working with electrical wiring. “Once you take off your plug and you’re going to do this, take a meter and let’s make sure we have no power. . . I’m not going to kill myself today at least not on video,” says Adams. Double-checking ensures you’re not at risk of electric shock, especially in boxes where previous repairs or junctions may have left live wires connected. Always make fresh connections whenever possible, never reuse old wire nuts, and ensure grouped wires are twisted securely before capping.Complying with Code and Ensuring Strong ConnectionsElectrical code requires at least 6” of wire extending from the front edge of the electrical box for safe hookup.Never reuse old or damaged wire nuts; always use a fresh, appropriately sized nut rated for the gauge and number of wires in your pigtail.Ensure all wire bundles are tightly twisted and the copper is fully covered by the wire nut for a secure, reliable connection that will not loosen over time.A code-compliant electrical pigtail depends on neatness and secure connectors. "By code, we're supposed to have at least six inches outside the front of the box. . . you want as much as you can get comfortably," Adams stresses. Equally important is the quality of every connection: “Don’t reuse old wire nuts—you’re going to cause future problems. " When in doubt, replace questionable materials and strive for bundles that are tight but not overstressed, with no exposed copper visible beyond the wire nut.Common Tools and Materials for Making an Electrical PigtailTool/MaterialPurpose/UseWire strippersRemoving insulation from wiresPliersTwisting wires togetherWire nutsSecuring the pigtail junctionVoltage testerConfirming power is offAppropriate gauge wireCompliant with circuit amperageGathering the right tools—like quality wire strippers for stripping back the ends, sturdy pliers to twist the wires, and appropriately rated wire nuts—ensures your connections are strong. Make every electrical pigtail as solid and safe as possible, with tools ready and tested for reliability.Step-by-Step Instructions: How to Pigtail Electrical Wires"So this is pig tailing we've taken three three wires and then we added the tail the pigtail there you go so the ground is now pigtailed okay." – James Adams, Master ElectricianPrepare the work area: Turn off power and verify with a tester no longer showing voltage.Trim and strip back the ends of existing wires for a fresh, even starting point.Twist together all ground (bare copper or green) wires, then add a ground pigtail lead and secure with a new wire nut.Repeat for neutral (white) wires and hot (black) wires, aligning insulation and exposed copper for a tidy bundle. Use a separate pigtail for each type.Trim pigtails to the proper length (at least 6”), ensuring they’ll fit neatly onto device screws without excess slack or tension.Carefully loop each pigtail lead clockwise around the device terminal screws (outlet or switch), so tightening the screw draws the wire in securely.Finish by neatly folding or pushing the grouped wires back into the electrical box, securing devices, and checking for neatness and tightness throughout."You want to do it in tight enough so that your wires and your bundle start to twist with it to that point it's tight enough it's not going anywhere okay." – James Adams, Master ElectricianEvery step of making an electrical pigtail is about dependable connections. Start by killing power and checking with your voltage tester—never skip this safety step. As Adams notes, “We’re going to cut these off. . . make my own connections, don’t be lazy. . . You need to learn how to strip wire. " Align your black and white wires, trim the ends for fresh contact, then twist the grouped wires with pliers until they’re firmly bound. Cap each with a new wire nut and tug gently to check for tightness. After looping the pigtails onto device screws, tuck the bundled wires back into the electrical box for a professional finish.Detailed Tips and Troubleshooting from a Master ElectricianAvoid backstabbing wires into devices—particularly #12 gauge wire, which is not code-compliant and can loosen over time.Check that wire bundles are neat, even, and free of stray copper to reduce risk of shorts or unreliable power.Always tighten any unused terminal screws on outlets or switches to keep them from accidentally contacting loose wires inside the box.Attentive, neat workmanship is crucial. Adams emphasizes correcting mistakes rather than settling for poor connections: “So instead of just mashing a wire nut on it and hoping it stays connected. . . we’re going to do it again. ” Always double-check your twists, keep the connections tight, and when you’re ready to install a new outlet or switch, make sure everything is lined up and back the ends into the box carefully. Good habits now will prevent hours of troubleshooting later.Applications and Variations: Where to Make an Electrical PigtailSwitch boxes: For adding switches, switch legs, or new lights, pigtailing the neutrals or hots keeps wiring neat and code-compliant.Outlets: Use pigtails to correct doubled conductors under screws, to install GFCI outlets, or for daisy chaining multiple outlets together safely.Panels and junction boxes: Ensures circuit continuity and allows future devices to be added without disturbing existing wiring."The pig tailing saves a lot of future problems and it makes sure even on new construction it makes sure that your power is continuous all the way through okay." – James Adams, Master ElectricianProperly installed pigtails make adding or moving devices easy, allowing you to make fresh connections whenever an upgrade is needed—without risking code violations or the trouble of losing power in rooms downstream if a single device fails. This versatility is essential for both DIYers and professionals aiming to make an electrical pigtail that stands the test of time.People Also Ask: Expert Answers on How to Pigtail Electrical WiresHow long should pigtail wires be?Electrical code typically requires a minimum of 6 inches extending from the box, but pigtails should be long enough to attach easily to terminals without excessive slack.For best practice, each pigtail wire should be at least 6 inches long—enough to install comfortably but not so long as to create a tangle inside the box. This length ensures compliance with the NEC and leaves enough wire for future work if an outlet or switch needs replacing.Do you have to pigtail outlets by code?NEC requires that wires are not doubled (more than one conductor) under a single terminal screw. Pigtailing outlets ensures code compliance by creating separate, safe connections.Pigtailing is no longer just a best practice—it’s a code issue. Modern outlets and switches only allow one wire per terminal, so making an electrical pigtail is not only safer, but required to prevent code violations and potential insurance issues in the event of a fire or electrical failure.Can I pigtail a neutral wire?Yes, neutral wires can be pigtailed, especially when multiple circuits or devices share a junction. Always use a wire nut rated for the number and gauge of wires.Pigtailing neutral (white) wires is recommended when connecting multiple outlets, switches, or fixtures. Just ensure the wire nut is sized correctly to handle the grouped wires back and securely covers all exposed copper.How to make a pigtail for an electrical outlet?Cut a short piece of wire (matching gauge), strip ends, twist with existing wires, and secure with a wire nut. Attach the pigtail lead to the outlet terminal.The steps are easy: cut and strip a length of same-gauge wire, twist it together with existing black, white, or ground wires, cap with a fresh wire nut, loop the lead around its terminal, and you’re ready to install your outlet or switch.Frequently Asked Questions on How to Pigtail Electrical WiresIs aluminum wiring safe for pigtailing?How do I choose wire nut size for pigtails?What are signs of a bad pigtail connection?Can you mix wire gauges in a pigtail?How do you secure multiple grounds in a metal box?If you’re dealing with aluminum wiring, you’ll need special connectors and anti-oxidant paste—consult a licensed electrician. Always match your wire nut to the gauge and number of wires in the bundle (the packaging will specify), and check for signs of bad pigtails such as loose outlets, flickering lights, or heat at the wire nut. Mixing wire gauges in a pigtail can be risky; stick to same-gauge where possible, or use a nut specifically rated for mixed sizes. For multiple grounds in a metal box, always bond the ground pigtail securely to the box before attaching the outlet or switch for maximum safety.Summary: Key Takeaways on How to Pigtail Electrical WiresAlways turn off power and verify safety before starting any wiring work.Pigtailing prevents code violations, loose connections, and downstream power loss.Use proper tools, correct wire gauge, and approved wire nuts on every electrical pigtail.Neat workmanship and tight connections ensure dependable, long-lasting electrical wiring.Next Steps: Safely Upgrade Your Home Wiring—Contact a Licensed Electrician for How to Pigtail Electrical WiresIf you’re uncertain about making an electrical pigtail or your project involves aluminum, old, or complex wiring, don’t take chances—reach out to a licensed electrician. Solomon advice: Make safe home wiring your priority.

03.10.2026

Transform Your Basement into a Space for Craft and Creativity in DC

Update Revolutionizing Basements: From Forgotten Space to Functional Artistry Basements often linger as the most neglected area of homes, particularly in cities like Washington, DC, where space is always at a premium. Traditionally viewed as storage areas or dark dungeons filled with forgotten boxes, these spaces are now being recognized as untapped potential for living. One such transformation can be seen in a recent project undertaken in an architectural gem of a home in the heart of DC. Understanding the Basement Renovation Journey The homeowners, seeking to convert their basement from a forgotten zone into a vibrant extension of their home, faced several challenges: low ceilings, limited natural light, and a stairway that made access difficult. They envisioned a multifunctional space that would serve as a bedroom, a family lounge, and a special dedicated area for crafts and creativity. Partnering with designer Lisa Magee, the BOWA team embarked on a transformation that would reimagine how they utilized their basement. Key Renovation Strategies for Success One of the most critical strategies was undermining the existing foundation to create full ceiling height. This step unlocked the space, allowing it to feel less like a basement and more like an integrated part of the home. Additionally, larger windows were incorporated to flood the area with natural light, while mechanical systems were reconfigured to improve access and flow. The result? A bright and welcoming environment that was both functional and visually appealing. The Heart of Creativity: A Dedicated Craft Room At the very heart of this renovation lies a spacious craft room, designed for inspiration and productivity. With semi-custom cabinetry and a large central island, the space is organized for optimal workflow, complete with ample storage for materials and tools. Such purposeful design fosters an environment where creativity can flourish, resonating with a growing trend of making home spaces not just functional but also inspirational. Beyond a Craft Room: Multifunctional Living Spaces Beyond creativity, the renovated basement includes features to enrich family life. The addition of a new bedroom with egress and a full bathroom elevates the basement's functionality, accommodating guests or providing private space for family members. The lounge area, furnished with comfortable seating and aesthetic finishes, encourages family gatherings and casual hangouts. Financial Sense: The Benefits of Renovation Investing in a basement renovation not only enhances daily living but also adds significant value to the property. Industry data suggests that a well-executed basement remodel can recoup 60-70% of its costs during resale. This is particularly true in competitive neighborhoods like Capitol Hill, where buyers appreciate additional livable space. As residents increasingly seek flexible layouts to accommodate modern lifestyles, a finished basement can provide the extra square footage that families need without costly expansions. Learning from Successful Transformations Transforming basements into usable spaces is not just a personal endeavor; it's part of a broader trend where urban homeowners maximize their property potential. Real-life examples, such as the trendy English basements emerging in DC, show that dedicated living quarters—like home theaters, guest suites, or playrooms—can elevate family functioning while keeping aesthetics in check. These spaces promote harmony and creativity in the home, supporting various activities that reflect the evolving needs of families. Common Challenges and How to Overcome Them While undertaking a basement renovation, several key challenges must be addressed. Moisture and ventilation are common issues; ensuring proper drainage and installing high-efficiency exhaust systems are vital to maintaining a healthy environment. Moreover, obtaining the necessary permits is crucial—especially in a regulated area like Washington, DC where local compliance mandates can impact a project’s success. Conclusion: Your Basement Awaits For homeowners in Washington, DC, the opportunity to transform basements into functional artistic spaces is not just feasible; it’s a reality that many are embracing. Whether you’re looking to create a haven for creativity or simply enhance your living space, considering a basement remodel could lead to the most rewarding investment in your home. If you are inspired by what you’ve read, take the next step and consult with an expert to start your basement transformation journey today.

03.10.2026

Discover the Exciting Remodeling Trends for Spring 2026 You Can't Miss

Update Emerging Remodeling Trends for Spring 2026: A Personal Touch As we welcome Spring 2026, the way we approach home remodeling is shifting significantly. Designers and homeowners alike are searching for ways to make their living spaces more personal and functional. This year, the focus is on creating environments that reflect individuality, passions, and the joys of daily life. Layered, Collected Interiors: Moving Beyond Minimalism The minimalist trends that dominated previous years are fading as homeowners begin to crave richer, more layered interior designs. The look of perfection is being replaced with an emphasis on texture and a curated collection of meaningful items. Incorporating statement lighting, patterned textiles, and unique finishes create spaces that tell stories and express personality. This mirrors a broader theme emphasized in the lifestyle sector, where a move toward unique personal style is becoming a defining characteristic of modern design. Interior designers agree that homes should feel lived-in and reflective of the owner's tastes, straying away from the overly curated look. Spaces Designed for Passions: Making Room for Hobbies A notable design trend in 2026 is the prioritization of spaces dedicated to personal interests. Whether it’s a craft room, home gym, or music studio, homeowners are seeking to incorporate areas specifically tailored for their hobbies. These dedicated spaces do not only enhance the home’s functionality but also contribute to the well-being of the wearer by allowing them to engage in activities they love. This reflects a larger societal trend toward wellness and mental health, where having designated spaces for hobbies contributes to a balanced lifestyle. The integration of personal interests into home design can invigorate daily routines, making home life more enjoyable. Bold Statement Materials: A Dramatic Shift in Design The materials chosen for home renovations are evolving as well. Rather than opting for understated finishes, designers in 2026 are leaning toward bold stone surfaces and richly textured cabinetry that command attention. These statement materials act as focal points, adding depth and character to kitchens and living spaces. This trend towards timeless yet striking materials aligns with a growing appreciation for craftsmanship, as homeowners seek to invest in quality pieces that enhance their overall aesthetic. By spotlighting these unique materials, designers are not only creating visual interest but also honoring the art of skilled workmanship. Enhancing Natural Light: A Bright Idea Efforts to increase natural light intake in homes have become a major renovation focus. Expanding windows, adding doors, and maximizing sightlines are essential to creating brighter, more open spaces that feel welcoming. This strategy does not solely improve aesthetics but also contributes to a healthier living environment, maximizing the benefits of natural light for residents. The correlation between light-filled rooms and mood enhancement resonates with ongoing discussions about the importance of mental and physical health at home. The architectural community is prioritizing this aspect to ensure that homes not only look appealing but foster well-being. Outdoor Living: Extending Spaces Beyond Walls As the weather warms, outdoor spaces are being redesigned to seamlessly connect with interiors. Outdoor kitchens, covered patios, and inviting lounge areas are becoming essential features in home renovations, allowing homeowners to enjoy nature's beauty while enjoying the comforts found inside. Bringing outdoor elements into home design reflects a lifestyle choice that encourages relaxation and social interaction, aligning with broader wellness trends. These thoughtfully designed spaces aim to blur the lines between indoor and outdoor living, lessening the barriers often associated with seasonal activities. Conclusion: Designing a Home That Reflects You With these Spring 2026 remodeling trends, homeowners can create spaces that reflect their unique tastes, current lifestyle, and emotional needs. By moving away from rigid, impersonal design aesthetics, individuals are finding value in personal expression and a connection to their environments. As you contemplate renovation or design projects this spring, consider how these trends can enhance your home and overall lifestyle. Choose to create spaces that bring you joy, comfort, and a sense of belonging.

Terms of Service

Privacy Policy

Core Modal Title

Sorry, no results found

You Might Find These Articles Interesting

T
Please Check Your Email
We Will Be Following Up Shortly
*
*
*