Add Row
Add Element
UPDATE
Add Element

Your guide to modern living—every day.

  • Home
  • Categories
    • Wellness
    • Home and Garden
    • Work and Life
    • Travel
    • People and Style
    • Living Spaces
October 26.2025
1 Minute Read

Rain Gutter Cost Explained: Save Big on Installation

Did you know? The average homeowner who ignores proper rain gutter installation spends up to $9,000 more on preventable water damage and repairs over 10 years compared to neighbors who plan their gutter install smartly from the start. Rain gutter cost is more than just a line item—it's a critical investment in the longevity of your home. In this comprehensive guide, you'll uncover the real numbers behind gutter installation, cost-saving secrets, and tips only the pros use.

Dive in to discover how underestimating your rain gutter cost can lead to unexpected home repair headaches—and learn how to plan a gutter install that protects your home and your wallet. Whether you’re searching for a new gutter system, exploring material options like aluminum, copper, vinyl, or galvanized steel, or planning for future upgrades, understanding the true cost is your first step to saving thousands long term.

Understand Rain Gutter Cost: Surprising Facts Every Homeowner Should Know

  • Discover why underestimating your rain gutter cost could lead to costly home repairs and how a well-planned gutter install saves thousands in the long run.
  • Learn about typical installation cost ranges and essential budget planning tips for rain gutter installations.

Modern suburban home exterior with rain gutters and homeowner inspecting – rain gutter cost

Many homeowners are shocked to find that neglecting or misjudging their rain gutter cost can lead to far more than just a one-time payment—it’s the gateway to expensive water damage , hidden repair bills, and even foundation issues. On average, rain gutter installation cost ranges between $3 to $30 per linear foot , depending on the choice of material, labor, and additional features. Yet, savvy planning—from budgeting for gutter guards to choosing the right style gutter —can ensure your dollars go the distance, transforming a standard rain gutter into a lifetime investment.

Practical Example: A homeowner who chooses the budget option without considering local heavy rain risks or the true installation costs may spend double in repairs within a decade. In contrast, homeowners who factor in the expense of seamless gutters or invest in gutter guards up front enjoy reliable drainage and substantial savings over the system's lifespan. Taking the time to understand all elements influencing your rain gutter cost empowers you to make informed decisions that protect both your property and your finances.

Key Takeaways: What You'll Learn About Rain Gutter Cost

  • Factors affecting rain gutter installation cost and how you can optimize your spending.
  • Cost breakdowns by material, gutter type, and professional installation services.
  • Insider tips to save money on your gutter system without compromising quality.
  • Advice on comparing seamless gutters, gutter guards, and other options.

Rain Gutter Cost: Breaking Down the Basics

Typical Gutter Install Pricing and Installation Costs by Linear Foot

  • Explore average cost per linear foot, including installation cost and material expenses.
  • See the price differences between DIY and professional gutter installation.
Comparison of Average Rain Gutter Cost per Linear Foot by Material
Gutter Material Material Cost per Linear Foot Installed Cost per Linear Foot
Vinyl $2 – $4 $3 – $6
Aluminum $4 – $7 $6 – $12
Galvanized Steel $6 – $9 $8 – $15
Copper $15 – $25 $25 – $40

When budgeting for your gutter installation cost , always calculate the total linear feet required and match your budget to your expectations. DIY installations may save you on labor costs but often miss warranty coverage and sometimes lead to errors requiring expensive repairs. Professional gutter install services come with higher upfront installation costs, but the added protection and quality workmanship typically offset these expenses over time—especially if you live in a region with heavy rain or extreme weather.

The price of installing gutters is influenced by both the material type and the difficulty of your roofline. Longer, more complex rooflines increase the amount of gutter needed, while premium materials like copper gutters can substantially raise both the material and labor costs. Be sure to factor in these variables before making a final decision—and don’t forget to obtain estimates from at least three professional gutter companies for an accurate view of your project’s total cost of gutter installation.

Gutter System Types and Their Impact on Rain Gutter Cost

  • Understand how style gutter (K-style, round gutter/half-round) and seamless gutter systems affect total cost.
  • Detail the differences between sectional vs. seamless gutter installation cost.
“Seamless gutters typically cost 10-20% more but last far longer, offering real value over time.”

Side-by-side illustration of K-style, half-round, and seamless gutters – gutter system comparison for rain gutter cost

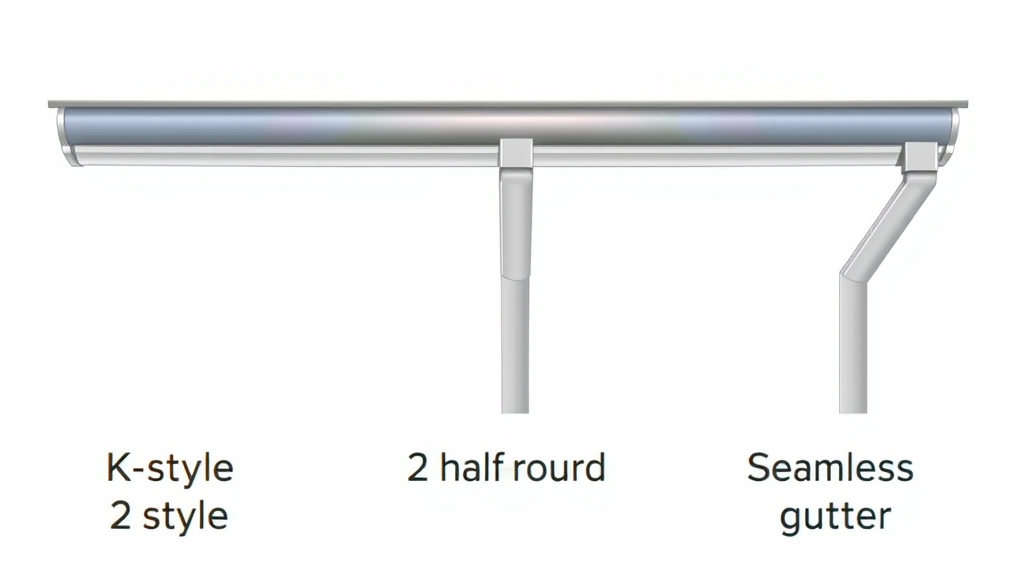
The most popular style gutter options are K-style and round (half-round) gutters. K-style offers a modern look and extra water-handling capacity, making it ideal for homes facing heavy rain . Round gutters, while more traditional, can be slightly pricier due to specialty hangers and more complex installation. Yet, the real game-changer in rain gutter cost is whether you choose seamless gutter or sectional systems. Seamless gutters require professional fabricators and are custom-cut on site for a perfect fit, reducing leaks and future maintenance.

Sectional gutters are more affordable and perfect for most DIYers, but tend to leak at joints and are more prone to clogging and wear over time. Although the installation cost for seamless gutters can run 10-20% higher, the long-term savings from fewer repairs and less frequent gutter replacement often make this a smart investment, especially if you want a low-maintenance, high-performance gutter system for your home.

Factors Influencing Rain Gutter Cost and Gutter Installation Cost

Material Matters: Comparing Gutter Materials and Their Installation Costs

  • Assess cost of gutter by type: vinyl, aluminum, galvanized steel, copper gutter.
  • Evaluate gutter material durability, climate suitability (for heavy rain), and maintenance requirements.

Choosing the right gutter material is crucial because each type affects your rain gutter cost very differently. Vinyl is the least expensive, lightweight, and easy to install gutters yourself, but it can crack in extreme cold over time. Aluminum gutters combine affordability with good style and resilience, making them the most popular choice for standard residential projects. Galvanized steel gutters are much stronger and handle heavy water flows, but require regular maintenance and might develop rust in damp climates. For those looking for top-tier longevity and a beautiful finish, copper gutters offer unmatched durability at a premium price point and can last for generations with minimal care.

Consider your climate—if your region experiences frequent heavy rain or storms, you’ll want a stronger material and possibly a larger gutter system. Maintenance is another factor, as certain materials (like galvanized steel) require more upkeep to prevent leaks or corrosion. Ultimately, match your gutter material to your local conditions and your desired lifespan for the best value and minimum overall gutter replacement costs.

Gutter System Size: Calculating Linear Feet Needed for Your Home

  • How roofline complexity and total linear feet affect rain gutter cost and gutter installation cost.
Sample Cost Breakdown by Linear Feet of Gutters Installed
Total Linear Feet Vinyl (Installed) Aluminum (Installed) Galvanized Steel (Installed) Copper (Installed)
100 ft $300 – $600 $600 – $1,200 $800 – $1,500 $2,500 – $4,000
150 ft $450 – $900 $900 – $1,800 $1,200 – $2,250 $3,750 – $6,000
200 ft $600 – $1,200 $1,200 – $2,400 $1,600 – $3,000 $5,000 – $8,000
250 ft $750 – $1,500 $1,500 – $3,000 $2,000 – $3,750 $6,250 – $10,000

When calculating your total rain gutter cost , precise measurement of your roofline’s linear feet is key. A more intricate roofline with multiple corners or multiple stories may increase both labor and material requirements, driving up the overall gutter installation cost . Use a measuring tape to get the total perimeter that needs gutter coverage and factor in any additional length for downspouts or special features.

Be aware that even a small error in measuring linear feet can significantly affect your final gutter cost . Always round up slightly to avoid shortages and unexpected installation delays. For complex layouts or custom homes, investing in a professional measurement—often provided free by reputable gutter install companies—ensures accuracy and the most effective gutter system for your property.

Installation Method: DIY vs Professional Gutter Installation

  • Compare saving potential and risks when you install gutters yourself versus hiring professional gutter installers.
  • Explore gutter installation costs including permits, labor, and warranty factors.

Homeowner and professional crew installing gutters side-by-side – installation method comparison for gutter installation cost

DIY gutter installation can reduce labor costs by up to 50%, but you absorb all risks—wrong angles cause water pooling, leaks, and in some cases, serious water damage. DIY also means buying all materials yourself, renting scaffolding, and assuming all maintenance and repairs going forward. Permits may be required in certain areas, and any mistakes could void manufacturer warranties or reduce home value.

On the other hand, hiring a professional gutter installation company ensures your system meets local code, angles are correct, and all seams are sealed. Professionals often offer warranties covering gutter replacement and repairs down the line. While professional installation costs are higher, that investment pays off in reliability, time saved, and peace of mind.

Style, Function, and Features Affecting Rain Gutter Cost

Gutter Guards and Their Impact on Gutter Installation Cost

  • Costs and benefits of gutter guard systems for reducing future gutter replacement and cleaning expenses.
  • Price comparison of gutter guards by style and material.

Gutter guards keep debris from clogging your gutters, dramatically lowering the need for regular cleaning and reducing the risk of water damage due to overflow. Their upfront costs—$4 to $12 per linear foot installed—can pay for themselves after just a few professional cleanings, especially in areas with lots of trees or heavy rain . Styles range from inexpensive plastic screens to permanent, integrated micromesh systems that all but eliminate gutter cleaning.

Material and installation complexity are main drivers of gutter guard costs. Snap-in plastic guards are cheapest for DIY, while professionally installed micro-mesh guards cost more but deliver superior performance and longevity. Adding gutter guards during a new gutter installation maximizes savings and makes the system more resilient for years to come.

Choosing Between Seamless Gutters and Sectional Gutters

  • Why seamless gutter systems reduce leak risks and require less maintenance.
  • Calculate long-term rain gutter cost savings with seamless gutter installation.

Unlike traditional sectional gutters that join with visible seams every 10–20 feet, seamless gutters are custom-fabricated to the exact linear feet needed for your home. Fewer seams mean fewer leaks—which is why seamless gutter systems are strongly favored by gutter pro installers and homeowners in regions prone to heavy rain and storm activity. Seamless gutters require fewer repairs and cleaning, driving down the true rain gutter cost over their long lifespan.

Although seamless gutter installation costs can be higher—expect 10-20% more spent upfront—the potential for fewer repairs and less frequent replacement balances out the initial investment, especially when paired with high-quality gutter guards. Seamless options also add curb appeal and can even boost property value, particularly on modern homes that benefit from continuous lines and minimal visual clutter.

Upgrade Options: Downspouts, Rain Chains, and Accessories and Their Installation Cost

  • Evaluate costs for essential and decorative gutter add-ons.
  • Heavy rain and unique gutter system needs for various climates.

Close-up of different gutter guard styles and rain chains on residential roofline – upgrade options affecting rain gutter cost

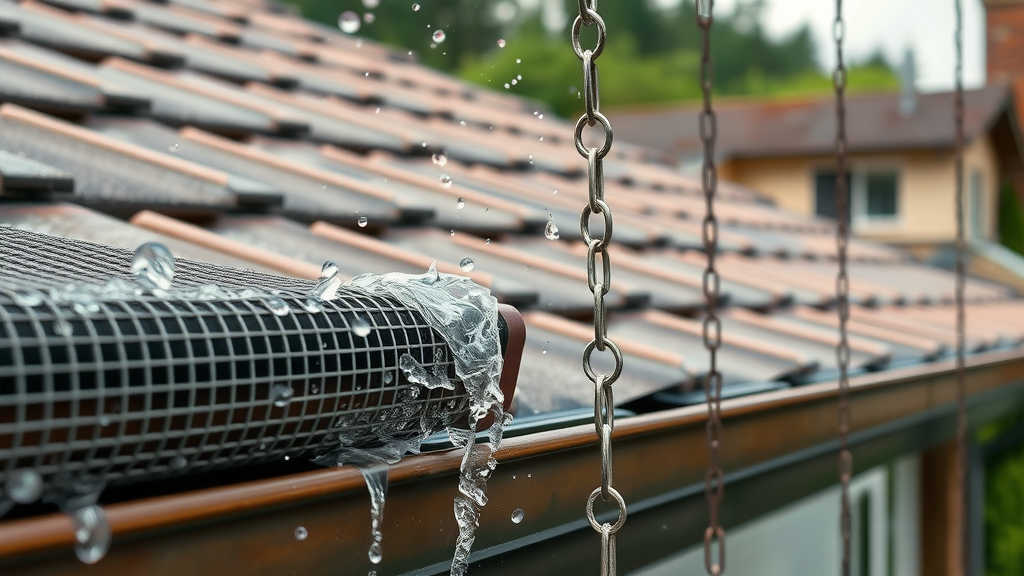
Basic downspouts often cost $5–$10 per linear foot installed, but custom sizes or decorative options like rain chains can run $15–$30 per linear foot. Functional accessories—such as hangers for heavy snow loads, splash blocks, or heated cables for ice dams in cold regions—all add to the total rain gutter cost . While these features may seem like extra expenses, they protect your home from unique climate challenges and minimize future gutter replacement costs.

It's vital to match upgrade options to your climate. For regions with heavy rain or snow, sturdier accessories or larger-diameter downspouts prevent overflow and ice damming. Rain chains not only add a decorative touch but help guide water safely away from your foundation, reducing erosion and basement flooding risks. Strategic investment in the right accessories can save thousands in future repairs and manual gutter cleaning.

Regional and Project-Specific Rain Gutter Cost Considerations

Gutter Installation Cost by Location: What to Expect

  • How the cost of gutter replacement and install gutter services differ in regions like OKC and urban vs rural areas.

Regional US map illustrating rain gutter costs by state – regional variation in rain gutter cost and installation cost

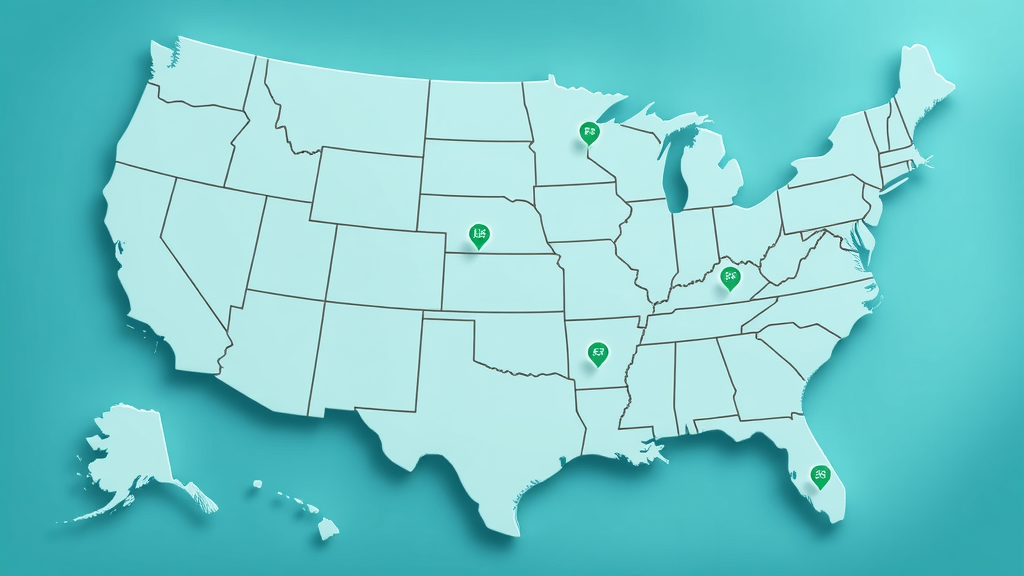
Gutter installation and replacement costs vary significantly by region, reflecting local labor rates, climate, and house styles. In rural areas with fewer contractors, travel fees may be added, while cities like Oklahoma City (OKC) benefit from competitive pricing but might see higher labor costs due to strong demand for licensed professionals. For example, standard rain gutter cost in OKC often ranges from $5.00 to $12.00 per linear foot installed , while premium systems or custom homes may push prices higher.

Areas with frequent heavy rain or extreme winters typically require higher-capacity gutter systems or specialized add-ons, further increasing project estimates. Always ask local gutter install companies for references, recent price sheets, and before-and-after photos to verify the value and reliability of their work.

Project Scope: Gutter Replacement, Upgrades, or New Gutter Systems

  • Comparing gutter installation costs for new homes versus existing gutter replacement projects.
  • Case studies highlighting average gutter install outcomes in various scenarios.

New home construction typically offers the lowest installation costs, as gutter pros can work alongside other trades and eliminate the need for complex tear-outs. By contrast, replacing outdated or damaged gutters—especially if your current system has rust, leaks, or pest problems—can add $2–$4 per linear foot in removal and disposal fees. Upgrades such as wider downspouts or gutter guards are easiest and most affordable when bundled with full gutter installation or replacement, so always discuss these options with your contractor early in the project planning process.

Consider real-world examples: A new 2,000-square-foot home in the Midwest might pay $1,200–$2,500 for basic aluminum K-style gutters, while a 1940s bungalow in the Northeast needing full gutter replacement , fascia repairs, and copper upgrades could approach $7,000 or more. Always get a detailed, written estimate to avoid surprise costs and ensure your investment matches your expectations.

How to Save on Rain Gutter Cost Without Compromising Quality

  • Smart purchasing: When to shop for supplies and hire for gutter installation for best rates.
  • Bundling services, seasonal deals, and negotiating professional gutter installation costs.
  • Maintenance tips to reduce lifetime gutter replacement frequency and overall gutter cost.
"Investing in durable gutters and gutter guards often pays for itself in reduced repairs and home protection."

Young family maintaining rain gutters, happy interaction – maintaining gutters reduces rain gutter cost over time

Timing is everything. The best time to buy gutter materials or book installation is late winter or early spring, when demand is lower and deals are more common. Request quotes from at least three professional gutter installers, and don't hesitate to ask about discounts for bundling services like gutter cleaning or guard installations with your new system. Many companies offer reduced labor costs or bulk pricing if you need both gutter replacement and upgrades at the same time.

Maintain your gutters proactively by clearing debris every few months and checking for leaks or rust. Installing gutter guards pays for itself quickly in both cleaning cost reductions and lower risk of water damage. Lastly, durable materials (aluminum or copper) minimize the need for frequent repairs, keeping your long-term rain gutter cost as low as possible without sacrificing quality or curb appeal.

People Also Ask: Frequently Searched Rain Gutter Cost Questions

What is the average cost to install new rain gutters?

  • Discuss the national average installation cost, explain price ranges for gutter install and material options.

The national average cost to install new rain gutters is typically $1,000 to $2,500 for a standard-sized, single-story home. This price includes both materials and labor and factors in a mix of common materials like vinyl and aluminum. Smaller homes can expect lower costs, while larger homes or those requiring custom solutions will pay more. Always compare quotes and check the cost per linear foot for the most accurate budgeting.

How much is 200 linear feet of gutters?

  • Price breakdown by material and seamless gutter vs standard options for 200 linear feet, including installation cost.

For 200 linear feet, vinyl gutters average $600 to $1,200 installed; aluminum options are around $1,200 to $2,400. Galvanized steel runs $1,600 to $3,000, and copper gutters can exceed $5,000. Upgrading to seamless gutters typically adds 10-20% to the total project cost, but offers lower maintenance for years to come.

How much should it cost to replace guttering?

  • Factors affecting gutter replacement pricing: removal fees, installation costs, and regional factors.

Gutter replacement costs range from $4 to $15 per linear foot depending on the material, removal of old gutters, and local labor rates. Urban areas generally have slightly higher installation costs, while rural areas might charge extra for travel or disposal. Always ask your gutter pro if removal and haul-away are included in your written estimate to avoid hidden fees.

How much do gutters cost in OKC?

  • Regional price range for rain gutter cost, contractor costs, and gutter installation cost specifics in Oklahoma City.

In Oklahoma City, average rain gutter cost for basic aluminum systems is $6 to $12 per linear foot, with seamless installations and added gutter guards pushing prices toward the higher end. Factoring in labor and local contractor overhead, most OKC homeowners spend $1,500–$3,500 for a mid-sized home, depending on scope and material choices.

Expert Advice: Interview with a Professional Gutter Installer

"Proper measurement and choosing the right gutter system style can maximize your home's protection for decades."
  • Pro tips on choosing gutter material, negotiating installation costs, and avoiding common mistakes.

Professional gutter installer advising client on rain gutter cost and system choice

Seasoned gutter pros recommend always measuring your home’s linear feet twice and never choosing gutter sizing based purely on builder-grade standards. Focus on compatibility with local rainfall patterns—a mistake here can spell water damage or extra repair costs later. Opt for materials that balance lifespan and cost, such as aluminum for standard homes or copper for enhancing property value.

When negotiating gutter installation cost, ask for a detailed breakdown and look for bundled deals that include gutter guards, annual cleaning, and extended warranties. Avoid hiring the lowest bidder unless they can demonstrate proven results and valid insurance—savings disappear quickly if improper installation leads to leaks or repeated gutter replacement.

Smart Buyer Guide: Choosing the Right Rain Gutter System for Your Budget

List: Quick Comparison of Rain Gutter System Types and Their Costs

  • Vinyl gutters: lowest installation cost, shortest lifespan.
  • Aluminum gutters: affordable, easy gutter install, moderate durability.
  • Copper gutters: highest rain gutter cost, premium appearance and longest life.
  • Galvanized steel gutters: strong, but may rust over time.

Checklist: What to Consider Before You Install Gutters

  • Budget for gutter installation cost, maintenance, and replacement.
  • Calculate total linear feet needed and preferred style gutter.
  • Evaluate climate conditions including heavy rain when deciding on gutter system options.

Organized flat lay of gutter material samples, measuring tape, and notepad checklist – smart buyer planning for rain gutter cost

Before you install gutters , compare all material and gutter system options, check product reviews, and assess your maintenance commitment. Read the fine print on warranties and make sure your installer is licensed and insured for your region. Taking these steps upfront ensures that your home remains protected during every storm and that your investment in rain gutter cost is well-spent.

FAQ: Your Rain Gutter Cost and Installation Questions Answered

How do I know if I need full gutter replacement or a simple repair?

  • Signs your gutter system needs replacing: leaks, sagging, rust, or frequent heavy rain issues.

If you notice persistent leaks, sagging sections, visible rust, or gutters pulling away from the roof even after repairs, it's time for a full gutter replacement. Frequent overflows during heavy rain or ongoing water damage to your siding or foundation also indicate that repairs may no longer be effective or cost-efficient.

When is it best to add gutter guards to minimize maintenance cost?

  • Factors indicating when gutter guards are a smart investment to lower long-term gutter installation costs.

Install gutter guards if your property is shaded by trees or if past clogs have caused roof leaks or water backups. Adding guards is most cost-effective during new gutter installation when labor is bundled. Consistent clogging or difficult gutter cleaning makes this upgrade a smart choice for reducing total gutter cost and maintenance headaches.

Are seamless gutters worth the investment in terms of rain gutter cost?

  • Define seamless gutter benefits for cost, performance, and property value.

Yes! Seamless gutters greatly reduce leak risks, maintenance, and long-term repair costs. Their custom fit increases performance in all conditions, particularly during heavy rain . While the upfront cost is higher, seamless systems increase property value and keep your home protected for decades—making them a wise investment for most homeowners.

Visual Guide: Rain Gutter Cost Calculation Video

  • Step-by-step video analyzing a rain gutter install, showing price breakdown by linear foot and material.
  • Video demonstration of comparing gutter guard types and gutter materials for overall rain gutter cost savings.
  • Meet a professional gutter installer explaining the process and tips to lower your rain gutter cost.

How to Take Action: Save Big on Your Rain Gutter Cost

  • Get multiple quotes for your gutter installation project today.
  • Compare rain gutter cost from top-rated gutter installation providers and unlock exclusive savings.

Ready to protect your home and your budget? Request multiple local quotes today and see how the right planning can transform your rain gutter cost from a worry into a wise investment.

Home and Garden

0 Comments

Write A Comment

*
*
Please complete the captcha to submit your comment.
Related Posts All Posts
03.13.2026

How to Pigtail Electrical Wires: Step-by-Step Guide for Safe Home Wiring

Opening Inquiry: Why Is Knowing How to Pigtail Electrical Wires Crucial for Homeowners?Have you ever flicked a light switch and noticed the lights flicker—or worse, lost power to half your room when an outlet failed? Electrical issues often hide behind the walls, but one essential skill—knowing how to pigtail electrical wires—can help prevent these problems from spiraling into hazards. Whether you’re renovating, upgrading outlets or switches, or simply ensuring your home wiring is up to code, mastering the electrical pigtail process brings safety, reliability, and peace of mind that every homeowner needs."Hey good morning and hey howdy we're here today and we're going to do some pigtailing." – James Adams, Master ElectricianWhat You'll Learn in This Guide on How to Pigtail Electrical WiresDefinition and basics of electrical pigtail connectionsWhy you should make an electrical pigtail for outlets or switchesPreparation, tools, and essential safety checksStep-by-step instructions for making an electrical pigtailCommon mistakes and code compliance tips from a master electricianHow pigtailing ensures safety, longevity, and reliability in home wiringWhat Is an Electrical Pigtail? Understanding How to Pigtail Electrical Wires"So pig tailing is when we have a device and... we're adding another set of wires and... not enough spaces to add all those wires." – James Adams, Master ElectricianAn electrical pigtail is a fundamental wiring technique used when you need to connect several wires to a single outlet or switch, but the device’s terminals don't allow for multiple conductors. The process involves taking short lengths of wire—called pigtails—and using a wire nut to join them with the existing grouped wires in the electrical box. The pigtail then connects individually to the device. This method is common in both new construction and when repairing older homes, helping distribute power safely and ensuring each connection remains secure and code-compliant.If, for example, you’re adding a device to your electrical circuit and quickly discover that there aren’t enough terminal screws on the outlet or switch, or if you notice doubled or overloaded terminals while replacing an outlet, pigtailing is the right solution. James Adams explains, "You'll see wires doubled up under screws, which is wrong. . . stuff forced into the back end that’s too large. " By creating an electrical pigtail, you bypass these common mistakes—making your wiring safer and easier for future troubleshooting.Why and When to Make an Electrical PigtailUse pigtails when outlets or switches have more wires than their terminals can safely handle.Address overloaded terminals or multiple conductors under a single screw—a violation of the National Electrical Code (NEC).Examples include adding a new device, correcting doubled wires under screws, or ensuring circuit continuity in older wiring.Pigtailing is not just a matter of convenience—it’s about code compliance and safety. The electrical code prohibits attaching more than one wire to a single terminal, and using wire nuts to make fresh connections with short pigtail wires ensures nothing gets crowded. This is especially important when you upgrade an outlet or switch (like installing a GFCI), or when previous DIY repairs leave tangled or doubled-up black or white wires. The result is a tidy, professional installation that enhances circuit reliability throughout your home.How Does Making an Electrical Pigtail Work?Short pigtail wires are twisted together with existing black, white, or ground conductors using a new wire nut, then attached as single wires to device screws.Pigtails allow circuits to remain continuous—if the outlet or switch fails, power still flows on to other outlets or switches downstream.Pigtail connections prevent voltage drop and loose connections that can cause flickering lights or dangerous overheating.When you make an electrical pigtail, you effectively give each device its own dedicated connection to the shared black (hot), white (neutral), or green/bare (ground) wires. This avoids the risk of loose connections that can occur if too many wires are backstabbed or doubled under one screw. With exposed copper strands properly twisted and secured under a quality wire nut, you get a fail-safe junction that’s easy to check, retighten, or replace as needed. Properly made pigtails ensure that when you push the grouped wires back into the electrical box and later need to install a new outlet or switch, everything stays organized and safe.Benefits of Pigtailing Outlets or Switches"If you have an older house a lot of times pig tailing will get rid of loose connections and voltage drop." – James Adams, Master ElectricianEliminates flickering or intermittent power caused by loose connections in outlets or switchesMeets NEC and local electrical code requirements by separating conductors and ensuring safe, single-wire connectionsPrevents a single failed outlet from cutting off power to devices downstream in the circuitProper pigtailing means fewer flickering lights and surprise outages. As Adams describes, “When you use the plug to hold the wires, if the plug fails then everything that's going out of this box will drop. . . [but with] pigtails with wire nuts, even if this plug fails the worst that's going to happen is this plug will go dead but everything that goes out of here will stay on. ” This alone makes it invaluable for both older homes and new installations—ensuring not just code compliance but peace of mind for every homeowner.Preparation and Essential Safety: How to Pigtail Electrical Wires Safely"I advise you... once you take off your plug... take a meter and let's make sure we have no power." – James Adams, Master ElectricianTurn off power to the circuit at the breaker panel; always verify with a voltage tester.Use a multimeter or non-contact voltage tester to check for live wires before touching anything.Gather all necessary tools: wire strippers, pliers, wire nuts, voltage tester, and correctly sized wires for your pigtails.Cut your pigtail wires to the recommended length (typically 6” or longer) and ensure they match the existing wiring’s gauge and insulation.Trim, strip back the ends, and align all wires evenly for a neat, safe connection.Safety cannot be overstated when working with electrical wiring. “Once you take off your plug and you’re going to do this, take a meter and let’s make sure we have no power. . . I’m not going to kill myself today at least not on video,” says Adams. Double-checking ensures you’re not at risk of electric shock, especially in boxes where previous repairs or junctions may have left live wires connected. Always make fresh connections whenever possible, never reuse old wire nuts, and ensure grouped wires are twisted securely before capping.Complying with Code and Ensuring Strong ConnectionsElectrical code requires at least 6” of wire extending from the front edge of the electrical box for safe hookup.Never reuse old or damaged wire nuts; always use a fresh, appropriately sized nut rated for the gauge and number of wires in your pigtail.Ensure all wire bundles are tightly twisted and the copper is fully covered by the wire nut for a secure, reliable connection that will not loosen over time.A code-compliant electrical pigtail depends on neatness and secure connectors. "By code, we're supposed to have at least six inches outside the front of the box. . . you want as much as you can get comfortably," Adams stresses. Equally important is the quality of every connection: “Don’t reuse old wire nuts—you’re going to cause future problems. " When in doubt, replace questionable materials and strive for bundles that are tight but not overstressed, with no exposed copper visible beyond the wire nut.Common Tools and Materials for Making an Electrical PigtailTool/MaterialPurpose/UseWire strippersRemoving insulation from wiresPliersTwisting wires togetherWire nutsSecuring the pigtail junctionVoltage testerConfirming power is offAppropriate gauge wireCompliant with circuit amperageGathering the right tools—like quality wire strippers for stripping back the ends, sturdy pliers to twist the wires, and appropriately rated wire nuts—ensures your connections are strong. Make every electrical pigtail as solid and safe as possible, with tools ready and tested for reliability.Step-by-Step Instructions: How to Pigtail Electrical Wires"So this is pig tailing we've taken three three wires and then we added the tail the pigtail there you go so the ground is now pigtailed okay." – James Adams, Master ElectricianPrepare the work area: Turn off power and verify with a tester no longer showing voltage.Trim and strip back the ends of existing wires for a fresh, even starting point.Twist together all ground (bare copper or green) wires, then add a ground pigtail lead and secure with a new wire nut.Repeat for neutral (white) wires and hot (black) wires, aligning insulation and exposed copper for a tidy bundle. Use a separate pigtail for each type.Trim pigtails to the proper length (at least 6”), ensuring they’ll fit neatly onto device screws without excess slack or tension.Carefully loop each pigtail lead clockwise around the device terminal screws (outlet or switch), so tightening the screw draws the wire in securely.Finish by neatly folding or pushing the grouped wires back into the electrical box, securing devices, and checking for neatness and tightness throughout."You want to do it in tight enough so that your wires and your bundle start to twist with it to that point it's tight enough it's not going anywhere okay." – James Adams, Master ElectricianEvery step of making an electrical pigtail is about dependable connections. Start by killing power and checking with your voltage tester—never skip this safety step. As Adams notes, “We’re going to cut these off. . . make my own connections, don’t be lazy. . . You need to learn how to strip wire. " Align your black and white wires, trim the ends for fresh contact, then twist the grouped wires with pliers until they’re firmly bound. Cap each with a new wire nut and tug gently to check for tightness. After looping the pigtails onto device screws, tuck the bundled wires back into the electrical box for a professional finish.Detailed Tips and Troubleshooting from a Master ElectricianAvoid backstabbing wires into devices—particularly #12 gauge wire, which is not code-compliant and can loosen over time.Check that wire bundles are neat, even, and free of stray copper to reduce risk of shorts or unreliable power.Always tighten any unused terminal screws on outlets or switches to keep them from accidentally contacting loose wires inside the box.Attentive, neat workmanship is crucial. Adams emphasizes correcting mistakes rather than settling for poor connections: “So instead of just mashing a wire nut on it and hoping it stays connected. . . we’re going to do it again. ” Always double-check your twists, keep the connections tight, and when you’re ready to install a new outlet or switch, make sure everything is lined up and back the ends into the box carefully. Good habits now will prevent hours of troubleshooting later.Applications and Variations: Where to Make an Electrical PigtailSwitch boxes: For adding switches, switch legs, or new lights, pigtailing the neutrals or hots keeps wiring neat and code-compliant.Outlets: Use pigtails to correct doubled conductors under screws, to install GFCI outlets, or for daisy chaining multiple outlets together safely.Panels and junction boxes: Ensures circuit continuity and allows future devices to be added without disturbing existing wiring."The pig tailing saves a lot of future problems and it makes sure even on new construction it makes sure that your power is continuous all the way through okay." – James Adams, Master ElectricianProperly installed pigtails make adding or moving devices easy, allowing you to make fresh connections whenever an upgrade is needed—without risking code violations or the trouble of losing power in rooms downstream if a single device fails. This versatility is essential for both DIYers and professionals aiming to make an electrical pigtail that stands the test of time.People Also Ask: Expert Answers on How to Pigtail Electrical WiresHow long should pigtail wires be?Electrical code typically requires a minimum of 6 inches extending from the box, but pigtails should be long enough to attach easily to terminals without excessive slack.For best practice, each pigtail wire should be at least 6 inches long—enough to install comfortably but not so long as to create a tangle inside the box. This length ensures compliance with the NEC and leaves enough wire for future work if an outlet or switch needs replacing.Do you have to pigtail outlets by code?NEC requires that wires are not doubled (more than one conductor) under a single terminal screw. Pigtailing outlets ensures code compliance by creating separate, safe connections.Pigtailing is no longer just a best practice—it’s a code issue. Modern outlets and switches only allow one wire per terminal, so making an electrical pigtail is not only safer, but required to prevent code violations and potential insurance issues in the event of a fire or electrical failure.Can I pigtail a neutral wire?Yes, neutral wires can be pigtailed, especially when multiple circuits or devices share a junction. Always use a wire nut rated for the number and gauge of wires.Pigtailing neutral (white) wires is recommended when connecting multiple outlets, switches, or fixtures. Just ensure the wire nut is sized correctly to handle the grouped wires back and securely covers all exposed copper.How to make a pigtail for an electrical outlet?Cut a short piece of wire (matching gauge), strip ends, twist with existing wires, and secure with a wire nut. Attach the pigtail lead to the outlet terminal.The steps are easy: cut and strip a length of same-gauge wire, twist it together with existing black, white, or ground wires, cap with a fresh wire nut, loop the lead around its terminal, and you’re ready to install your outlet or switch.Frequently Asked Questions on How to Pigtail Electrical WiresIs aluminum wiring safe for pigtailing?How do I choose wire nut size for pigtails?What are signs of a bad pigtail connection?Can you mix wire gauges in a pigtail?How do you secure multiple grounds in a metal box?If you’re dealing with aluminum wiring, you’ll need special connectors and anti-oxidant paste—consult a licensed electrician. Always match your wire nut to the gauge and number of wires in the bundle (the packaging will specify), and check for signs of bad pigtails such as loose outlets, flickering lights, or heat at the wire nut. Mixing wire gauges in a pigtail can be risky; stick to same-gauge where possible, or use a nut specifically rated for mixed sizes. For multiple grounds in a metal box, always bond the ground pigtail securely to the box before attaching the outlet or switch for maximum safety.Summary: Key Takeaways on How to Pigtail Electrical WiresAlways turn off power and verify safety before starting any wiring work.Pigtailing prevents code violations, loose connections, and downstream power loss.Use proper tools, correct wire gauge, and approved wire nuts on every electrical pigtail.Neat workmanship and tight connections ensure dependable, long-lasting electrical wiring.Next Steps: Safely Upgrade Your Home Wiring—Contact a Licensed Electrician for How to Pigtail Electrical WiresIf you’re uncertain about making an electrical pigtail or your project involves aluminum, old, or complex wiring, don’t take chances—reach out to a licensed electrician. Solomon advice: Make safe home wiring your priority.

03.10.2026

Transform Your Basement into a Space for Craft and Creativity in DC

Update Revolutionizing Basements: From Forgotten Space to Functional Artistry Basements often linger as the most neglected area of homes, particularly in cities like Washington, DC, where space is always at a premium. Traditionally viewed as storage areas or dark dungeons filled with forgotten boxes, these spaces are now being recognized as untapped potential for living. One such transformation can be seen in a recent project undertaken in an architectural gem of a home in the heart of DC. Understanding the Basement Renovation Journey The homeowners, seeking to convert their basement from a forgotten zone into a vibrant extension of their home, faced several challenges: low ceilings, limited natural light, and a stairway that made access difficult. They envisioned a multifunctional space that would serve as a bedroom, a family lounge, and a special dedicated area for crafts and creativity. Partnering with designer Lisa Magee, the BOWA team embarked on a transformation that would reimagine how they utilized their basement. Key Renovation Strategies for Success One of the most critical strategies was undermining the existing foundation to create full ceiling height. This step unlocked the space, allowing it to feel less like a basement and more like an integrated part of the home. Additionally, larger windows were incorporated to flood the area with natural light, while mechanical systems were reconfigured to improve access and flow. The result? A bright and welcoming environment that was both functional and visually appealing. The Heart of Creativity: A Dedicated Craft Room At the very heart of this renovation lies a spacious craft room, designed for inspiration and productivity. With semi-custom cabinetry and a large central island, the space is organized for optimal workflow, complete with ample storage for materials and tools. Such purposeful design fosters an environment where creativity can flourish, resonating with a growing trend of making home spaces not just functional but also inspirational. Beyond a Craft Room: Multifunctional Living Spaces Beyond creativity, the renovated basement includes features to enrich family life. The addition of a new bedroom with egress and a full bathroom elevates the basement's functionality, accommodating guests or providing private space for family members. The lounge area, furnished with comfortable seating and aesthetic finishes, encourages family gatherings and casual hangouts. Financial Sense: The Benefits of Renovation Investing in a basement renovation not only enhances daily living but also adds significant value to the property. Industry data suggests that a well-executed basement remodel can recoup 60-70% of its costs during resale. This is particularly true in competitive neighborhoods like Capitol Hill, where buyers appreciate additional livable space. As residents increasingly seek flexible layouts to accommodate modern lifestyles, a finished basement can provide the extra square footage that families need without costly expansions. Learning from Successful Transformations Transforming basements into usable spaces is not just a personal endeavor; it's part of a broader trend where urban homeowners maximize their property potential. Real-life examples, such as the trendy English basements emerging in DC, show that dedicated living quarters—like home theaters, guest suites, or playrooms—can elevate family functioning while keeping aesthetics in check. These spaces promote harmony and creativity in the home, supporting various activities that reflect the evolving needs of families. Common Challenges and How to Overcome Them While undertaking a basement renovation, several key challenges must be addressed. Moisture and ventilation are common issues; ensuring proper drainage and installing high-efficiency exhaust systems are vital to maintaining a healthy environment. Moreover, obtaining the necessary permits is crucial—especially in a regulated area like Washington, DC where local compliance mandates can impact a project’s success. Conclusion: Your Basement Awaits For homeowners in Washington, DC, the opportunity to transform basements into functional artistic spaces is not just feasible; it’s a reality that many are embracing. Whether you’re looking to create a haven for creativity or simply enhance your living space, considering a basement remodel could lead to the most rewarding investment in your home. If you are inspired by what you’ve read, take the next step and consult with an expert to start your basement transformation journey today.

03.10.2026

Discover the Exciting Remodeling Trends for Spring 2026 You Can't Miss

Update Emerging Remodeling Trends for Spring 2026: A Personal Touch As we welcome Spring 2026, the way we approach home remodeling is shifting significantly. Designers and homeowners alike are searching for ways to make their living spaces more personal and functional. This year, the focus is on creating environments that reflect individuality, passions, and the joys of daily life. Layered, Collected Interiors: Moving Beyond Minimalism The minimalist trends that dominated previous years are fading as homeowners begin to crave richer, more layered interior designs. The look of perfection is being replaced with an emphasis on texture and a curated collection of meaningful items. Incorporating statement lighting, patterned textiles, and unique finishes create spaces that tell stories and express personality. This mirrors a broader theme emphasized in the lifestyle sector, where a move toward unique personal style is becoming a defining characteristic of modern design. Interior designers agree that homes should feel lived-in and reflective of the owner's tastes, straying away from the overly curated look. Spaces Designed for Passions: Making Room for Hobbies A notable design trend in 2026 is the prioritization of spaces dedicated to personal interests. Whether it’s a craft room, home gym, or music studio, homeowners are seeking to incorporate areas specifically tailored for their hobbies. These dedicated spaces do not only enhance the home’s functionality but also contribute to the well-being of the wearer by allowing them to engage in activities they love. This reflects a larger societal trend toward wellness and mental health, where having designated spaces for hobbies contributes to a balanced lifestyle. The integration of personal interests into home design can invigorate daily routines, making home life more enjoyable. Bold Statement Materials: A Dramatic Shift in Design The materials chosen for home renovations are evolving as well. Rather than opting for understated finishes, designers in 2026 are leaning toward bold stone surfaces and richly textured cabinetry that command attention. These statement materials act as focal points, adding depth and character to kitchens and living spaces. This trend towards timeless yet striking materials aligns with a growing appreciation for craftsmanship, as homeowners seek to invest in quality pieces that enhance their overall aesthetic. By spotlighting these unique materials, designers are not only creating visual interest but also honoring the art of skilled workmanship. Enhancing Natural Light: A Bright Idea Efforts to increase natural light intake in homes have become a major renovation focus. Expanding windows, adding doors, and maximizing sightlines are essential to creating brighter, more open spaces that feel welcoming. This strategy does not solely improve aesthetics but also contributes to a healthier living environment, maximizing the benefits of natural light for residents. The correlation between light-filled rooms and mood enhancement resonates with ongoing discussions about the importance of mental and physical health at home. The architectural community is prioritizing this aspect to ensure that homes not only look appealing but foster well-being. Outdoor Living: Extending Spaces Beyond Walls As the weather warms, outdoor spaces are being redesigned to seamlessly connect with interiors. Outdoor kitchens, covered patios, and inviting lounge areas are becoming essential features in home renovations, allowing homeowners to enjoy nature's beauty while enjoying the comforts found inside. Bringing outdoor elements into home design reflects a lifestyle choice that encourages relaxation and social interaction, aligning with broader wellness trends. These thoughtfully designed spaces aim to blur the lines between indoor and outdoor living, lessening the barriers often associated with seasonal activities. Conclusion: Designing a Home That Reflects You With these Spring 2026 remodeling trends, homeowners can create spaces that reflect their unique tastes, current lifestyle, and emotional needs. By moving away from rigid, impersonal design aesthetics, individuals are finding value in personal expression and a connection to their environments. As you contemplate renovation or design projects this spring, consider how these trends can enhance your home and overall lifestyle. Choose to create spaces that bring you joy, comfort, and a sense of belonging.

Terms of Service

Privacy Policy

Core Modal Title

Sorry, no results found

You Might Find These Articles Interesting

T
Please Check Your Email
We Will Be Following Up Shortly
*
*
*