

Opening Inquiry: Why Is Knowing How to Pigtail Electrical Wires Crucial for Homeowners?
Have you ever flicked a light switch and noticed the lights flicker—or worse, lost power to half your room when an outlet failed? Electrical issues often hide behind the walls, but one essential skill—knowing how to pigtail electrical wires—can help prevent these problems from spiraling into hazards. Whether you’re renovating, upgrading outlets or switches, or simply ensuring your home wiring is up to code, mastering the electrical pigtail process brings safety, reliability, and peace of mind that every homeowner needs.
"Hey good morning and hey howdy we're here today and we're going to do some pigtailing." – James Adams, Master Electrician
What You'll Learn in This Guide on How to Pigtail Electrical Wires
Definition and basics of electrical pigtail connections
Why you should make an electrical pigtail for outlets or switches
Preparation, tools, and essential safety checks
Step-by-step instructions for making an electrical pigtail
Common mistakes and code compliance tips from a master electrician
How pigtailing ensures safety, longevity, and reliability in home wiring
What Is an Electrical Pigtail? Understanding How to Pigtail Electrical Wires
"So pig tailing is when we have a device and... we're adding another set of wires and... not enough spaces to add all those wires." – James Adams, Master Electrician
An electrical pigtail is a fundamental wiring technique used when you need to connect several wires to a single outlet or switch, but the device’s terminals don't allow for multiple conductors. The process involves taking short lengths of wire—called pigtails—and using a wire nut to join them with the existing grouped wires in the electrical box. The pigtail then connects individually to the device. This method is common in both new construction and when repairing older homes, helping distribute power safely and ensuring each connection remains secure and code-compliant.
If, for example, you’re adding a device to your electrical circuit and quickly discover that there aren’t enough terminal screws on the outlet or switch, or if you notice doubled or overloaded terminals while replacing an outlet, pigtailing is the right solution. James Adams explains, "You'll see wires doubled up under screws, which is wrong. . . stuff forced into the back end that’s too large. " By creating an electrical pigtail, you bypass these common mistakes—making your wiring safer and easier for future troubleshooting.
Why and When to Make an Electrical Pigtail
Use pigtails when outlets or switches have more wires than their terminals can safely handle.
Address overloaded terminals or multiple conductors under a single screw—a violation of the National Electrical Code (NEC).
Examples include adding a new device, correcting doubled wires under screws, or ensuring circuit continuity in older wiring.
Pigtailing is not just a matter of convenience—it’s about code compliance and safety. The electrical code prohibits attaching more than one wire to a single terminal, and using wire nuts to make fresh connections with short pigtail wires ensures nothing gets crowded. This is especially important when you upgrade an outlet or switch (like installing a GFCI), or when previous DIY repairs leave tangled or doubled-up black or white wires. The result is a tidy, professional installation that enhances circuit reliability throughout your home.
How Does Making an Electrical Pigtail Work?
Short pigtail wires are twisted together with existing black, white, or ground conductors using a new wire nut, then attached as single wires to device screws.
Pigtails allow circuits to remain continuous—if the outlet or switch fails, power still flows on to other outlets or switches downstream.
Pigtail connections prevent voltage drop and loose connections that can cause flickering lights or dangerous overheating.
When you make an electrical pigtail, you effectively give each device its own dedicated connection to the shared black (hot), white (neutral), or green/bare (ground) wires. This avoids the risk of loose connections that can occur if too many wires are backstabbed or doubled under one screw. With exposed copper strands properly twisted and secured under a quality wire nut, you get a fail-safe junction that’s easy to check, retighten, or replace as needed. Properly made pigtails ensure that when you push the grouped wires back into the electrical box and later need to install a new outlet or switch, everything stays organized and safe.
Benefits of Pigtailing Outlets or Switches
"If you have an older house a lot of times pig tailing will get rid of loose connections and voltage drop." – James Adams, Master Electrician
Eliminates flickering or intermittent power caused by loose connections in outlets or switches
Meets NEC and local electrical code requirements by separating conductors and ensuring safe, single-wire connections
Prevents a single failed outlet from cutting off power to devices downstream in the circuit
Proper pigtailing means fewer flickering lights and surprise outages. As Adams describes, “When you use the plug to hold the wires, if the plug fails then everything that's going out of this box will drop. . . [but with] pigtails with wire nuts, even if this plug fails the worst that's going to happen is this plug will go dead but everything that goes out of here will stay on. ” This alone makes it invaluable for both older homes and new installations—ensuring not just code compliance but peace of mind for every homeowner.
Preparation and Essential Safety: How to Pigtail Electrical Wires Safely
"I advise you... once you take off your plug... take a meter and let's make sure we have no power." – James Adams, Master Electrician
Turn off power to the circuit at the breaker panel; always verify with a voltage tester.
Use a multimeter or non-contact voltage tester to check for live wires before touching anything.
Gather all necessary tools: wire strippers, pliers, wire nuts, voltage tester, and correctly sized wires for your pigtails.
Cut your pigtail wires to the recommended length (typically 6” or longer) and ensure they match the existing wiring’s gauge and insulation.
Trim, strip back the ends, and align all wires evenly for a neat, safe connection.
Safety cannot be overstated when working with electrical wiring. “Once you take off your plug and you’re going to do this, take a meter and let’s make sure we have no power. . . I’m not going to kill myself today at least not on video,” says Adams. Double-checking ensures you’re not at risk of electric shock, especially in boxes where previous repairs or junctions may have left live wires connected. Always make fresh connections whenever possible, never reuse old wire nuts, and ensure grouped wires are twisted securely before capping.
Complying with Code and Ensuring Strong Connections
Electrical code requires at least 6” of wire extending from the front edge of the electrical box for safe hookup.
Never reuse old or damaged wire nuts; always use a fresh, appropriately sized nut rated for the gauge and number of wires in your pigtail.
Ensure all wire bundles are tightly twisted and the copper is fully covered by the wire nut for a secure, reliable connection that will not loosen over time.
A code-compliant electrical pigtail depends on neatness and secure connectors. "By code, we're supposed to have at least six inches outside the front of the box. . . you want as much as you can get comfortably," Adams stresses. Equally important is the quality of every connection: “Don’t reuse old wire nuts—you’re going to cause future problems. " When in doubt, replace questionable materials and strive for bundles that are tight but not overstressed, with no exposed copper visible beyond the wire nut.
Common Tools and Materials for Making an Electrical Pigtail
Tool/Material |
Purpose/Use |
|---|---|
Wire strippers |
Removing insulation from wires |
Pliers |
Twisting wires together |
Wire nuts |
Securing the pigtail junction |
Voltage tester |
Confirming power is off |
Appropriate gauge wire |
Compliant with circuit amperage |
Gathering the right tools—like quality wire strippers for stripping back the ends, sturdy pliers to twist the wires, and appropriately rated wire nuts—ensures your connections are strong. Make every electrical pigtail as solid and safe as possible, with tools ready and tested for reliability.
Step-by-Step Instructions: How to Pigtail Electrical Wires
"So this is pig tailing we've taken three three wires and then we added the tail the pigtail there you go so the ground is now pigtailed okay." – James Adams, Master Electrician
Prepare the work area: Turn off power and verify with a tester no longer showing voltage.
Trim and strip back the ends of existing wires for a fresh, even starting point.
Twist together all ground (bare copper or green) wires, then add a ground pigtail lead and secure with a new wire nut.
Repeat for neutral (white) wires and hot (black) wires, aligning insulation and exposed copper for a tidy bundle. Use a separate pigtail for each type.
Trim pigtails to the proper length (at least 6”), ensuring they’ll fit neatly onto device screws without excess slack or tension.
Carefully loop each pigtail lead clockwise around the device terminal screws (outlet or switch), so tightening the screw draws the wire in securely.
Finish by neatly folding or pushing the grouped wires back into the electrical box, securing devices, and checking for neatness and tightness throughout.
"You want to do it in tight enough so that your wires and your bundle start to twist with it to that point it's tight enough it's not going anywhere okay." – James Adams, Master Electrician
Every step of making an electrical pigtail is about dependable connections. Start by killing power and checking with your voltage tester—never skip this safety step. As Adams notes, “We’re going to cut these off. . . make my own connections, don’t be lazy. . . You need to learn how to strip wire. " Align your black and white wires, trim the ends for fresh contact, then twist the grouped wires with pliers until they’re firmly bound. Cap each with a new wire nut and tug gently to check for tightness. After looping the pigtails onto device screws, tuck the bundled wires back into the electrical box for a professional finish.
Detailed Tips and Troubleshooting from a Master Electrician
Avoid backstabbing wires into devices—particularly #12 gauge wire, which is not code-compliant and can loosen over time.
Check that wire bundles are neat, even, and free of stray copper to reduce risk of shorts or unreliable power.
Always tighten any unused terminal screws on outlets or switches to keep them from accidentally contacting loose wires inside the box.
Attentive, neat workmanship is crucial. Adams emphasizes correcting mistakes rather than settling for poor connections: “So instead of just mashing a wire nut on it and hoping it stays connected. . . we’re going to do it again. ” Always double-check your twists, keep the connections tight, and when you’re ready to install a new outlet or switch, make sure everything is lined up and back the ends into the box carefully. Good habits now will prevent hours of troubleshooting later.
Applications and Variations: Where to Make an Electrical Pigtail
Switch boxes: For adding switches, switch legs, or new lights, pigtailing the neutrals or hots keeps wiring neat and code-compliant.
Outlets: Use pigtails to correct doubled conductors under screws, to install GFCI outlets, or for daisy chaining multiple outlets together safely.
Panels and junction boxes: Ensures circuit continuity and allows future devices to be added without disturbing existing wiring.
"The pig tailing saves a lot of future problems and it makes sure even on new construction it makes sure that your power is continuous all the way through okay." – James Adams, Master Electrician
Properly installed pigtails make adding or moving devices easy, allowing you to make fresh connections whenever an upgrade is needed—without risking code violations or the trouble of losing power in rooms downstream if a single device fails. This versatility is essential for both DIYers and professionals aiming to make an electrical pigtail that stands the test of time.
People Also Ask: Expert Answers on How to Pigtail Electrical Wires
How long should pigtail wires be?
Electrical code typically requires a minimum of 6 inches extending from the box, but pigtails should be long enough to attach easily to terminals without excessive slack.
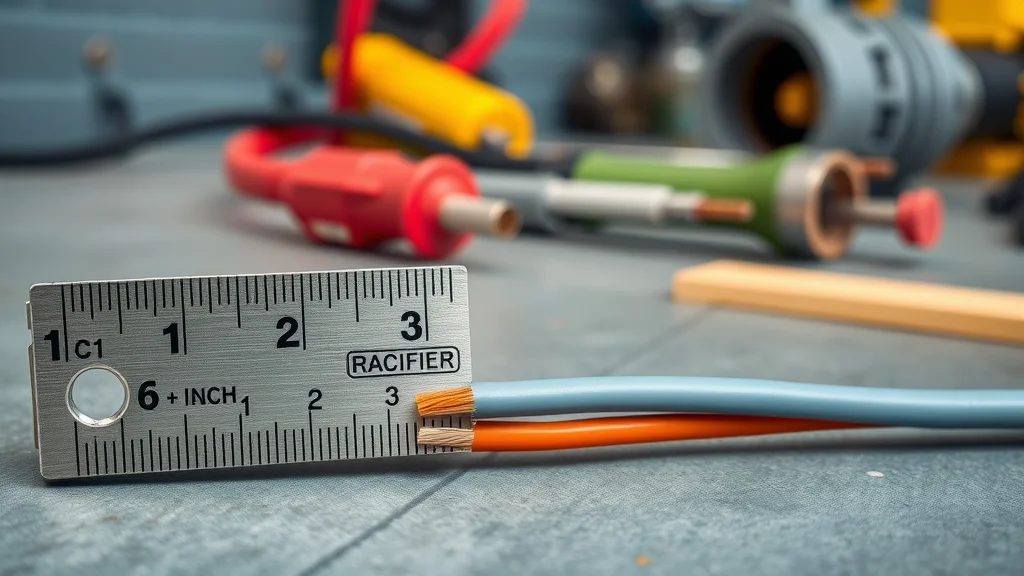
For best practice, each pigtail wire should be at least 6 inches long—enough to install comfortably but not so long as to create a tangle inside the box. This length ensures compliance with the NEC and leaves enough wire for future work if an outlet or switch needs replacing.
Do you have to pigtail outlets by code?
NEC requires that wires are not doubled (more than one conductor) under a single terminal screw. Pigtailing outlets ensures code compliance by creating separate, safe connections.
Pigtailing is no longer just a best practice—it’s a code issue. Modern outlets and switches only allow one wire per terminal, so making an electrical pigtail is not only safer, but required to prevent code violations and potential insurance issues in the event of a fire or electrical failure.
Can I pigtail a neutral wire?
Yes, neutral wires can be pigtailed, especially when multiple circuits or devices share a junction. Always use a wire nut rated for the number and gauge of wires.
Pigtailing neutral (white) wires is recommended when connecting multiple outlets, switches, or fixtures. Just ensure the wire nut is sized correctly to handle the grouped wires back and securely covers all exposed copper.
How to make a pigtail for an electrical outlet?
Cut a short piece of wire (matching gauge), strip ends, twist with existing wires, and secure with a wire nut. Attach the pigtail lead to the outlet terminal.
The steps are easy: cut and strip a length of same-gauge wire, twist it together with existing black, white, or ground wires, cap with a fresh wire nut, loop the lead around its terminal, and you’re ready to install your outlet or switch.
Frequently Asked Questions on How to Pigtail Electrical Wires
Is aluminum wiring safe for pigtailing?
How do I choose wire nut size for pigtails?
What are signs of a bad pigtail connection?
Can you mix wire gauges in a pigtail?
How do you secure multiple grounds in a metal box?
If you’re dealing with aluminum wiring, you’ll need special connectors and anti-oxidant paste—consult a licensed electrician. Always match your wire nut to the gauge and number of wires in the bundle (the packaging will specify), and check for signs of bad pigtails such as loose outlets, flickering lights, or heat at the wire nut. Mixing wire gauges in a pigtail can be risky; stick to same-gauge where possible, or use a nut specifically rated for mixed sizes. For multiple grounds in a metal box, always bond the ground pigtail securely to the box before attaching the outlet or switch for maximum safety.
Summary: Key Takeaways on How to Pigtail Electrical Wires
Always turn off power and verify safety before starting any wiring work.
Pigtailing prevents code violations, loose connections, and downstream power loss.
Use proper tools, correct wire gauge, and approved wire nuts on every electrical pigtail.
Neat workmanship and tight connections ensure dependable, long-lasting electrical wiring.
Next Steps: Safely Upgrade Your Home Wiring—Contact a Licensed Electrician for How to Pigtail Electrical Wires
If you’re uncertain about making an electrical pigtail or your project involves aluminum, old, or complex wiring, don’t take chances—reach out to a licensed electrician. Solomon advice: Make safe home wiring your priority.


Write A Comment