Add Row
Add Element
UPDATE
Add Element

Your guide to modern living—every day.

  • Home
  • Categories
    • Wellness
    • Home and Garden
    • Work and Life
    • Travel
    • People and Style
    • Living Spaces
November 22.2025
1 Minute Read

Discover the Best Dog Walking Trails in ABC Council Area

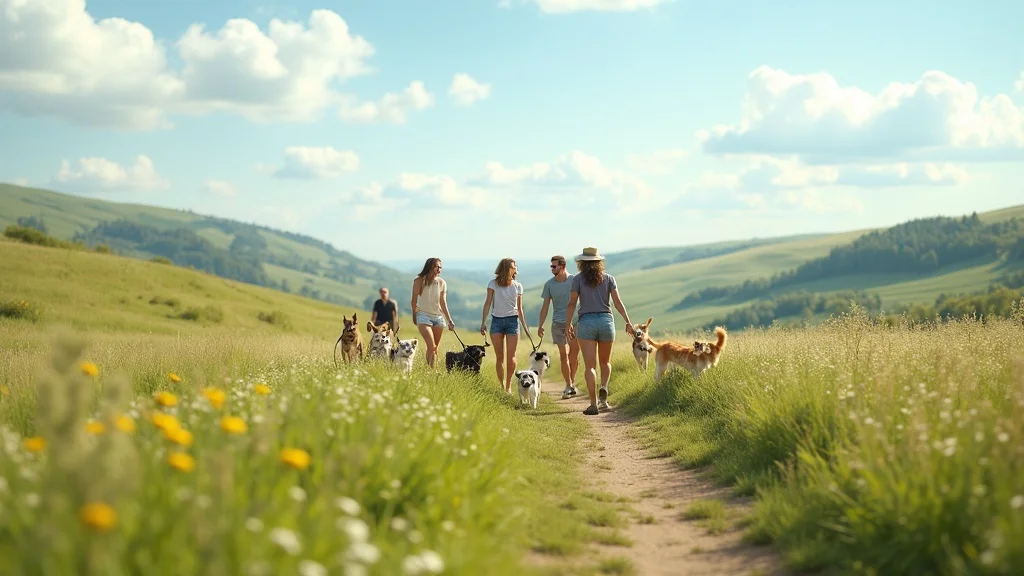
Did you know dog owners in the ABC council area clock up nearly three times more walking hours than the UK average, thanks to a remarkable network of local trails? If you’re searching for your next adventure with your furry friend, you’re in the right place. Dog walking trails in ABC council area aren’t just footpaths—they’re vibrant green corridors, brimming with outdoor spaces, historic charm, and community spirit. In this opinion-driven guide, you’ll get a behind-the-scenes look at the region’s best routes, discover hidden gems, and pick up handy tips to make every walk uplifting for both you and your dog.

Unveiling the Top Dog Walking Trails in ABC Council Area: Surprising Trends and the Joy of Green Spaces

Dog walking isn’t just a routine in the ABC council area—it’s a cherished lifestyle that blends wellness with community and a love for the outdoors. Whether you reside in Armagh City, are a regular at (or new to) forest park strolls, or are seeking new green spaces in Banbridge and Craigavon, the region delivers in abundance. Over recent years, there’s also been a rise in specialized routes with features like pump tracks and mountain bike trails, making it easy to combine family fun, exercise, and pet-friendly activities into a single day out.

What stands out most about the dog walking trails in ABC council area is their diversity. From shaded woodland tracks to sparkling lakesides and open meadows, these paths do more than keep your dog’s tail wagging—they offer a revitalising escape for their humans too. Locals regularly share stories of finding new favorite spots in unexpected places, whether a peaceful loop around Gosford Forest Park or a brisk shoreline stroll at Craigavon Lakes. Facilities like car parking, accessible paths for buggies, on-site play areas, and information boards ensure everyone, regardless of age or ability, can get outdoors and enjoy these wonderful settings year-round.

dog walking trails in ABC council area, joyful owner and dog on woodland path, photorealistic, lush green forest, natural motion and high detail

What You'll Learn About Dog Walking Trails in ABC Council Area

  • The most scenic and engaging dog walking trails in ABC council area

  • Opinions on accessibility, facilities, and dog-friendliness

  • Highlights of unique features like pump tracks and mountain bike trails

  • Insights into green spaces in Banbridge and Craigavon

  • Personal experiences concerning Armagh City and Palace Demesne

"A well-chosen trail not only excites your dog but also revitalises your own connection with nature in the heart of ABC council area's great outdoors."

Why Dog Walking Trails in ABC Council Area Stand Out for Pet Owners

Dog walking trails in ABC council area are truly exceptional, not just for their variety but for their thoughtful integration with the local landscape and community. You’ll find any walk here may lead you from the peaceful hush of old-growth forest parks to the vivid colors of wildflower meadows. The council has done an impressive job enhancing open spaces and improving access, whether it’s adding water stations at trailheads or providing clear signage for different routes—including dedicated mountain bike trails and even family-friendly play parks.

The tapestry of green spaces stretches from the tranquil lakeside promenades of Craigavon Borough to bustling urban parks and far-flung countryside escapes. These routes invite people—and their dogs—of all mobility levels to get outdoors. With regular events, supervised areas for off-lead play, and popular features like pump tracks for sporty families, choosing the best trail really depends on your mood for the day. Locals often mention how many people end up chatting with fellow dog walkers, swapping stories and discovering new sections of the borough together.

  • Unique green spaces throughout the area

  • Diversity from forest parks to lakeside routes

  • Integration with local community facilities and amenities

banbridge and craigavon dog walking lakeside trail, owner walking retriever, tranquil lake, photorealistic, cool blues and greens

Comparison of Popular Dog Walking Trails in ABC Council Area

Trail Name

Length (km)

Difficulty

Facilities

Dog Policy

Gosford Forest Park

5–10

Easy to Moderate

Car park, water points, picnic areas, play park, pump track

Leashed, Off-lead zones

Craigavon Lakes Trail

3–8

Easy

Accessible paths, benches, lakeside play area, parking

Leashed, Water access for dogs

Palace Demesne, Armagh City

2–6

Easy

Historical gardens, car park, buggy access

Leashed

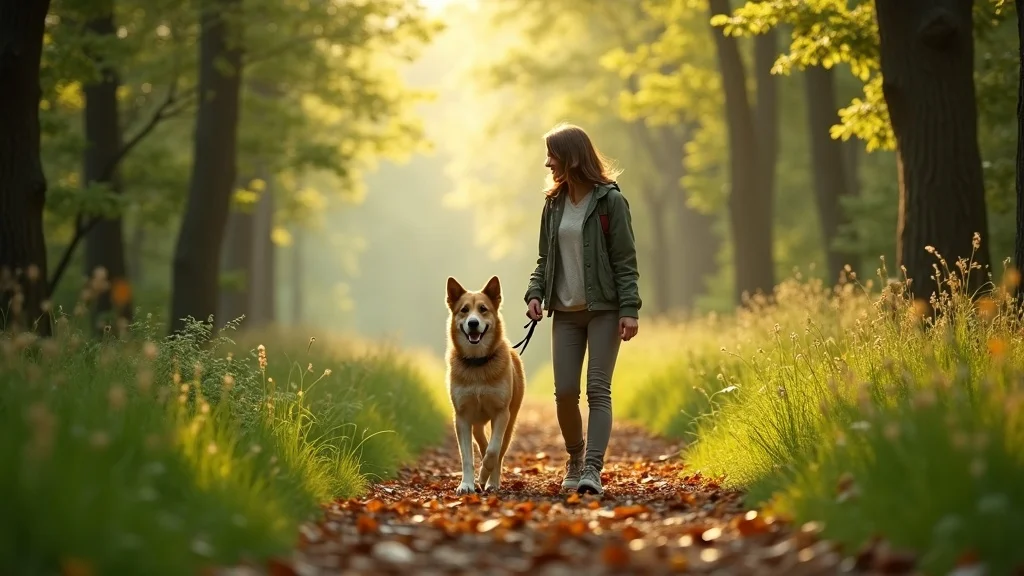
Gosford Forest Park: A Crown Jewel Among Dog Walking Trails in ABC Council Area

When it comes to legendary green spaces, Gosford Forest Park stands tall as the ultimate destination for dog owners in the borough council region. This is the kind of forest park where memories are made—lush trees, winding paths, and varied routes for every mood or ability level. The park covers hundreds of acres, offering trails from short beginner loops to more challenging long hikes, all with clearly marked signage and well-maintained surfaces. Whether you’re planning a casual amble with the kids or want a brisk pace, it’s all here.

Beyond sheer beauty, Gosford’s popularity is boosted by smart amenities: generous car parking, well-placed bins, accessible play parks for younger explorers, and modern pump tracks that adjoin several main trails. It’s also a haven for wildlife, so keep an eye out for resident deer or playful squirrels as your dog sniffs along. The park is family-friendly—paved routes for buggies and wheelchairs, shelters for wet weather, and often a friendly member of staff on hand to advise. Annual car passes are available for frequent visitors and are worth the value for avid explorers.

Exploring Gosford Forest and Its Dog-Friendly Features

I have spent many Sundays at Gosford Forest Park with my spaniel, and no two visits are the same. One week, we might circle the longer lake trail—me absorbing forest scents, him nose-to-the-ground in canine bliss. The next, we could loop the shorter Wild Deer Walk and wind up at the play area for a family picnic. The park’s courteous vibe stands out—there’s a relaxed etiquette among walkers that balances enjoyment for all, whether your dog is on lead or making friends in a supervised off-lead field.

For sports enthusiasts, Gosford Forest Park’s proximity to a dedicated mountain bike trail and the multi-use pump track is a bonus. You’ll meet everyone from experienced riders to families with dogs in tow, sometimes sharing stories of local wildlife or exchanging tips on favorite forest corners. In autumn, the leaf-carpeted paths are breathtaking; in spring, bluebells carpet the glades. Don’t miss out on special events, occasional outdoor markets, or themed walks advertised through the Gosford Forest Park’s website and borough council social media.

gosford forest park, family with dogs on forest path, photorealistic, deep greens and golden sunlight, highly detailed trees

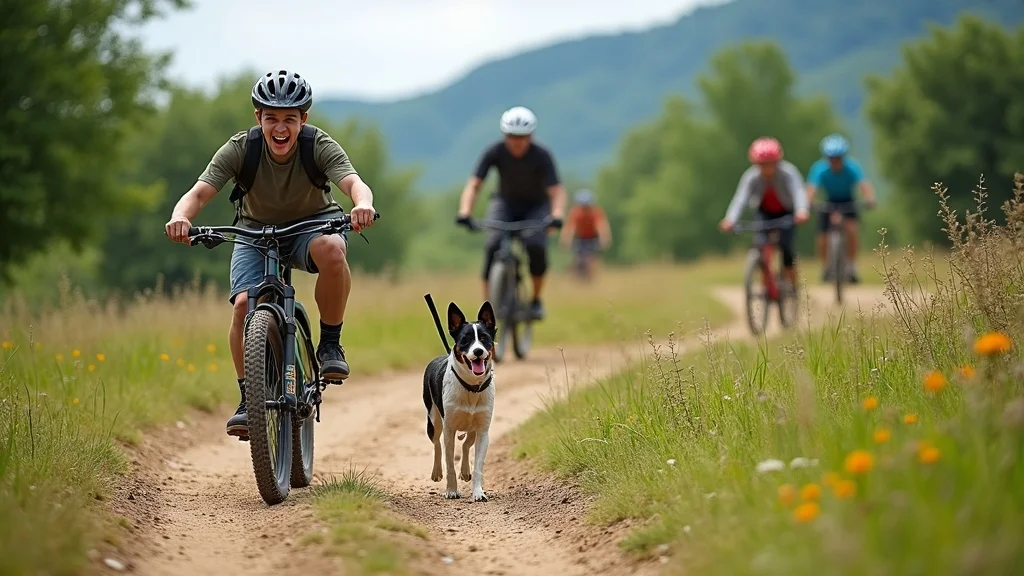
Mountain Bike and Pump Track Adventures for Active Dog Owners

If your ideal location combines thrilling activity with canine companionship, Gosford Forest’s mountain bike trail and new pump track deliver. The pump track, with its rolling hills and flowing corners, is a magnet for young families and adrenaline seekers. Watching riders zip past as your dog keeps pace on the perimeter path makes for a dynamic outing—add in the laughter of children and distant shouts from the play park, and you’ll feel the energy of community and the great outdoors in full swing.

These amenities have cemented Gosford’s reputation as more than a walk—it’s a day out. With picnic spots, accessible toilets, and new surfaces for safe riding and walking, you can easily mix and match activities. There’s ample car parking (including annual car pass options), and the facilities are well signed. For those interested in variety, combining a walk with time at the bike and pump tracks keeps every visit fresh and keeps both you and your dog energized in every season.

energetic trail activity, mountain bike pump track, happy owner with dog, countryside park, bold natural colours

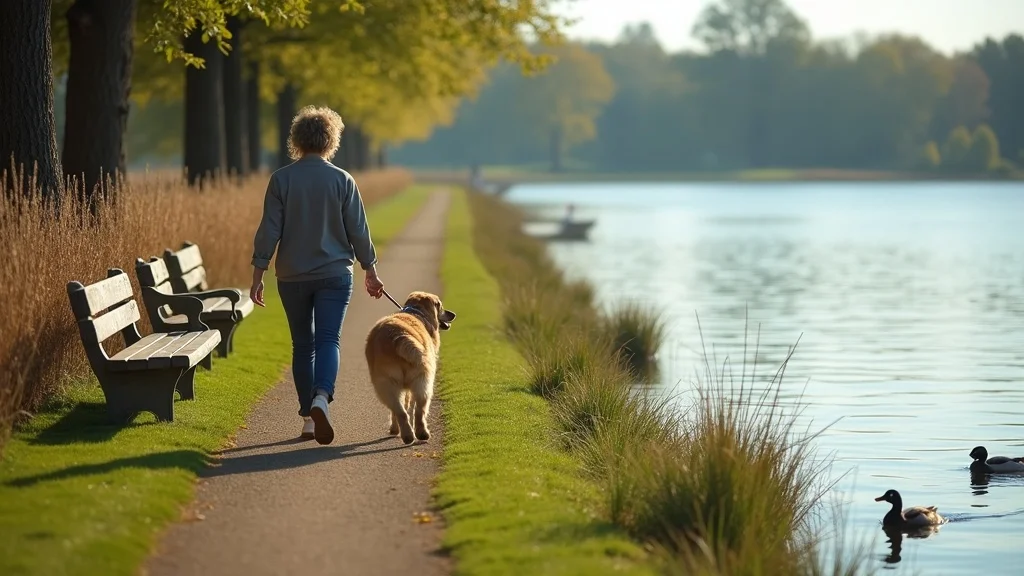
Lakeside Serenity: Dog Walking at Craigavon Lakes in Craigavon

The Craigavon Lakes area, sitting scenically in Craigavon, is the borough’s go-to for peaceful lake circuits and community atmosphere. This site provides wide, flat paths perfect for all ages, whether walking, jogging, or cycling. It’s especially popular on weekends, where many people come together to enjoy the fresh air. The lakeside is dog-friendly—most sections are leashed, though there are snippets where off-lead fun is possible. With parking at several points around the water and accessible benches, it’s a breeze to visit even with younger kids or elderly relatives.

Facilities include a well-kept play area beside the lakes, refreshment kiosks, and clean toilets. Many local events, from parkruns to charity walks, use this open space as a central hub, making it an ideal spot to combine exercise for you and your dog with meeting up with family and friends. Locals point out the stunning sunrise reflections—perfect for early risers with boisterous pups, while gentle evening strolls allow time to unwind alongside the subtle ripple of water and the calm hush of the lakes.

Walking Distance, Accessibility, and Local Insights

The loop around the main Craigavon Lake is just over 4km, making it a manageable and rewarding distance for most dogs (and humans!), with flat, well-paved sections suitable for buggies and wheelchairs. Side paths let you extend your walk up to 8km if you’re feeling adventurous. For those bringing your dog, there are multiple water access points—puddle-loving pups can splash responsibly beneath watchful eyes, while clean-up bins and mapped out dog zones help keep the walk enjoyable for everyone.

The proximity of car parking ensures an easy arrival even during busy periods. Don’t be surprised if you bump into regulars—friendly members of the community who’ll gladly share their personal favorite routes or recommend the day’s best picnic spot. Whether you’re out to socialize or seeking solitude on your walk, Craigavon Lakes in Banbridge and Craigavon truly shines as a versatile, inclusive destination for dog walkers across Northern Ireland.

Nature and Heritage Combined: Palace Demesne Trails and Forest Parks in Armagh City

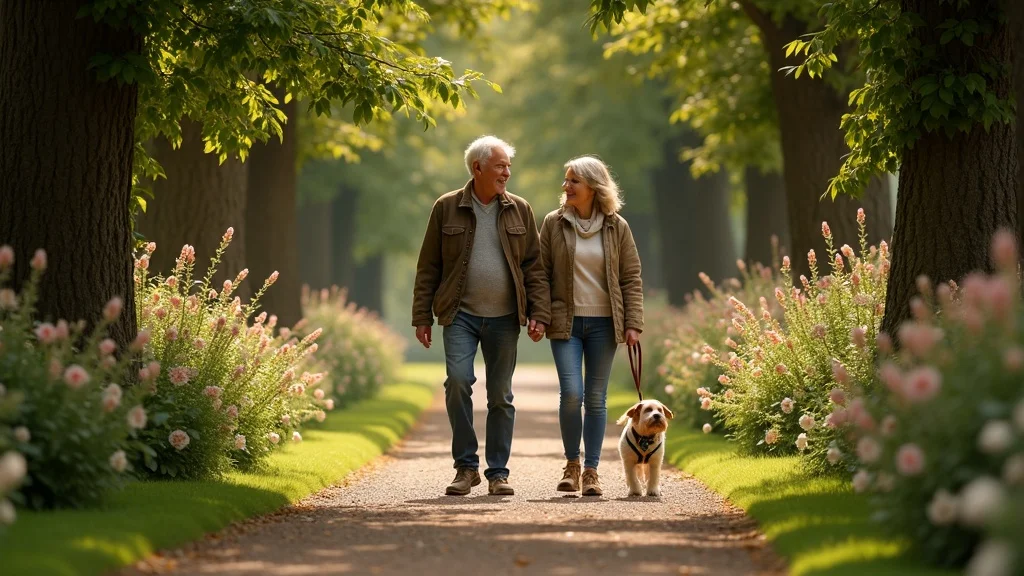
Head over to Armagh City for a dramatically different (and equally rewarding) walking experience: the blend of natural beauty and centuries-old heritage at Palace Demesne. Here, wandering through sweeping lawns and tree-lined avenues, you and your dog are truly at the intersection of history and fresh air. Palace Demesne is perfect for those who love gardens, stately architecture, and a gentle meander across diverse terrain, with plenty of spots to rest and soak up the views of historic buildings and ornate floral displays.

While the true draw here is the atmosphere—tranquil yet layered with stories of Northern Irish heritage—the facilities don’t disappoint. Trails are accessible, the car park is conveniently placed, and there’s ample information for visitors. If you’re local, you’ll have heard the tales: family picnics under oak canopies, dogs gambolling on the grass, and couples meandering as bells chime from the city beyond. For new visitors, Palace Demesne quickly becomes a favorite for leisurely afternoon walks or as a reflective start to your Sunday.

Experience the Great Outdoors in Armagh City

One of the joys of Armagh City’s green spaces is the sheer peace you find—even when just moments from the bustling high street. I recall my first walk with my rescue terrier here; we wandered between ancient trees, circled ornamental pathways, and ended up sharing a snack on a sun-warmed bench, both feeling immensely better for it. Palace Demesne’s thoughtfully maintained paths mean anyone can experience the best of the outdoors, and signage keeps you aware of dog-friendly zones and any historical features along your way.

The area’s proximity to the heart of Armagh means it’s well-served by local cafés, so you can easily make a morning of it. Don’t forget to check out special events or seasonal displays in the gardens—they’re as popular with dog owners as they are with history buffs. The synergy of rich history, outstanding scenery, and practical details makes every visit here feel unique and keeps you looking forward to that next stroll, rain or shine.

armagh city palace demesne, mature couple with dog, heritage trail, photorealistic, warm and green hues

Get Outdoors: The Benefits of Dog Walking Trails in ABC Council Area

Regular use of dog walking trails in ABC council area delivers huge benefits to both owners and pets. Physically, they motivate you and your dog to stay in shape—long, varied walks mean stronger muscles, joints, and cardiovascular health. Mentally, time spent in green spaces and open air helps to reduce stress, combat anxiety, and keep moods lifted, whether you’re on a solo stroll for reflection or out adventuring with family and friends.

Beyond the health perks, these trails foster a real sense of community. Meeting other dog lovers on the path, swapping dog care tips, and sometimes even joining impromptu walking groups can transform a routine walk into a social highlight. Many people mention how dogs naturally break the ice, turning new acquaintances into future friends in the heart of the great outdoors. Getting outdoors and making the most of these trails is one of the simplest joys you can share with your dog—and your wider community.

  • Physical and mental health perks for both pets and owners

  • Social aspects and meeting other dog lovers

Listicle: Top 5 Essential Tips for Enjoying Dog Walking Trails in ABC Council Area

  1. Pack fresh water and dog waste bags – Trails vary in amenities, so prepare ahead to keep your route clean and your pup hydrated.

  2. Observe leash and permitted area rules – Respect off-lead and leashed zones, which help all walkers and dogs stay safe and happy.

  3. Explore bike trails for variety – Many sites offer combined walking and cycling options, adding excitement and new scenery.

  4. Join local walking groups – Meeting up with other dog lovers can add fun, new learning, and a little friendly motivation to your walks.

  5. Respect wildlife and natural habitats – ABC’s outdoor spaces are rich in flora and fauna, so keep an eye out for animals and stay to marked paths whenever possible.

Immerse yourself in a high-energy, beautifully shot video montage that takes you and your dog through the ABC council’s forests, lakes, heritage estates, and offbeat open spaces. Wide-angle drone shots, close-ups of happy dogs, and scenes capturing all seasons and weather showcase just how inviting, diverse, and uplifting these dog-friendly trails are.

People Also Ask About Dog Walking Trails in ABC Council Area

Where to walk the dog today in ABC Council Area?

Answer:

Today, you have a wealth of options for dog walking in the ABC council area. Top recommendations include Gosford Forest Park for wooded adventures, Craigavon Lakes for tranquil lakeside strolls, Palace Demesne in Armagh City for a blend of history and nature, or the offbeat green haven at Site B. For a quick outing, check local urban parks or ask fellow owners; there’s always a walk waiting, even on rainy days.

How far is it to walk around Craigavon Lakes?

Answer:

The main loop around Craigavon Lakes is just over 4km. It’s a flat, accessible route suitable for all abilities—including families with buggies and wheelchair users. If you and your dog want to go further, you can branch onto adjoining paths, stretching your walk to nearly 8km depending on your chosen segments. The whole area is well-marked and ideal for a variety of walk lengths.

Where can you walk your dog in the ABC Council Area?

Answer:

The ABC council area offers a fantastic range of dog-friendly walking spaces: Gosford Forest Park, Craigavon Lakes, Palace Demesne, Site B, and numerous local parks, woodlands, and riverside paths. Whether you prefer peaceful countryside, lively community parks, or discovering hidden spots, there’s a perfect walk for every dog and owner.

Where to bring a dog for a walk in ABC Council Area?

Answer:

From adventurous hikes at Gosford and peaceful moments at Palace Demesne to lakeside rambles at Craigavon Lakes and secret trails at Site B, ABC council area provides countless inviting footpaths. Explore your chosen site’s facilities, check for off-lead areas, and don’t hesitate to ask locals for their personal favorites—you’ll soon build an inspiring walking routine.

Frequently Asked Questions on Dog Walking Trails in ABC Council Area

  • Are dogs allowed off-leash in forest parks?
    Most forest parks require dogs to be on a lead, but several provide dedicated off-lead or exercise zones. Always check signage to confirm rules for your chosen site.

  • What amenities exist at most ABC council dog walking sites?
    Common amenities include car parks, water points, bin stations, trailside benches, information boards, and in larger parks, play and picnic areas.

  • Are the trails accessible for buggies and wheelchairs?
    Yes, most major sites, especially Craigavon Lakes, Gosford Forest Park, and Palace Demesne, feature paved or well-maintained paths suited for buggies and wheelchair users.

Key Takeaways: Making the Most of Dog Walking Trails in ABC Council Area

  • Explore a variety of trails across ABC council area, from Gosford Forest Park to hidden green spaces

  • Each route offers distinct amenities for pets and owners

  • Embrace the great outdoors for wellbeing and connection

invigorating open countryside trail, group of dog owners, dogs at play, open spaces, photorealistic, wildflowers and rolling hills

Ready to Embark on an Adventure? Plan Your Next Walk on the Best Dog Walking Trails in ABC Council Area

There’s no better time to explore the uniquely rewarding dog walking trails in ABC council area. Gather your gear, rope in a friend or two, and discover why locals cherish this special network of walks—one adventure at a time.

Living Spaces

Write A Comment

*
*
Related Posts All Posts
12.15.2025

Don't Make This Costly Mistake in Home painting tips!

“Nearly 60% of DIY paint jobs require expensive touch-ups or complete re-dos due to avoidable mistakes.” If you think picking up a brush and a can of paint means guaranteed success, think again! Many homeowners unknowingly sabotage their own efforts and end up with streaky, peeling walls or costly repaints. In this eye-opening guide, we'll break down exactly what most people get wrong and how you can sidestep these pitfalls with expert-approved home painting tips. Stick around—you might just save yourself days of frustration and hundreds of dollars! A Shocking Truth About Home Painting Tips: What Most Homeowners Miss Most homeowners dive into painting projects believing a fresh coat will instantly transform a room. However, many overlook the crucial foundation beneath that shiny new color: proper prep, product choice, and technique. Even a high-quality paint can’t hide rough patches, poor adhesion, or streaks caused by ignoring simple, professional home painting tips. The truth is, those paint streaks you see or the peeling sections that appear months later are rarely the fault of the paint itself—they’re usually the result of overlooked steps and misunderstood instructions. From using the wrong roller cover on textured walls, skipping bonding primer, or neglecting a wet edge when rolling, the list of common mistakes is long—and expensive to fix. Whether you’re selecting a new paint color or prepping for a finish coat, understanding the right home painting tips means you can avoid costly re-dos and achieve beautiful results that truly last. Let’s uncover the practical tips and inside secrets that even experienced DIYers sometimes miss! “Nearly 60% of DIY paint jobs require expensive touch-ups or complete re-dos due to avoidable mistakes.” What You’ll Learn From These Home Painting Tips How to avoid the most common painting mistakes Techniques for achieving a professional finish with home painting tips Which tools and products to use for quality paint results Step-by-step guidance for proper application and preparation Expert advice on using a wet edge and understanding based paint options The Ultimate List: 10 Home Painting Tips to Prevent Expensive Mistakes 1. Never Neglect Surface Preparation in Home Painting Tips Why thorough cleaning and repair are vital in home painting tips Based paint adherence and the risks of skipping prep Surface preparation is the #1 secret behind every successful paint job. Experienced pros recognize that prep can actually take longer than painting itself. Before you dip a brush or roller in quality paint, be sure to meticulously clean, patch, and sand all surfaces. Use a mild soap or cleaner and a sponge or cotton ball to remove dust, oils, and old marks. This step is critical for both based paint and latex paint to adhere properly and avoid peeling. Skipping this stage leads to patchy, uneven coats and can cause paint from hard-to-reach spots to flake off within months. If you’re painting over wood trim or stained walls, use a bonding primer to maximize paint adhesion and eliminate the risk of peeling. Remember to remove or cover switches, fixtures, and lay down drop cloths to protect floors. Sand rough areas and fill holes using lightweight spackle; stubborn stains may require targeted cleaning or sealing. Well-prepped surfaces hold primer and finish coats better, giving your project a flawless, professional look that outlasts shortcuts. Investing extra time up front will dramatically reduce extra paint costs and frustration later! 2. Always Use Quality Paint for Long-Lasting Results How quality paint pays off over time Comparing price vs. performance in home painting tips While budget paints can look tempting, investing in a quality paint ensures long-lasting color, better texture, and fewer touch-ups. Higher quality paints generally provide better coverage and a more durable, higher sheen finish coat. They’re formulated with superior binders and pigments, meaning fewer coats per paint job and easier touch-ups in the future. The price tag may be higher, but the difference in performance outpaces the cost—especially on demanding surfaces like wood trim or high-traffic areas. When evaluating paint brands, look beyond marketing. Check online reviews on sites like Imageworks Painting, ask for sample brushes, and compare how paint color and finish resist scuffs, fading, or peeling. Quality paints spread evenly with less effort, adhere better after prep and priming, and ultimately save both time and money in future painting projects. Whether you choose latex or oil-based, don’t skimp; your finish coat will thank you for years. "Quality paint may cost more up front, but can save homeowners hundreds on frequent repaints." — Professional Painter 3. Keep A Wet Edge to Avoid Streaks and Marks Understanding the wet edge technique in home painting tips Common errors when maintaining a wet edge If you’ve ever seen visible lines or “lap marks” on a painted wall, chances are a wet edge was not maintained. The wet edge technique means that each stroke or roller pass overlaps the previous one before it dries. This allows the paint to blend seamlessly for a streak-free finish. Failing to follow this essential tip often results in the dreaded uneven sheen, especially when using a roller cover for walls and ceilings. To maintain a wet edge, work in manageable sections and never pause in the middle of a wall. When painting with a nap roller, avoid letting one area dry while you’re still working on an adjacent section. Re-load your brush or roller regularly and blend your strokes. This tip is crucial for both oil- and water-based paints, as each has unique drying times. Consistent attention to your wet edge delivers a finish coat worthy of a professional—and saves you from aggravating re-dos. 4. Choose the Right Based Paint for Each Room Differences between oil- and water-based paints When to use each type in home painting tips Not all rooms or surfaces are created equal, and neither are paints. Choosing between oil-based and water-based paint depends on the room’s function and the surface to be covered. For kitchens and bathrooms, where moisture and humidity are common, oil-based paints (also known as alkyd) deliver a higher sheen and superior durability. They're ideal for wood trim and surfaces exposed to regular wear. But for walls and ceilings, modern latex paint or acrylic-based paint is often the best option—offering easy cleanup, low odor, and quick drying. Always check labels for best use cases and drying times. For instance, water-based paints are better for living rooms and bedrooms, while oil-based is great for cabinetry. Don’t forget: using the wrong based paint can result in poor adhesion, bubbling, or chipping over time. Seek guidance from local paint pros or reliable resources like Imageworks Painting before making your selection, especially for high-traffic or specialty areas. 5. Invest in Quality Brushes and Rollers for Best Home Painting Tips How poor tools sabotage quality paint application Caring for your painting tools for longevity Your tools are just as important as your paint. A high-quality brush or nap roller cover will help you distribute the paint smoothly and evenly, minimizing streaks and roller marks. Cheaper tools tend to shed bristles or create an uneven finish coat, leading to a less professional paint job. Invest in an assortment of premium brushes (angled for edges, flat for large spaces) and roller covers suited for your wall texture—a longer nap roller holds more paint for rough surfaces, while a short nap is best for smooth walls. After use, wash brushes and rollers promptly with water for latex paint or the recommended solvent for oil-based paints. Storing them in airtight containers or wrapped in plastic between coats can prolong their life. Good maintenance not only saves you money on replacement tools but also ensures flawless results in every painting project. Remember, your choice of tools can make or break the beauty and longevity of your home’s painted surfaces! 6. Don’t Skip Priming: A Core Home Painting Tips Principle Why primer is essential for based paint and quality paint adhesion When and where to prime Priming is a crucial step often skipped by rushed DIYers. But primers play a major role in creating a strong bond between the surface and your topcoat, especially on patched walls, bare drywall, or wood trim. Using a bonding primer ensures paint adhesion and evens out surface porosity for a true paint color after the finish coat is applied. For hard-to-cover stains or color changes (especially with chalk paint), a primer will prevent bleed-through and discoloration. You should always prime after heavy patching, when painting over dark or glossy surfaces, or when switching between paint types (such as oil to latex). Don’t forget that skipping primer can cause your paint job to peel, streak, or require additional paint—ballooning your project’s time and budget. For a durable, professional look, priming is a step you can’t afford to miss! 7. Proper Tape Application: Clean Lines in Every Home Painting Project How to use painter’s tape for a perfect wet edge Tips for preventing paint bleeding There’s nothing more satisfying than a crisp, straight line between a wall and ceiling or along baseboards. This is where painter’s tape shines. Ensure you apply painter’s tape with firm pressure to prevent bleeding; a cotton ball run along the edge can help seal it further. Always remove the tape while the paint is still slightly wet to maintain clean lines and avoid lifting dried paint from hard surfaces. Choose blue or green painter’s tape rated for the length of your project; never use ordinary masking tape, which can tear or leave residue. Taping off wood trim, light switches, and windows is a pro strategy that distinguishes flawless paint jobs from amateur attempts. This attention to detail is what turns a basic DIY project into a showcase-worthy painting project that stands up to scrutiny. 8. Don’t Overload Your Brush or Roller Correct techniques for even distribution of quality paint Avoiding drips and roller marks in home painting tips Loading up your roller or brush with too much paint can lead to disastrous drips, sags, and roller marks. Instead, dip your tool about a third of the way into the paint; tap off excess against the tray or bucket. For roller covers, always roll off extra paint on the tray’s ridges to ensure even distribution. Overloading wastes quality paints and creates an uneven finish coat that’s prone to peeling and chipping. When using a nap roller, start in a “W” or “M” pattern to distribute the paint, then fill in the gaps using light, even strokes. If you see stubborn streaks or globs, stop and redistribute the paint with your brush or roller before continuing. This home painting tip is simple, but it makes a world of difference in achieving that smooth, professional wall or ceiling appearance. 9. Mind Your Drying Times When Following Home Painting Tips Why patience saves time and money Understanding manufacturer recommendations for based paint and finish types One of the most overlooked home painting tips is honoring proper drying times between coats. Impatience can ruin an otherwise flawless job: layers that are applied too quickly won't adhere, leading to bubbling, streaks, and possible paint removal during tape pulling. Always consult the paint manufacturer’s instructions for drying and curing times—these differ between water-based and oil-based paints, humidity levels, and finish coat types (including higher sheen or chalk paint). Allow ample ventilation using fans and open windows. This not only speeds up drying but also ensures a safer workspace and reduces lingering paint fumes. For the very best results, don’t rush to apply that next coat—even the highest quality paint or paint spray system can’t compensate for ignored drying times. Your patience now will reward you with a stronger, more beautiful finish for years to come. 10. Ventilation and Safety: Overlooked Home Painting Tips The impact of proper airflow on drying and indoor air quality Using PPE and handling based paint safely Never start a painting project without planning for ventilation and safety, especially when working with based paint that may release stronger fumes. Open windows and set up fans to promote airflow—this will not only speed drying but also protect your indoor air quality. Using personal protective equipment (PPE) like masks, gloves, and eyewear is crucial, especially when sanding, using a paint sprayer, or working in tight spaces. Strong solvents and fumes from oil-based or alkyd paints require extra caution and diligent use of PPE. Always store paint and supplies away from children and pets, and dispose of unused paint, cotton balls, and drop cloths responsibly. Safer working habits mean you can enjoy your beautiful, freshly painted room without health worries! Table: Comparison of Based Paint Types for Home Painting Tips Type Description Best Use Drying Time Durability Oil-Based Traditional alkyd resin; offers higher sheen and hard finish Trim, cabinets, kitchens, bathrooms, high-traffic areas 6–8 hours to touch; 24 hours to recoat Very high; withstands scrubbing and moisture Water-Based (Latex) Acrylic resins; low odor, quick drying, easy cleanup Walls, ceilings, general interior rooms 1–2 hours to touch; 4 hours to recoat Good; resists yellowing and mild scuffs Chalk Paint Ultra-matte, highly adhesive; easy to distress for vintage look Furniture, feature walls, crafts, upcycled projects 30–60 minutes to touch; requires sealing topcoat Moderate; needs wax/sealer for best wear People Also Ask: Common Questions About Home Painting Tips What is the 80/20 rule in painting? The 80/20 rule in painting means that 80% of your results stem from 20% of your efforts—primarily surface preparation. This classic principle highlights the importance of activities like taping, patching, and sanding. When you invest most of your time in prepping walls with a cotton ball, drop cloth, and bonding primer, you’ll find the actual painting goes smoothly, and the final result looks professional. Skimping on prep can double or triple your painting workload down the road! What is the correct way to paint a house? Start by thoroughly cleaning all surfaces and repairing any damage. Apply a suitable primer, choosing water-based for general walls or oil-based for trim or high-humidity areas. Use painter’s tape for crisp edges and protect floors with drop cloths. Paint from top to bottom—ceilings, then walls, then trim—with a quality nap roller or brush, always maintaining a wet edge. Allow sufficient drying times between coats, and ventilate well throughout the project. Finish by removing tape promptly and performing final touch-ups. How do I get a perfect line between my wall and ceiling? Achieving a flawless line between wall and ceiling requires patience and the right tools. First, use painter’s tape rated for delicate surfaces and press it down firmly with a cotton ball. Apply your ceiling color first and let it dry thoroughly. Then, tape off the ceiling just above the wall to be painted, overlap slightly, and paint the wall color. Remove the tape before the paint sets to avoid peeling, and use an angled brush for precision in tight corners or along wood trim. Can I just paint over existing paint? You can often paint over existing paint if the surface is in good condition—smooth, clean, and free of flaking or peeling. For glossy or oil-based surfaces, lightly sanding and priming with a bonding primer ensures better paint adhesion. When switching between paint types (like oil to latex), proper prep, cleaning with a cotton ball, and priming prevents compatibility problems and ensures your finish coat doesn’t peel or chip prematurely. Watch this step-by-step walkthrough covering every phase of a home painting project—surface prep, priming, taping, brushing, rolling, drying, and more. See how to avoid the most common mistakes and apply these expert home painting tips for a flawless finish! Expert Quotes on Home Painting Tips "Investing in surface prep and quality paint will always reward homeowners in beauty and longevity." — Painting Contractor Frequently Asked Questions on Home Painting Tips How many coats of based paint should I apply? What's the best type of quality paint for bathrooms? Can you mix different brands when using home painting tips? How many coats of based paint should I apply? Generally, two coats of paint are standard for most projects—this ensures true color and full coverage, especially after priming. For drastic color changes or challenging surfaces, an extra coat may be needed. What's the best type of quality paint for bathrooms? Choose a water-resistant, high-sheen latex or acrylic-based paint labeled for kitchens and baths. These formulas resist mold and are easier to clean, standing up well to humidity and frequent cleaning. Can you mix different brands when using home painting tips? While you should avoid mixing brands within the same coat, you can use different brands for primer, base, and top coats—just ensure they are compatible (oil with oil, water with water). When in doubt, stick to one manufacturer’s system for best results. Key Takeaways: Avoiding Expensive Home Painting Tips Mistakes Preparation and quality paint are the foundations of successful home painting tips Always select the right based paint for the surface Maintain a wet edge and follow manufacturer directions for best results See real-world home painting tips applied by pros and DIYers alike, with commentary on what to do—and what to avoid—for a picture-perfect paint job! Ready for a Flawless Paint Job? Visit us @ www.ocalapaintingpros.com/ for Expert Home Painting Tips Don’t let another paint project turn into a costly mistake. Trust the pros for guidance, products, and tips that truly make a difference. Visit our site, ask your questions, and let’s help you paint with confidence! Conclusion Apply these essential home painting tips for results you'll be proud to show off. Preparation, quality methods, and the right products are your best tools for avoiding expensive mistakes and ensuring beautiful, lasting walls.

12.15.2025

Why Professional Painters Transform Your Space Instantly

Shocking Fact: Did you know that the average professional painter can complete a flawless paint job in one day, while the typical homeowner may take up to a week—often with imperfect results? The impact of professional painters goes far beyond speed. If you’re seeking a breathtaking transformation and lasting beauty in your home, the evidence is overwhelmingly in favor of hiring the experts. This guide unveils the reasons behind these instant makeovers and gives you the insider’s path to a stunning, 2026-ready living space. The Immediate Impact of Professional Painters: Surprising Facts & Stats 80% of homeowners say their paint job by professional painters instantly refreshed their home's look—which can boost perceived value by 5-10% overnight. Painting contractors finish projects 60% faster than DIYers, with a far lower rate of costly mistakes or do-overs. Pro painters use specialized tools and techniques, resulting in a flawless coat of paint and superior durability that DIY attempts rarely achieve. Choosing a painting contractor often means less disruption, minimal paint fumes, and guaranteed satisfaction for both interior paint and exterior paint projects. What You'll Learn from Professional Painters Why hiring a painting contractor or professional painters delivers more than just a fresh coat of paint. The true cost to paint—from single rooms to entire homes, including commercial painting and stucco house projects. How to select top-rated painting services and avoid costly mistakes. The difference professional advice makes, including paint color trends for 2026 and choosing the right type of paint. Painting Contractor Vs. DIY: Why Professional Painters Are the Smart Choice Pro painters possess advanced skills, refined over thousands of painting projects, minimizing streaks, drips, and unevenness that are common in DIY jobs. Typical DIY mistakes include improper prep work, using the wrong type of paint, and neglecting surface repairs—leading to peeling, bubbling, and the need for an expensive redo. Painting contractors use precision taping, priming, and even application. Their methods ensure every inch of your walls, ceilings, and trim receive thorough, beautiful coverage. With a painting company’s guarantee, you’re covered in case of unforeseen paint issues, and you benefit from warranties rarely seen in DIY efforts. “A single professional painter can do in a day what might take homeowners a week—minus the mess and stress.” Painting Contractors’ Process: What Sets Pro Painters Apart Step-by-step precision: Pro painters inspect, patch, sand, and prime every surface before a single drop of paint is applied, ensuring longevity and flawless results on every painting project. Efficiency & tools: From dustless sanders to high-volume sprayers and premium roller covers, painting contractors use equipment that most homeowners simply don’t have. This means your space is refreshed quickly and cleanly. Star painting standards: Every detail is managed, from color consistency to crisp lines and clean transitions, ensuring your home is not just painted—but perfectly finished for show-stopping impact. Cost to Paint: How Much Do Professional Painters Charge? Project Type Average Cost Details Small Room (10x12 ft) $350 – $700 Includes two coats, standard prep Large Room (15x20 ft) $700 – $1,200 Extra prep, premium paint optional Interior (2,000 sq ft house) $2,500 – $7,500 Multiple colors, trim, ceilings Exterior House Painting $3,500 – $12,000 Depends on material (wood, stucco house), height, prep Commercial Painting $1.50 – $4.50/sq ft Varies by commercial paint type, size, and surface Factors affecting price include surface prep needs, number of coats, accessibility (e.g., high ceilings), and paint quality. Commercial and residential painting jobs can have varying costs—commercial painting often demands higher-grade products and more intensive preparation. Commercial paint and exterior paint choices influence final costs. A stucco house or historic home may require specialty products and skilled application, increasing the investment but protecting your property for years. Painting Services Offered by Professional Painters Interior paint: Walls, ceilings, trim, doors, cabinetry, accent features, and complete room transformations for a modern, beautiful home. Exterior paint: Siding, brick, stucco house exteriors, decks, fences, and more—guaranteeing lasting curb appeal and weather resistance. Specialty painting: Decorative finishes, mural art, faux textures, and restoration projects that demand expert attention. Commercial painting: Offices, retail, warehouses, and multi-unit properties with durable, code-compliant paints for business excellence. Stucco house and advanced finishes: Expertly applied exterior coatings for enhanced protection, modern color styles, and energy efficiency. Observe professional painters prep, paint, and reveal a stunning before-and-after—evidence of what hiring experts delivers in record time. Star Painting Results: How Pro Painters Elevate a Beautiful Home Professional painters deliver dramatic before-and-after reveals that showcase their painting contractor expertise. When you see a faded exterior or tired kitchen walls instantly refreshed, you'll truly appreciate the artistry and efficiency of pro painters. From increased curb appeal to higher listing values, a fresh coat by the right painting company pays off. Realtors report that new paint can be the deciding factor for potential buyers who fall in love at first sight. Clients regularly share stories of stress-free, mess-free painting projects—testimonials that reinforce why a star painting team is worth every penny. Choosing the Right Painting Contractor: Tips from Pro Painters Ask about licensing, insurance, and years of experience. Every reputable painting contractor will provide proof, and the best offer references and reviews to showcase past successes. Look for red flags—refusal to provide a written estimate, lack of detailed contracts, or absence of key certifications for professional painters. These are signals to continue your search. “Hiring professional painters is an investment in both tranquility and lasting beauty.” Types of Paint: Expert Recommendations by Professional Painters Commercial painting often demands high-durability, low-VOC paints that stand up to heavy use. Residential painting focuses on finishes that provide both beauty and protection—think stain-resistant enamels for kitchens and spa-like finishes for bathrooms. For a beautiful home in 2026, color trends are moving toward energized pastels (mint green, blush rose, sky blue) and modern neutrals (warm taupe, soft beige). Pro painters can recommend the type of paint that resists fading, staining, and wear for each area of your home or business. See how preparation, drop cloths, trim taping, and surface repairs ensure your painting project achieves lasting beauty and durability. Hiring a Painting Contractor: What Every Homeowner Should Know Checklist for screening: Confirm licensing, insurance, recent references, and familiarity with both residential and commercial painting projects. Get a detailed, itemized quote before agreeing to any work. Planning your project: Ask about prep timelines, expected completion dates, and paint brand recommendations. Top professional painters will manage your pro experience, from consultation to clean-up, with minimal disruption to your home. FAQ: Professional Painters & Painting Services How much does a professional painter cost per room? Most professional painters charge based on room size, surface preparation, and paint selection. A standard room is typically priced at $350-$700, with factors like wall repairs or specialty finishes increasing costs. Is it worth getting professional painters? Absolutely. Professional painters not only save you time and stress, but their craftsmanship consistently produces a lasting, high-quality result that adds curb appeal and real home value. How much does it cost to paint a 12x12 room? Expect to invest $400–$800 for a 12x12 room, depending on details like whether walls need repairs, number of coats needed, and the quality of the chosen paint. What is the average cost to paint the interior of a 2000 sq ft house? For a 2,000 square foot home, interior painting typically ranges from $2,500 to $7,500. Factors like custom colors, specialty ceilings, and the quality of paints can affect your final cost. Key Takeaways: Why Professional Painters Are the Foundation of a Beautiful Home Professional painters deliver superior results, speedy transformations, and long-lasting value to any home improvement project. Choosing the right painting contractor means enjoying a stunning, durable finish—without the risk and hassle of DIY mistakes. Special painting services, from commercial paint to stucco house transformations, are best left to expert hands who understand the critical role of using the correct type of paint every time. Ready for Transformation? Trust Local Professional Painters Today Visit our website: ocalapaintingpros.com Conclusion: For a home that truly shines in 2026 and beyond, the secret is simple—experience the difference only professional painters can bring.

11.30.2025

Unlock the Magic of bathroom renovation guide—Transform Your Space

Did you know? According to a recent survey, 72% of UK homeowners say a professionally finished bathroom adds significant value to their property – and 49% said it improves daily wellbeing. Whether you’re dreaming of a soothing new bath, envisioning a full bathroom remodel, or searching for the latest bathroom trends, this comprehensive bathroom renovation guide is your essential step-by-step resource. Read on to discover how planning, design, and the right fixtures and fittings can transform even the most tired old bathroom into a rejuvenating, value-adding space you’ll love.Unlocking the Magic of Bathroom Renovation: Why a Bathroom Reno is More Important Than You ThinkIf you’ve ever considered a bathroom reno, you’ll know it’s not just about a home improvement project. A fresh and functional bathroom has the power to change your daily routine, influence your mood, and boost your property’s value. According to recent bathroom renovation statistics, updating your space is one of the most cost-effective ways to invest in your home. Enhanced bathroom design, modern wall tile choices, and smart use of room ideas can turn a neglected space into the highlight of your house—making a new bath not only a luxury but a practical upgrade. Plus, integrating new fixtures and fittings, like a walk-in shower or high-quality vanity unit, doesn’t just add style; it builds durability and convenience into your everyday life.But why is a bathroom renovation guide so crucial? Every bathroom remodel comes with unique challenges: plumbing intricacies, clever bathroom suites selection, and balancing wants versus needs. Planning is everything. A detailed bathroom reno plan ensures you avoid costly mistakes, incorporate trending yet timeless bathroom design choices, and see each step through to a flawless finish. With the right approach, turning an old bathroom into a new bathroom is less stressful than you might imagine!What You'll Learn in This Bathroom Renovation Guide:Clear planning and design strategies for your bathroom renovationStep-by-step breakdown: from removing an old bathroom to creating a new bathExpert bathroom design insights, including fixture and fittings selectionHow to set a realistic budget for your new bathroomThe latest 2024 bathroom trends and bathroom suite inspirationMust-have bathroom remodel checklists and FAQs"According to a recent survey, 72% of UK homeowners say a professionally finished bathroom adds significant value to their property – and 49% said it improves daily wellbeing."Planning Your Bathroom Renovation: The Foundation of Every Bathroom RenoEffective planning sits at the core of every successful bathroom renovation guide. Before any tile is laid or new bath fitted, a thorough assessment and design strategy will maximise space, function, and aesthetic appeal. Homeowners often underestimate the impact of good planning—taking time here streamlines labour, avoids expensive last-minute changes, and ensures the entire bathroom reno aligns with your vision and budget. Start by scrutinising your old bathroom: what works and what doesn’t? Consider how space, plumbing, and natural light influence your options.Setting a clear goal for your new bathroom renovation is vital. Do you crave a peaceful, spa-like bathroom suite, or does your busy family need robust and easy-to-clean surfaces? Balancing bathroom design ambition with practical considerations—like storage, safety, and water use—can be the difference between a bathroom remodel you love and one that feels underwhelming or dated in a few short years. Let’s break down the key steps, using proven room ideas and 2024 bathroom trends to lay the foundation for your project.Assessing the Old Bathroom: What Works and What Doesn’tStart by making a complete inventory of your old bathroom. Identify fixtures and fittings that function well, versus those that have seen better days. Is there persistent damp behind old wall tiles? Are certain floor tiles uneven or cracking? Pinpoint current issues—like insufficient lighting, lack of storage, or unreliable shower heads. This part of the bathroom renovation guide helps you avoid repeating mistakes and spot easy wins, such as keeping a rock-solid bath but updating the glass shower enclosure or replacing the vanity unit for instant impact. Make sure you note any structural limitations—window placement, plumbing access, or low ceilings—as these will shape your bathroom design options down the line.Understanding what you love and loathe about your existing room provides clarity when weighing up bathroom suites, wall and floor options, and where your budget may be best allocated. Ultimately, this process saves time, money, and disappointment along the way, ensuring your bathroom reno delivers both function and flair. Don’t skip it—your shiny new bathroom will thank you for this groundwork.Setting Realistic Goals for Your New BathroomThe best bathroom renovation guide will always recommend setting clear, realistic objectives. Before you fall in love with the latest interior design trend or a luxury freestanding new bath, define your non-negotiables. Are you maximising a small ensuite, or building a durable family bathroom? Will you need specialised fixtures and fittings for accessibility, or prefer streamlined, minimal looks? Prioritise these needs, then list your wants: dual sinks, custom bathroom suites, underfloor heating, or statement wall tile patterns.Be honest about your timeline, too—renovating a bathroom is a significant home project and may need careful coordination with electrical work, tile installers, or even temporary disruption to your daily routine. Factoring in realistic time frames will reduce last-minute stress. Above all, allocate budget for surprises. A solid plan that blends your wishes with practical realities will make your bathroom reno smoother and far more satisfying once complete.Incorporating Bathroom Trends and Room Ideas into Your Bathroom DesignIntegrating fresh room ideas and bathroom trend forecasts into your project will help your bathroom reno stay current and appealing for years to come. Consider the big picture: Do contemporary bathroom suites inspire you, or do you lean towards classic elegance? Explore trending paint colours, popular floor tile options like terrazzo, or minimalist floating vanities. The 2024 bathroom trends spotlight sustainable materials, spa-inspired layouts, and bold yet subtle wall tile designs. Personalise your bathroom design with clever storage, bespoke lighting, or standout fixtures and fittings for a space that feels uniquely yours.Consult reputable bathroom renovation guides, interior design resources, and real-world room ideas online—Pinterest boards and Houzz galleries are full of useful inspiration. Use these insights to create a digital or physical moodboard before making final decisions on bathroom suites, fixtures, and finishes. Remember: your new bathroom should balance on-trend style with timeless utility, ensuring both immediate wow-factor and decades of enjoyment.Steps to Prepare for a Successful Bathroom Reno:Evaluate existing fixtures and fittingsIdentify 'must-haves' for your new bathroomExplore bathroom suite examples and bathroom trend forecastsSample Budget Breakdown for a Bathroom Renovation Guide:ItemEstimated Cost (£)Bathroom Suite600 - 2500Tiles (Wall/Floor)300 - 1200Plumbing Works800 - 2500Labour1000 - 2500Fixtures300 - 1500Total3000 - 10200How to Design Your Dream Bathroom: Bathroom Design Tips and Room IdeasTackling a bathroom renovation guide requires more than just replacing bathroom suites and slapping on new floor tiles. It’s about creating a harmonious blend of function and beauty—optimising your space, selecting the right fixtures and fittings, and weaving in the latest bathroom trends. This section walks you through essential bathroom design choices and creative room ideas to bring your dream bathroom to life, regardless of size or budget.Whether you’re after a high-contrast modern bathroom, a timeless classic, or a soothing sanctuary, smart layout decisions and thoughtful finishing touches make all the difference. Let’s explore how to achieve maximum impact, from space-maximising floor plans to choosing the perfect vanity unit and signature wall tile details.Planning Bathroom Layouts and Maximising SpaceThe best bathroom renovation guide always begins with smart layout planning. Assess the footprint of your room and measure everything twice. Consider traffic flow—where will the bath, shower enclosure, toilet, and vanity unit best suit your needs? For smaller bathrooms, opt for wall-hung fixtures and floating vanities to create an illusion of space and improve cleaning access. Larger spaces allow for features like double vanity units, a walk-in glass shower enclosure, or even a freestanding statement bathtub. Maximise natural light by positioning mirrors opposite windows and using light-toned wall tile to brighten the room.Don’t overlook the importance of accessibility and convenience. Make sure your electrical work and plumbing align with your design choices, and factor in essentials like towel storage, easy-reach shelving, and roomy pathways. Modern bathroom suites provide integrated solutions, such as compact shower trays, concealed cisterns, and space-saving vanity units. With meticulous planning, your new bathroom layout will feel open, functional, and effortlessly stylish—no matter the size.Choosing the Perfect Bathroom Suite for Your Bathroom RenoYour choice of bathroom suite sets the tone for the entire renovation project. Today’s market features everything from budget-friendly three-piece bathroom suites to ultra-modern modular solutions. Think about your household’s lifestyle needs: Is a shower-over-bath arrangement the best option for busy mornings, or do you cherish a spa-like sanctuary with a separate walk-in shower and soak tub? Look for suites that promise longevity—ceramic and porcelain fixtures, durable coatings, and robust frames outperform cheaper alternatives in high-use areas.Don’t forget the aesthetics. Sleek, minimal designs are leading bathroom trend charts, while ‘statement’ pieces—like bold-coloured bathtubs or sculptural basins—instantly elevate your new bathroom. Consider matching your suite’s style to your wider interior design scheme for a sense of flow between rooms. Practical, well-chosen bathroom suites provide a solid foundation for every other design decision you’ll make along the way.Selecting a Stylish Vanity Unit and FittingsThe vanity unit is a central piece in most bathroom renovation guides—a place for essential storage, daily rituals, and design expression. Modern options range from floating vanities for space efficiency to statement freestanding cabinets with designer textures or colours. When selecting, take note of how much countertop and storage space you’ll need, as well as the finish: gloss white, natural wood, or the latest matt black and brass trend.Consider integrating the vanity unit with the rest of your interior design. For example, a vanity with a vessel basin looks stunning against large-format wall tile, while a sleek under-mount sink may complement a minimal, classic scheme. The right fixtures and fittings—think elegant taps, soft-close drawers, and integrated lighting—turn a practical item into a focal point. Your bathroom reno will truly shine with a thoughtfully chosen vanity unit."A well-chosen vanity unit is often the centrepiece of an inspiring bathroom renovation guide." — Jane Smith, Interior DesignerPicking Fixtures and Fittings: Taps, Showers, and MoreHigh-quality fixtures and fittings are the unsung heroes of bathroom renovation. Taps, shower heads, towel rails, and even the toilet flush handle all play their part in both performance and style. For a cohesive look, select fixtures within a single finish style—matt black, brushed brass, or polished chrome are the top 2024 bathroom trend options. Consider water-saving taps, rain-style shower heads, and thermostatic valves for extra safety and efficiency.Don’t skimp here—cheap fixtures may look fine initially but often wear quickly and are more prone to leaks or mechanical failure. Invest in trusted brands and ensure your fittings work harmoniously with your chosen bathroom suite and overall interior design. The right fixtures take your new bath or shower enclosure from ‘standard’ to ‘superb’.Exploring Current Bathroom Trends for 2024Staying up to date with the latest bathroom trends ensures your space feels fresh and inviting for years to come. The 2024 bathroom trend highlights include sustainable materials, such as recycled glass wall tile, eco-friendly paint colours, and upcycled wooden vanities. Walk-in showers, large-format floor tiles, and spa-inspired bathroom suites have become a popular choice for modern homes.Consider splashing out on custom storage and statement pieces, like full-length mirrors or feature lighting. Personalising your bathroom renovation guide with bold tile textures, pops of earth tones, and greenery also brings a restorative, wellness-inspired feel. According to interior design experts, the best bathroom remodels carefully balance trend-appeal with lasting utility. Don’t just follow the crowd; pick the elements that resonate most with your own room ideas and lifestyle.Popular Trends in 2024 Bathroom Design:Sustainable materialsStatement wall tileWalk-in showersCustom storage solutionsSpa-like bathroom suitesQuick Reference: Top Bathroom Reno Room IdeasFeatureDesign Trend (2024)Floor TilesTerrazzo and porcelainWall TileLarge-format ceramicsVanity UnitFloating & minimalistFixtures/FittingsMatt black & brassBathtubFreestanding statementFrom Old Bathroom to New Bath: Removing Your Existing Bathroom SuiteBefore any shiny new fixtures are installed, your bathroom renovation guide begins with removing the old bathroom suite. Safety is paramount—always isolate your water supply at the main stopcock before commencing. Removing fixtures and fittings, such as the old bath or vanity unit, often reveals hidden issues—damaged pipework, unexpected water damage, or outdated electrical wiring—that may need attention as part of your bathroom reno.A methodical approach avoids costly delays or accidents. Take photos before and after each stage, especially when dealing with complex plumbing or electrical work. Removal is also a great opportunity to rethink the location of your sink, bath, or shower head to maximise your new bathroom’s potential. With thoughtful preparation, you’ll clear the way for a smooth, trouble-free fit-out—bringing your bathroom project ever closer to completion.Step-by-Step: How to Safely Remove Fixtures and FittingsStart by shutting off both hot and cold water supplies and unplugging any electrical appliances from the immediate area. Remove moveable items first—shelves, mirrors, towel rails—then tackle larger installations like the old bath or glass shower enclosure. Loosen pipe connections gently and keep a bucket handy for any residual water left in the pipes. With large fittings, enlist a second pair of hands to avoid personal injury or damage to walls and floor tiles.Be mindful of disposal regulations—ceramic toilets, for example, require specialist handling. Salvage undamaged fixtures or tiles where useful for upcycling projects or emergency spares. Taking a step-by-step, safety-first approach prevents damage and forms an efficient, reliable starting point for the next stage of your bathroom renovation guide.Dealing with Plumbing and Pipework AdjustmentsUpdating the plumbing and pipework is often the most challenging—and costly—part of renovating a bathroom. You might need to reroute waste pipes, add new supplies for separate shower heads, or simply make sure that everything from the toilet to the sink flows properly. Begin by mapping out the intended locations for each key fixture and checking existing pipe runs. Where possible, keep new installations close to current supply and waste lines for efficiency and reduced costs.Major adjustments require a qualified plumber. If you’re updating electrical work as part of your new bathroom suite, employ a registered electrician to ensure your project meets building regulations. Plumbing works are not the place to cut corners—quality here ensures your bathroom reno stays problem-free for years to come. Remember: safety first, always."Always isolate the water supply before starting any bathroom renovation project—safety first!"Preparing Walls and Floors: The Key to Longevity in Bathroom Reno ProjectsYour bathroom’s walls and floor are constantly exposed to steam, splashes, and high foot traffic. Correct preparation is fundamental to any bathroom renovation guide: it guarantees the longevity and performance of every surface, from underfloor heating to the latest wall tile designs. Start by stripping away old adhesives and fixing any underlying damp, cracks, or weakness in the substrate. Apply a suitable primer and a dedicated bathroom waterproofing membrane before laying new tiles or installing fixtures and fittings.This proactive approach guards against leaks, mould, and long-term deterioration. Take time to make sure walls and floor are properly levelled—especially if you’re planning feature wall tiles or large-format porcelain floor tiles. Smart investments here secure both style and durability for your new bathroom, making it a pleasure to use for years to come.Wall and Floor Tile Selection: Function Meets StyleChoosing the right wall and floor tile means balancing style, slip-resistance, and long-term wear. Porcelain and ceramic remain the most popular choice for bathroom design in the UK due to their resilience, versatility, and attractiveness. 2024’s bathroom trend points to large-format tiles or terrazzo-inspired patterns for walls and floors, which create a seamless, visually spacious effect. If your room ideas include bold colour or statement tile, consider an accent wall in contrast with softer floor tiles.Look for tiles with a textured finish in wet zones for safety, and confirm that your chosen adhesive and grout are recommended for bathrooms. Remember that wall and floor installations may need different thicknesses and finishing trims—speak to your tile supplier or bathroom renovation guide for tailored advice. Finally, opt for tile types that are easy to clean and won’t show water spots or soap residue easily—factors as important as looks in a busy new bathroom.Waterproofing, Levelling, and Underfloor Heating BasicsWaterproofing is critical to bathroom reno success. Use specialist products to treat not just the shower enclosure or bath area but all wall and floor junctions, as well as under any new bathroom suite fixtures. Levelling compounds create a flat, durable base for both floor tiles and underfloor heating—now a premium feature in new bathrooms seeking added luxury and comfort. Installing underfloor heating mats or pipes involves preparation and should always be completed ahead of tiling to prevent rework or uneven surfaces.It’s worth investing in best-practice tools and techniques—or a professional fitter—at this stage. Proper groundwork now will pay dividends further down the line, keeping your bathroom renovation guide on course and safeguarding against leaks, cracks, or tile movement. Double-check substrate suitability for your chosen tile and make sure waterproofing extends well up the wall, especially in walk-in showers or “wet room” layouts.Preparation Checklist:Remove all debrisInspect for hidden dampApply primer and waterproofingConfirm substrate suitability for new tiles and flooringVideo Walkthrough:Tiling and Installation: Bringing Your Bathroom Renovation Guide to LifeThis phase is where your vision comes together. From aligning statement wall tile to laying durable floor tiles and installing bathroom suite elements, careful attention to detail sets a high-quality bathroom reno apart. Always check the manufacturer’s advice on tile setting and curing times—and follow a logical order: wall tiling before floor, fixtures after full tile curing. Don’t rush, especially if you’re working with large-format tiles—a small correction now can save costly repairs later.Whether you opt for traditional or contemporary layouts, use laser levels, spacers, and clean, consistent grout lines for a professional finish. With patience and diligence, your new bathroom will soon be ready for its final transformation.Wall Tile Installation: Patterns, Trends, and Mistakes to AvoidWall tiles are the real design statement in most bathroom remodels. Large-format ceramics continue to trend—providing a low-maintenance, luxurious look and fewer grout lines to clean. Consider stacking vertically to elongate the room, or herringbone patterns for architectural interest. Use a tile levelling system to avoid unsightly lippage, and remember to plan for any feature walls or niches ahead of time, as cutting large tiles to fit afterwards may compromise the look.One common mistake in wall tile installation is skipping the all-important layout ‘dry run’. Lay tiles out on the floor to double-check final look, making sure cut tiles end up in less-noticeable areas. As with all fixtures and fittings, it’s well worth consulting your bathroom renovation guide or a professional tiler to ensure best results, especially when using trending patterns or materials.Floor Tiles: From Classic to Contemporary Bathroom DesignStrong, beautiful floor tiles ground your new bathroom—and selecting the right finish can enhance light, flow, and room scale. Terrazzo and porcelain are leading bathroom trend favourites, delivering a superior mix of style and practicality. A common pitfall is using wall tile on floors; always check your tile’s slip rating before committing. A lighter colour palette can make smaller bathrooms look larger, while bolder shades and patterns add drama to bigger spaces.Consider using electric underfloor heating to add luxurious comfort and to dry excess moisture efficiently. Carefully align your floor tiles to suit any room ideas or fixture placements—misaligned patterns can quickly stand out, especially in rooms with natural light or open floor space. Seal porous tiles after installation and maintain grout lines for best long-term performance. Modern floor tiles are available in an array of stylish, hard-wearing options—ideal for busy family bathrooms or serene spa-inspired suites alike.Installing Bathroom Suite Elements: Tubs, Showers, and Vanity UnitsOnce tiles are set and cured, the most exciting stage of your bathroom reno begins: installing the new bath, shower enclosure, toilet, and vanity unit. Accurately measure the placement for all plumbing connections and double-check levels for sinks and baths. Modern freestanding tubs and walk-in showers are a popular choice in 2024’s bathroom trends, creating a feeling of openness and hotel-style luxury.When it comes to hanging mirrors, towel rails, and the final fixtures and fittings, always use specialist fixings designed for tiled walls. If you’re unsure about any structural or plumbing aspects, consult a professional. Your new bathroom is almost complete—now it’s time to see all your careful planning, design, and room ideas brought to life.Upgrading Fixtures and Fittings for Your New BathroomUpgrade your bathroom’s functionality and energy efficiency with smart, cohesive fixtures and fittings. Swap tired shower heads for rainfall or multi-function models, and look for water-saving taps and flush valves for environmental peace of mind. Choose lighting that enhances both safety and mood—mirror-mounted LEDs, dimmable spots, or sensor-activated under-cabinet lights elevate the daily experience in your new bathroom.Factor in thoughtful finishing touches: hooks, shelves, and towel warmers complete the new bath ambience. The right fixtures don’t just update looks—they guarantee easier cleaning, longer lifespan, and even reduced utility bills. Investing in quality fixtures and fittings is one of the most cost-effective moves in any bathroom renovation guide.The Final Stages: Bathroom Remodel Checks and Finishing TouchesAs your bathroom renovation guide nears completion, the last step is a thorough inspection and styling session. Look for perfect grout lines, quality sealing around the bath and shower head, and flawless functioning of every outlet. Test lighting, electrical work, and all fixtures and fittings—catching any issues now saves headaches later. A meticulous final inspection gives you confidence that your bathroom reno has met every expectation for style, performance, and comfort.Final Bathroom Renovation Guide Inspection: What to CheckTake a methodical walk-through, checking each aspect of your new bathroom in good light. Investigate every join and surface for leaks, loose tiles, or unfinished mastic. Test every water outlet, check for smooth drainage, and ensure electrical work (like extractor fans or mirror lighting) functions smoothly. Confirm all fixtures and fittings are securely mounted—including the shower enclosure and vanity unit. Addressing small snags now avoids trouble in the future and guarantees you get optimal value and enjoyment from your bathroom remodel for years to come.Styling Your Bathroom: Room Ideas for Ambience and ComfortPersonalise your space with accessories and thoughtful décor touches that complement your chosen paint colours and fixture styles. Fresh towels, decorative storage baskets, and greenery help soften harder surfaces and bring warmth and personality to your new bath. Consider adding subtle lighting—sconces or under-cabinet strips—for spa-like ambiance. The finishing touches, from premium soap dispensers to standout mirrors, transform the functionality of your bathroom reno into a daily pleasure and boost your home’s overall interior design appeal.Final Steps Checklist for Every Bathroom Reno:Inspect sealing and grout linesTest all water outletsClean and polish new fixturesAdd decor and storage solutionsPeople Also Ask: Your Top Bathroom Renovation Guide Questions AnsweredIn what order should you renovate a bathroom?Answer: The optimal order for a bathroom renovation typically follows these phases: planning/design, removal of the old bathroom suite, plumbing/electrical preparation, wall and floor prep (including waterproofing), installation of tiles, fitting the new bathroom suite and vanity unit, then finishing with final fixes and styling.What is a reasonable budget for a bathroom remodel?Answer: A typical UK bathroom renovation guide budget ranges between £3,000 and £10,000, influenced by the specification of the bathroom suite, wall/floor tile quality, room size, fixtures, fittings, and labour costs.What is the most expensive part of renovating a bathroom?Answer: The most expensive aspect of renovating a bathroom is usually plumbing/pipework modifications, followed by a new bathroom suite and premium wall or floor tiles.What are the steps when renovating a bathroom?Answer: Core steps: remove old bathroom, adjust plumbing/electrics, prep walls and floors, install tiles, fit bathroom suite and fittings, add finishing details.Frequently Asked Questions About Your Bathroom Renovation GuideHow do I choose the right bathroom design style?Select a bathroom design that aligns with your personal taste and your home’s overall style. Consider how you use the space—for relaxing, family routines, or quick morning starts. View design galleries online, create a moodboard, and factor in practical needs (storage, accessibility) before settling on a style. Blend timeless features with current bathroom trends for best results.Which materials last longest in a busy family bathroom?Porcelain and ceramic are the most durable choices for wall tile and floor tiles. Solid-surface or quartz vanity units and brass or stainless steel fixtures provide longevity and resist wear. Always choose waterproofed materials for wet zones and confirm product warranties. Quality materials mean less maintenance and longer life for your new bathroom.How can I minimise disruption during my bathroom reno?Plan your project in advance—work out a timeline, seek alternative bathing options during the disruption, and discuss logistics with your installer. If possible, keep one bathroom operational while renovating the other. Order materials and fixtures early to avoid delays and have all decisions made before work begins.What should I check before signing off on my new bath?Inspect for leaks, poor drainage, snags in electrical work, and loose fixtures and fittings. Ensure compliance with building regulations, check that all warranties and certificates are received, and confirm your new bathroom has been cleaned and finished to your standards before making the final payment.Key Takeaways from the Bathroom Renovation GuideMeticulous planning is crucial to a successful bathroom renoChoose durable fixtures and appropriate bathroom suitesBudget wisely – factor in installation and unforeseen adjustmentsDon’t overlook latest bathroom trends for a fresh lookWork with trusted professionals for peace of mindYour Next Steps: Start Your Bathroom Renovation with Expert Help"Transform your everyday routine and add value to your home with a well-executed bathroom renovation guide."Thinking About Renovating? Call Plumbrite today on 07933830316 or email: sales@plumbrite.org.ukStart your journey today—download this bathroom renovation guide and begin transforming your space with confidence and expert support from the Plumbrite team! Plumbrite, Battlehill Road, Portadown, Craigavon.

Terms of Service

Privacy Policy

Core Modal Title

Sorry, no results found

You Might Find These Articles Interesting

T
Please Check Your Email
We Will Be Following Up Shortly
*
*
*