Add Row
Add Element
UPDATE
Add Element

Your guide to modern living—every day.

  • Home
  • Categories
    • Wellness
    • Home and Garden
    • Work and Life
    • Travel
    • People and Style
    • Living Spaces
September 11.2025
1 Minute Read

Bring the Outdoors In: Transform Your Home With a Screened-In Porch

Did you know that more than 60% of homeowners believe an outdoor living space dramatically improves their quality of life? The modern desire to connect with nature—while enjoying the comfort and safety of home—drives a growing movement: adding on a screened-in porch. With the right design and materials, your porch invites fresh air, blocks insects and weather, and unlocks outdoor dining and relaxation all year round. Ready to reimagine your living space and enjoy open-air tranquility? Explore how a screened-in porch transforms not only your home but also your everyday lifestyle.

A Surprising Trend: Why Adding on a Screened-In Porch Is in High Demand

"According to recent surveys, over 60% of homeowners say outdoor living spaces dramatically improve their quality of life."

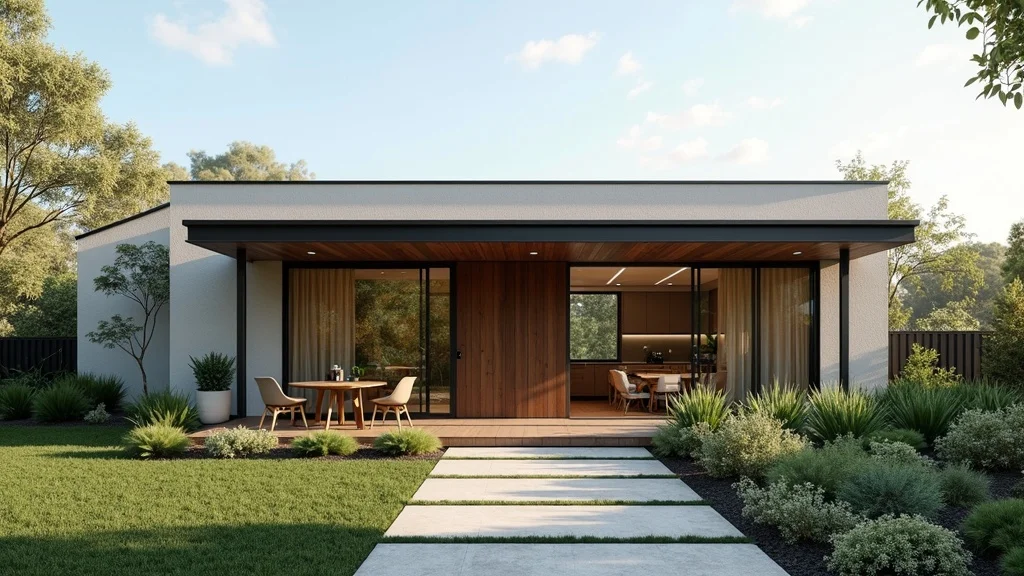
In recent years, the demand for adding on a screened-in porch has surged across the country. Homeowners are craving seamless transitions between their indoor and outdoor spaces, hoping to harness both the serenity of nature and the comforts of home. This movement is more than a trend—it's a lifestyle shift that values healthier air circulation, social gatherings, and flexible living space. The addition of a screened porch expands your usable square footage while letting you enjoy your backyard regardless of the season or inclement weather. Whether your focus is a cozy spot for outdoor dining, a bug-free retreat, or a fresh-air room for the family, the popularity of porches is rooted in the tangible enhancements they bring to daily life.

Analysts attribute this high demand to several factors: rising home improvement aspirations, people spending more time at home, and a collective appreciation for the outdoors. Screened-in porches offer unique benefits—improved property value, protected outdoor living space, and versatile functions, such as a secondary dining set or a peaceful reading nook. With the right composite decking and design elements, homeowners find that these spaces foster al fresco dining, stress-free entertaining, and countless outdoor memories, making the investment both practical and emotionally rewarding.

inviting family enjoying screened-in porch, sharing a meal together in lush green backyard setting, natural poses, soft sunlight, adding on a screened-in porch

What You'll Learn About Adding on a Screened-In Porch

  • The practical and aesthetic benefits of a screened-in porch
  • Key planning and design considerations
  • Cost breakdown per square foot & budget tips
  • Choosing composite deck and composite decking materials
  • How adding on a screened-in porch can enhance outdoor dining experiences
  • Expert advice, tips, and real-life inspiration

Understanding the Basics: What Is a Screened-In Porch?

Defining the Purpose of Adding on a Screened-In Porch

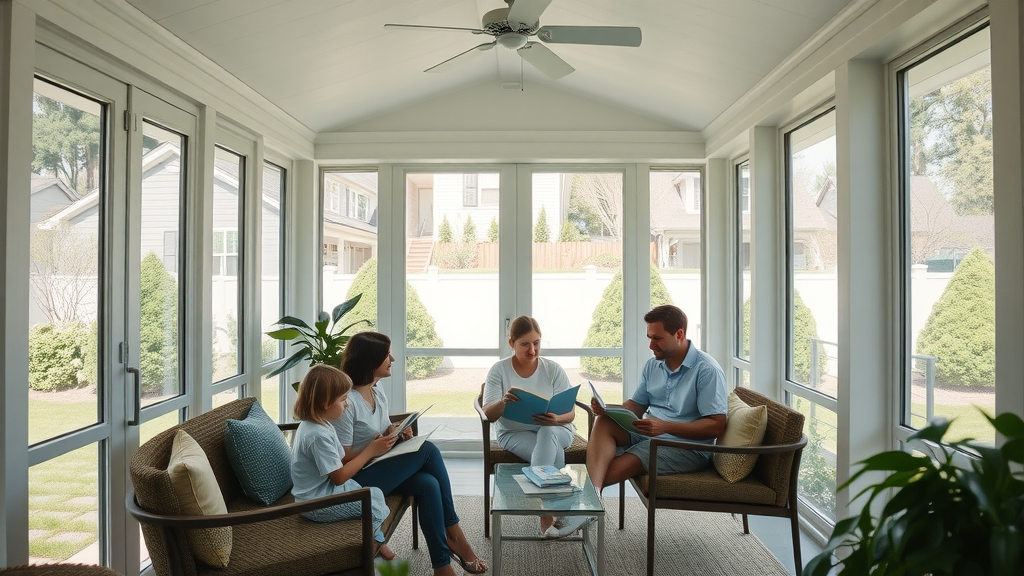
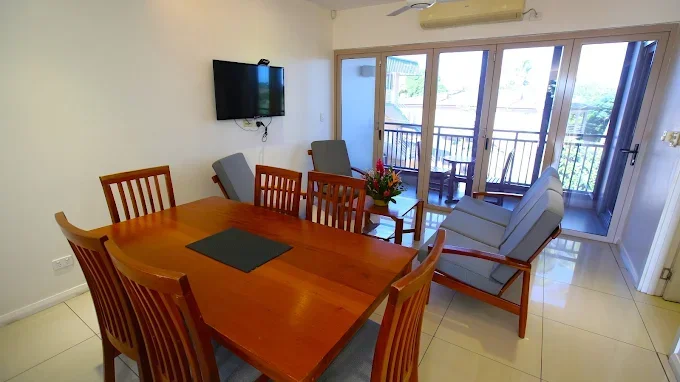
At its core, adding on a screened-in porch means attaching a sheltered, screened space to your home that bridges the gap between the indoors and outdoors. Unlike open decks or patios, screened porches use mesh walls to keep out insects and debris while letting in breezes and sunlight. The screened enclosure allows you to experience the sights and sounds of your backyard without worrying about bugs, rain, or harsh sun—a pure, fresh air refuge for everyone. Many homeowners use this extra living space as a secondary family room, children’s play area, or a peaceful retreat for work and relaxation. The porch design can be as simple as rustic wood and potted plants, or as luxurious as a fully furnished room with composite deck flooring, a ceiling fan, lighting, and a cozy dining table for outdoor dining experiences all year round.

The mission behind a screened-in porch addition is clear: bring more of the outdoors in—whenever you want it. A screen door welcomes you to this hybrid space, offering a seamless transition between your backyard and your home. By adopting the right design, you can ensure your porch serves the dual function of a social hub and a quiet nature escape, increasing the practical square foot utility of your residence.

bright spacious screened-in porch with clean architectural lines and family relaxing, natural daylight, adding on a screened-in porch

Screened-In Porch vs. Three-Season Room vs. Sunroom

It’s easy to confuse a screened-in porch with a three-season room or sunroom, but there are notable differences to consider—especially when adding on a screened-in porch to your home. A traditional screened porch features mesh panels and often an open or partially enclosed ceiling, allowing abundant fresh air flow. It’s ideal for spring, summer, and fall, offering direct exposure to outdoor breezes and the soothing sounds of nature. Three-season rooms raise the comfort level further, using more insulated materials and sometimes glass windows. While still designed to maximize interaction with the outdoors, these rooms can fend off chilly air better and extend usability deeper into autumn or early spring.

Sunrooms, unlike screened porches, are fully enclosed with glass and often climate-controlled, allowing year-round use regardless of outside temperatures. These rooms function as indoor extensions of your home, prioritizing weather-proof comfort over open-air exposure. When planning your project, clarify your goals—do you want constant fresh air and outdoor dining, or a sheltered spot with less direct exposure to the elements? Each option influences cost per square foot, materials (like composite deck or composite decking), and your overall enjoyment of the space.

The Top Benefits of Adding on a Screened-In Porch

  • Protection from bugs and weather; improved outdoor dining
  • Blending indoor comfort with outdoor enjoyment
  • Enhanced property value

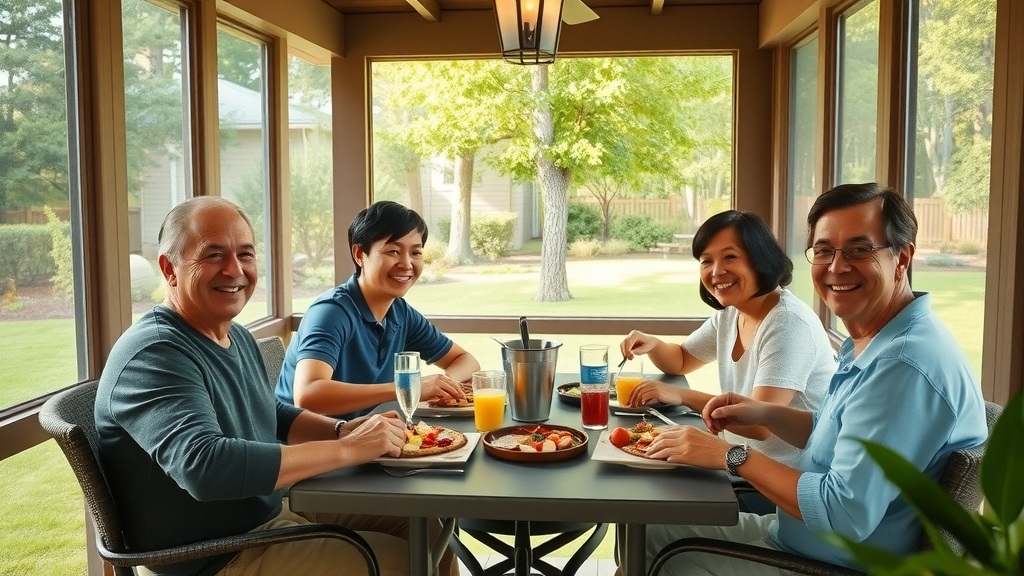
One of the main draws of adding on a screened-in porch is the freedom to enjoy outdoor living without the typical interruptions—no more swatting flies or worrying about afternoon showers sabotaging your plans. By keeping insects and weather at bay, a screened porch serves as a reliable setting for relaxing or hosting an outdoor dining event. The mesh barriers ensure every meal or family gathering is comfortable and free of uninvited pests. With the right furnishings, like a dining set or ceiling fan, you create a customizable sanctuary for any time of day.

Additionally, screened-in porches deliver the feel of the outdoors with the perks of indoor luxury. Homeowners love how these spaces blur boundaries—they add soft finishes, string lights, and potted plants to cultivate an atmosphere perfect for both casual brunches and energizing evening hangs. These elements offer a genuine boost in living space and daily enjoyment. Better yet, homes with porches like these typically see a measurable increase in market value, as buyers are eager for ready-made outdoor living and dining options that feel seamless, private, and protected.

cozy screened-in porch with family enjoying mosquito-free evening, elegant furniture, dusk, adding on a screened-in porch

Planning Your Project: Key Points for Adding on a Screened-In Porch

Determining the Right Location and Layout for a Screened-In Porch

Before you dive into adding on a screened-in porch, think carefully about where the porch will sit and how it connects with the rest of your home. Consider sightlines—do you want a garden view, pool access, or privacy from neighbors? Popular choices for placement include off the kitchen to extend dining options or adjacent to a living room for easy social flows. Plan the entrance with a convenient screen door and think about natural pathways between indoors and outdoors for a seamless transition. Don’t forget wind direction and sun exposure: A north- or east-facing porch may be cooler, while southern and western exposures yield more sunlight.

When laying out your space, map out your needs: Will this be exclusively a family hangout, a dedicated outdoor dining area, or a flexible retreat for guests? Prioritize what matters most, like space for a dining table, comfy seating, or a nook for potted plants. The right porch design unlocks the perfect mix of privacy, accessibility, and beauty—ensuring your addition feels like a natural extension and not an afterthought.

architectural blueprint overlay of couple planning screened-in porch addition, natural daylight, adding on a screened-in porch

Considering the Size and Square Foot Needs

The ideal size of your porch depends on your goals and budget, but most projects fall between 150 to 400 square feet. Think practically: Is there enough room for your full dining set, cozy lounge chairs, or children’s play area? Ensure everyone has elbow room for comfortable movement and furniture placement. The number of guests you anticipate will influence the square foot requirement. A modest 12’x14’ space may suit intimate gatherings or quiet evenings, while larger families and frequent entertainers may prefer bigger layouts with room for a large dining table and additional living space. Plan ahead for both everyday use and special occasions.

Remember, the bigger the screened porch, the higher both material and labor costs. Features such as composite decking, ceiling fans, and lighting add to the price per square foot but can vastly upgrade the final experience. Visualize your daily flow: is there a straight path from kitchen to porch for breezy outdoor dining, or do you prefer multiple access points? Smart size planning ensures you balance budget, comfort, and curb appeal for your home improvement project.

Navigating Local Permits and Building Codes for Adding on a Screened-In Porch

No matter how well you plan, ignoring local regulations can sabotage your porch project. Most municipalities require building permits for adding on a screened-in porch—especially if you’re altering an existing porch or adding to the structure of your home. Regulations cover setbacks from property lines, maximum allowable square foot coverage, railing and step requirements, and sometimes even the type of screening or decking materials you can use (such as composite deck boards or pressure-treated wood). Before you start, contact your city or county building department to clarify necessary permits and inspections. A reputable contractor should also be well-versed in navigating these legal hurdles.

Getting permits ensures your investment is legal, safe, and reflective of current building standards—protecting your family and adding measurable property value. If you skip permitting and later sell the home, you could face headaches, fines, or even forced removal. Always prioritize code compliance for a smooth, stress-free addition that stands the test of time.

Material Matters: Choosing Composite Deck and Composite Decking for Your Screened-In Porch

  • Pros and cons of composite deck vs. wood
  • Cost, durability, and square foot estimates
  • Best composite decking brands for screened-in porches

Choosing the right flooring is crucial in your screened porch design. The top contenders are traditional wood planks and modern composite decking. Composite deck boards—made from recycled plastics and wood fibers—have shot to popularity for their weather-resistance, color palette variety, and nearly maintenance-free comfort. These boards won’t rot, splinter, or require yearly staining, which is a major advantage in high-traffic outdoor living areas. Wood, by contrast, offers natural beauty and is often less expensive up-front, but comes with a greater need for sealing and repair, especially in humid climates or under constant exposure.

Expect to pay a little more per square foot for high-quality composite decking—usually between $10 and $16 (materials only), versus $3 to $7 for pressure-treated wood. However, the long-term savings in maintenance and product lifespan often make composites a smart investment for families who want a beautiful, durable screened porch without the hassle of yearly upkeep. Top composite deck brands like Trex and TimberTech offer warranty-backed products with a wide range of finishes, letting you match your deck flooring to your home’s style and commit to eco-friendly practices.

Comparison of Common Decking Materials (Composite, Pressure-Treated Wood, etc.)
Material Average Cost/Sq Ft Maintenance Durability Color Options
Composite Decking $10–$16 Low 25+ years Wide variety
Pressure-Treated Wood $3–$7 High 10–15 years Limited
Cedar/Redwood $7–$12 Medium 15–20 years Natural wood tones

close-up comparing composite decking and wood boards, hands feeling texture, natural light, adding on a screened-in porch

Step-by-Step Guide: How to Add On a Screened-In Porch

  1. Assessing your current space
  2. Designing for optimal outdoor dining and relaxation
  3. Selecting enclosure systems and screens
  4. Choosing flooring: composite decking or traditional materials
  5. Hiring professionals vs. DIY

Assess your current space and location: Take stock of available outdoor space and note where a porch would offer the best views, privacy, and indoor and outdoor flow. Is your existing porch a good candidate for an upgrade, or is a full addition needed?

Design for optimal outdoor dining and relaxation: Sketch or use digital tools to imagine a layout with zones for a dining set, lounge area, and possible entertainment spots. Make sure pathways to kitchen and garden are unobstructed for seamless outdoor living and dining transitions.

Select enclosure systems and screens: Choose screen materials (nylon, aluminum, or specialty pet-resistant mesh) that balance visibility, durability, and protection from insects and weather. Factor in a sturdy screen door for easy access.

Flooring matters: Decide between the charm of rustic wood or the longevity and color palette of composite decking. Each has aesthetic and practical trade-offs, so weigh maintenance, comfort, and lifespan.

Build it yourself or hire a pro? DIY can save on labor costs, but professional contractors ensure code compliance, polished finishes, and safe, code-approved construction—key for protecting your investment in this valuable living space.

Cost Breakdown: Understanding the Price of Adding on a Screened-In Porch

Factors Affecting Cost Per Square Foot

Porch prices vary widely based on location, size, material choice, and design complexity. On average, adding on a screened-in porch ranges from $30 to $120 per square foot, with total costs typically falling between $10,000 and $40,000. Major influences on the final price include flooring selection (composite deck vs. wood), roof configuration, enclosure style, and features like lighting, fans, or heated elements. Your region also affects labor rates and permit fees. A simple DIY screen upgrade to an existing porch may run just $5,000 to $10,000, while building a large, custom room with composite decking, ceiling fan, string lights, and high-end finishes might push past $50,000. Always budget at least 10–15% for unexpected expenses during construction.

Average Cost Table for Adding on a Screened-In Porch (by Square Foot)
Size (Sq Ft) Low-End Cost High-End Cost Typical Range
150 sq ft $6,000 $18,000 $8,500–$12,000
250 sq ft $10,000 $30,000 $13,500–$20,000
350 sq ft $14,000 $42,000 $20,000–$30,000

Estimating Your Budget for Composite Decking and Construction

When it comes to material choices, the upfront expense of composite decking is offset by its longevity and minimal upkeep. Factor both product costs and installation fees into your budget. Expect to pay a premium for advanced features such as wraparound porches, complex rooflines, or built-in lighting systems. If you’re making this a true extension of your main living space, professional design and project management might be worth the splurge. Remember to leave room in your budget for regular care—replacing old screens, maintaining your composite deck boards, and rejuvenating the space with updated furnishings and décor. Smart budgeting is key to ensuring your screened porch provides years of value and hassle-free outdoor enjoyment.

hands using calculator and construction plans for screened-in porch cost estimates, composite deck samples present, adding on a screened-in porch

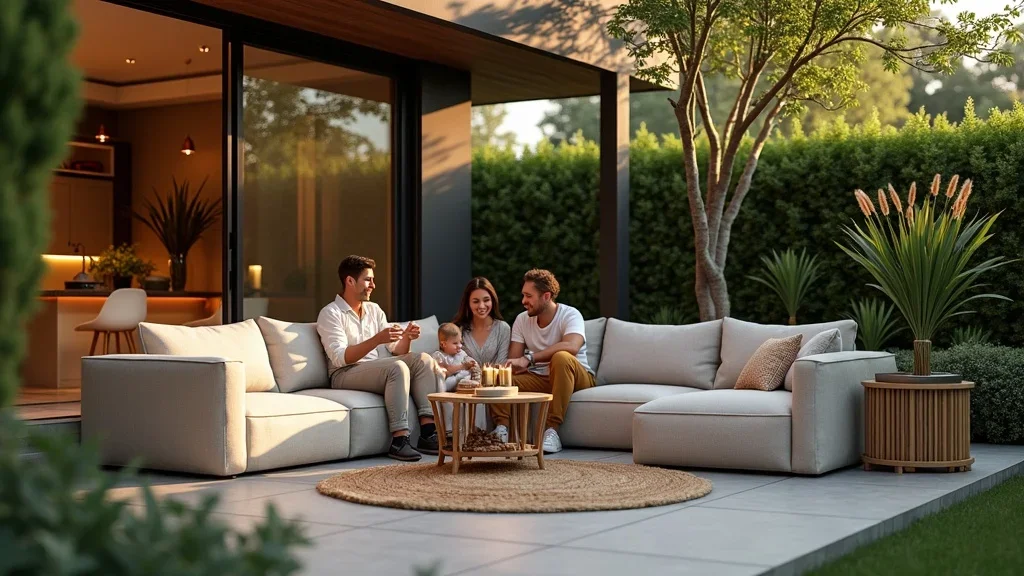
Maximizing Your Space: Outdoor Dining and Entertainment Ideas for Screened-In Porches

  • Outdoor dining furniture and layouts
  • Lighting, fans, and accessory choices
  • Incorporating nature: plants and garden elements

Thoughtful porch design unlocks endless outdoor dining and entertainment options. Start with durable, weatherproof dining tables and seating—choose materials and finishes that add soft comfort while standing up to open-air conditions. Arrange your primary dining set near the kitchen entrance for convenience. Use area rugs and sectional seating to create cozy nooks. Add string lights, a ceiling fan, or even a rustic wood chandelier for atmosphere and comfort both day and night. Floor lamps or side tables with built-in USB ports can extend usability after dinner, turning the porch into a true living space for cards, conversation, or relaxation. Don’t forget accessory touches such as flame-free lanterns, durable throw pillows, and weatherproof speakers for music or movie nights outdoors.

Integrate your screened porch with backyard nature using potted plants, vertical herb gardens, or a small water feature just outside the screen door. These touches add visual interest and a seamless transition to your larger outdoor living space. Opt for planters that mirror your color palette and choose screen material that maximizes garden views—think clean, thin mesh that lets in breezes without obscuring the landscape. The result is a vibrant, flexible zone for both intimate al fresco dining and lively gatherings with loved ones, bringing the joys of indoor and outdoor living together in one dynamic space.

elegant outdoor dining setup on screened-in porch, family gathering, string lights, evening, adding on a screened-in porch

Inspiration: Real-Life Screened-In Porch Transformations

"Our screened porch is now the best room in the house." – Recent client testimonial

Nothing inspires like seeing what’s possible. Homeowners nationwide have documented stunning transformations after adding on a screened-in porch. One family, for example, converted their underused deck into a fully furnished dining space with composite decking, ceiling fan, and string lights for twilight dinners. In another case, a small corner porch became the hub for summer reading, morning coffee, and weekend board games—thanks to a weatherproof dining set, durable screens, and potted plants that add life all year long. With smart planning and materials that last, you can transform your screened porch into the heart of your home, too.

Ask your contractor for before-and-after photos or browse local builder portfolios for inspiration. You'll find a wide range of aesthetics—from rustic lodge retreats to sleek, modern spaces—all unified by the simple strategy of blurring the line between indoors and outdoors for the ultimate in comfort and versatility. Each transformation reflects how personal touches, from furniture to specialty decking, turn a basic porch into a beloved extension of your living space.

Take a guided video walkthrough of a beautiful screened-in porch addition, featuring highlights of composite decking, outdoor dining setups, and comfort-focused features in action.

People Also Ask About Adding on a Screened-In Porch

How much would it cost to add a screened-in porch?

The average cost to add a screened-in porch ranges from $10,000 to $40,000, with square foot costs between $30 and $120 depending on material choice, size, location, and features like a composite deck, lighting, or ceiling fan. Expect to pay more for special finishes or complex designs, and be sure to factor in local labor rates and permit expenses.

Does adding a screened porch add value to your home?

Yes; most realtors agree that adding on a screened-in porch increases your property’s appeal and resale value. Potential buyers are often willing to pay a premium for enhanced outdoor living space, especially when features like composite decking, modern amenities, and versatile design allow year-round enjoyment without the hassle of bugs or harsh weather.

Do I need a permit to screen in an existing porch?

In most areas, yes—you’ll need a building permit to screen an existing porch or to build a new structure attached to your home. Local codes handle everything from materials to square foot limits and setback distances, so always check with your city or county before getting started. This ensures your addition is safe, insurable, and compliant with regulations.

Can you turn a screened-in porch into an addition?

Absolutely. Many homeowners convert a screened porch into a fully enclosed three-season room or sunroom by adding insulation, glass windows, and climate controls. This process often requires upgraded materials and new permitting but can yield a bonus room that extends your year-round living space and increases home value.

Expert Tips for Success When Adding on a Screened-In Porch

  1. Consult with professionals for code compliance
  2. Plan for optimal ventilation and outdoor dining flows
  3. Invest in quality materials like composite decking
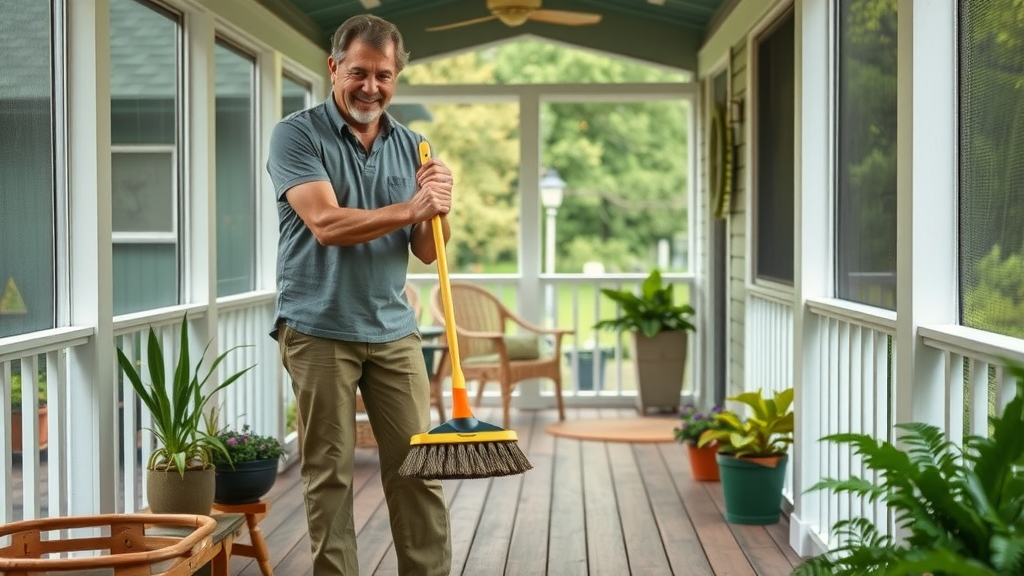
  4. Regularly maintain screens and decking

Partnering with experienced pros ensures your porch complies with all regulations, stands up to the elements, and protects your investment. Plan for ample air flow, especially when integrating ceiling fans or designing for outdoor dining convenience. Quality materials like composite decks and durable screen systems minimize maintenance, while regular cleaning preserves the details that make your porch shine season after season. Making these choices as you create your screened sanctuary delivers satisfaction and savings over the long run.

Learn expert maintenance tips for keeping screens, composite deck boards, and all porch surfaces in top condition—ensuring long-lasting comfort, safety, and curb appeal.

homeowner cleaning screened porch deck with gentle brush, organized and detailed space, composite decking, adding on a screened-in porch

FAQs: Everything Else About Adding on a Screened-In Porch

  • How do I keep my screened-in porch free from pollen and dust?
    Sweep or vacuum screens and flooring regularly, use ceiling fans to maintain air circulation, and wash screen surfaces monthly during peak pollen season to reduce buildup and keep air fresh.
  • Can I install a fireplace in my screened-in porch?
    Yes—choose electric, gas, or vented wood-burning models suitable for exterior installations. Ensure the porch is built to handle necessary ventilation and always follow local building codes for fire safety.
  • What's the best screen material for pets and durability?
    Look for heavy-duty polyester or pet-resistant screens. These withstand claws and daily wear far better than standard fiberglass or aluminum, providing a long-lasting solution for families with pets.

Key Takeaways: Adding on a Screened-In Porch

  • Screened-in porches blend indoor and outdoor living, boost property value, and can be tailored for outdoor dining and relaxation.
  • Careful planning, cost calculation by square foot, and smart material choices—like composite deck—ensure lasting enjoyment.

Conclusion: Ready to Transform Your Space by Adding on a Screened-In Porch?

Adding on a screened-in porch is a proven way to enhance your home's comfort and value, providing fresh air, shade, and a lifetime of memories with the people you love most.

Call to Action: Get Started on Your Screened-In Porch Project Today

Ready to create your dream porch? Call us at 479-903-1630 to transform your home and lifestyle—one screened porch at a time!

Sources

  • Bob Vila — Screened-In Porch Cost
  • Forbes Home — Screened-In Porch Cost
  • Trex — Composite Decking
  • Houzz — How to Add a Screened-In Porch

Adding a screened-in porch to your home offers a delightful blend of indoor comfort and outdoor enjoyment, providing a bug-free space to relax and entertain. For a comprehensive understanding of the costs involved, consider reading “How Much Does A Screened-In Porch Cost?” by Forbes Home, which details expenses associated with both new constructions and conversions of existing spaces. Additionally, “How To DIY A Screened In Porch” by Angi offers a step-by-step guide for those interested in a do-it-yourself approach, covering essential materials and techniques. If you’re serious about enhancing your living space with a screened-in porch, these resources will provide valuable insights to guide your project.

Living Spaces

Write A Comment

*
*
Related Posts All Posts
12.15.2025

Don't Make This Costly Mistake in Home painting tips!

“Nearly 60% of DIY paint jobs require expensive touch-ups or complete re-dos due to avoidable mistakes.” If you think picking up a brush and a can of paint means guaranteed success, think again! Many homeowners unknowingly sabotage their own efforts and end up with streaky, peeling walls or costly repaints. In this eye-opening guide, we'll break down exactly what most people get wrong and how you can sidestep these pitfalls with expert-approved home painting tips. Stick around—you might just save yourself days of frustration and hundreds of dollars! A Shocking Truth About Home Painting Tips: What Most Homeowners Miss Most homeowners dive into painting projects believing a fresh coat will instantly transform a room. However, many overlook the crucial foundation beneath that shiny new color: proper prep, product choice, and technique. Even a high-quality paint can’t hide rough patches, poor adhesion, or streaks caused by ignoring simple, professional home painting tips. The truth is, those paint streaks you see or the peeling sections that appear months later are rarely the fault of the paint itself—they’re usually the result of overlooked steps and misunderstood instructions. From using the wrong roller cover on textured walls, skipping bonding primer, or neglecting a wet edge when rolling, the list of common mistakes is long—and expensive to fix. Whether you’re selecting a new paint color or prepping for a finish coat, understanding the right home painting tips means you can avoid costly re-dos and achieve beautiful results that truly last. Let’s uncover the practical tips and inside secrets that even experienced DIYers sometimes miss! “Nearly 60% of DIY paint jobs require expensive touch-ups or complete re-dos due to avoidable mistakes.” What You’ll Learn From These Home Painting Tips How to avoid the most common painting mistakes Techniques for achieving a professional finish with home painting tips Which tools and products to use for quality paint results Step-by-step guidance for proper application and preparation Expert advice on using a wet edge and understanding based paint options The Ultimate List: 10 Home Painting Tips to Prevent Expensive Mistakes 1. Never Neglect Surface Preparation in Home Painting Tips Why thorough cleaning and repair are vital in home painting tips Based paint adherence and the risks of skipping prep Surface preparation is the #1 secret behind every successful paint job. Experienced pros recognize that prep can actually take longer than painting itself. Before you dip a brush or roller in quality paint, be sure to meticulously clean, patch, and sand all surfaces. Use a mild soap or cleaner and a sponge or cotton ball to remove dust, oils, and old marks. This step is critical for both based paint and latex paint to adhere properly and avoid peeling. Skipping this stage leads to patchy, uneven coats and can cause paint from hard-to-reach spots to flake off within months. If you’re painting over wood trim or stained walls, use a bonding primer to maximize paint adhesion and eliminate the risk of peeling. Remember to remove or cover switches, fixtures, and lay down drop cloths to protect floors. Sand rough areas and fill holes using lightweight spackle; stubborn stains may require targeted cleaning or sealing. Well-prepped surfaces hold primer and finish coats better, giving your project a flawless, professional look that outlasts shortcuts. Investing extra time up front will dramatically reduce extra paint costs and frustration later! 2. Always Use Quality Paint for Long-Lasting Results How quality paint pays off over time Comparing price vs. performance in home painting tips While budget paints can look tempting, investing in a quality paint ensures long-lasting color, better texture, and fewer touch-ups. Higher quality paints generally provide better coverage and a more durable, higher sheen finish coat. They’re formulated with superior binders and pigments, meaning fewer coats per paint job and easier touch-ups in the future. The price tag may be higher, but the difference in performance outpaces the cost—especially on demanding surfaces like wood trim or high-traffic areas. When evaluating paint brands, look beyond marketing. Check online reviews on sites like Imageworks Painting, ask for sample brushes, and compare how paint color and finish resist scuffs, fading, or peeling. Quality paints spread evenly with less effort, adhere better after prep and priming, and ultimately save both time and money in future painting projects. Whether you choose latex or oil-based, don’t skimp; your finish coat will thank you for years. "Quality paint may cost more up front, but can save homeowners hundreds on frequent repaints." — Professional Painter 3. Keep A Wet Edge to Avoid Streaks and Marks Understanding the wet edge technique in home painting tips Common errors when maintaining a wet edge If you’ve ever seen visible lines or “lap marks” on a painted wall, chances are a wet edge was not maintained. The wet edge technique means that each stroke or roller pass overlaps the previous one before it dries. This allows the paint to blend seamlessly for a streak-free finish. Failing to follow this essential tip often results in the dreaded uneven sheen, especially when using a roller cover for walls and ceilings. To maintain a wet edge, work in manageable sections and never pause in the middle of a wall. When painting with a nap roller, avoid letting one area dry while you’re still working on an adjacent section. Re-load your brush or roller regularly and blend your strokes. This tip is crucial for both oil- and water-based paints, as each has unique drying times. Consistent attention to your wet edge delivers a finish coat worthy of a professional—and saves you from aggravating re-dos. 4. Choose the Right Based Paint for Each Room Differences between oil- and water-based paints When to use each type in home painting tips Not all rooms or surfaces are created equal, and neither are paints. Choosing between oil-based and water-based paint depends on the room’s function and the surface to be covered. For kitchens and bathrooms, where moisture and humidity are common, oil-based paints (also known as alkyd) deliver a higher sheen and superior durability. They're ideal for wood trim and surfaces exposed to regular wear. But for walls and ceilings, modern latex paint or acrylic-based paint is often the best option—offering easy cleanup, low odor, and quick drying. Always check labels for best use cases and drying times. For instance, water-based paints are better for living rooms and bedrooms, while oil-based is great for cabinetry. Don’t forget: using the wrong based paint can result in poor adhesion, bubbling, or chipping over time. Seek guidance from local paint pros or reliable resources like Imageworks Painting before making your selection, especially for high-traffic or specialty areas. 5. Invest in Quality Brushes and Rollers for Best Home Painting Tips How poor tools sabotage quality paint application Caring for your painting tools for longevity Your tools are just as important as your paint. A high-quality brush or nap roller cover will help you distribute the paint smoothly and evenly, minimizing streaks and roller marks. Cheaper tools tend to shed bristles or create an uneven finish coat, leading to a less professional paint job. Invest in an assortment of premium brushes (angled for edges, flat for large spaces) and roller covers suited for your wall texture—a longer nap roller holds more paint for rough surfaces, while a short nap is best for smooth walls. After use, wash brushes and rollers promptly with water for latex paint or the recommended solvent for oil-based paints. Storing them in airtight containers or wrapped in plastic between coats can prolong their life. Good maintenance not only saves you money on replacement tools but also ensures flawless results in every painting project. Remember, your choice of tools can make or break the beauty and longevity of your home’s painted surfaces! 6. Don’t Skip Priming: A Core Home Painting Tips Principle Why primer is essential for based paint and quality paint adhesion When and where to prime Priming is a crucial step often skipped by rushed DIYers. But primers play a major role in creating a strong bond between the surface and your topcoat, especially on patched walls, bare drywall, or wood trim. Using a bonding primer ensures paint adhesion and evens out surface porosity for a true paint color after the finish coat is applied. For hard-to-cover stains or color changes (especially with chalk paint), a primer will prevent bleed-through and discoloration. You should always prime after heavy patching, when painting over dark or glossy surfaces, or when switching between paint types (such as oil to latex). Don’t forget that skipping primer can cause your paint job to peel, streak, or require additional paint—ballooning your project’s time and budget. For a durable, professional look, priming is a step you can’t afford to miss! 7. Proper Tape Application: Clean Lines in Every Home Painting Project How to use painter’s tape for a perfect wet edge Tips for preventing paint bleeding There’s nothing more satisfying than a crisp, straight line between a wall and ceiling or along baseboards. This is where painter’s tape shines. Ensure you apply painter’s tape with firm pressure to prevent bleeding; a cotton ball run along the edge can help seal it further. Always remove the tape while the paint is still slightly wet to maintain clean lines and avoid lifting dried paint from hard surfaces. Choose blue or green painter’s tape rated for the length of your project; never use ordinary masking tape, which can tear or leave residue. Taping off wood trim, light switches, and windows is a pro strategy that distinguishes flawless paint jobs from amateur attempts. This attention to detail is what turns a basic DIY project into a showcase-worthy painting project that stands up to scrutiny. 8. Don’t Overload Your Brush or Roller Correct techniques for even distribution of quality paint Avoiding drips and roller marks in home painting tips Loading up your roller or brush with too much paint can lead to disastrous drips, sags, and roller marks. Instead, dip your tool about a third of the way into the paint; tap off excess against the tray or bucket. For roller covers, always roll off extra paint on the tray’s ridges to ensure even distribution. Overloading wastes quality paints and creates an uneven finish coat that’s prone to peeling and chipping. When using a nap roller, start in a “W” or “M” pattern to distribute the paint, then fill in the gaps using light, even strokes. If you see stubborn streaks or globs, stop and redistribute the paint with your brush or roller before continuing. This home painting tip is simple, but it makes a world of difference in achieving that smooth, professional wall or ceiling appearance. 9. Mind Your Drying Times When Following Home Painting Tips Why patience saves time and money Understanding manufacturer recommendations for based paint and finish types One of the most overlooked home painting tips is honoring proper drying times between coats. Impatience can ruin an otherwise flawless job: layers that are applied too quickly won't adhere, leading to bubbling, streaks, and possible paint removal during tape pulling. Always consult the paint manufacturer’s instructions for drying and curing times—these differ between water-based and oil-based paints, humidity levels, and finish coat types (including higher sheen or chalk paint). Allow ample ventilation using fans and open windows. This not only speeds up drying but also ensures a safer workspace and reduces lingering paint fumes. For the very best results, don’t rush to apply that next coat—even the highest quality paint or paint spray system can’t compensate for ignored drying times. Your patience now will reward you with a stronger, more beautiful finish for years to come. 10. Ventilation and Safety: Overlooked Home Painting Tips The impact of proper airflow on drying and indoor air quality Using PPE and handling based paint safely Never start a painting project without planning for ventilation and safety, especially when working with based paint that may release stronger fumes. Open windows and set up fans to promote airflow—this will not only speed drying but also protect your indoor air quality. Using personal protective equipment (PPE) like masks, gloves, and eyewear is crucial, especially when sanding, using a paint sprayer, or working in tight spaces. Strong solvents and fumes from oil-based or alkyd paints require extra caution and diligent use of PPE. Always store paint and supplies away from children and pets, and dispose of unused paint, cotton balls, and drop cloths responsibly. Safer working habits mean you can enjoy your beautiful, freshly painted room without health worries! Table: Comparison of Based Paint Types for Home Painting Tips Type Description Best Use Drying Time Durability Oil-Based Traditional alkyd resin; offers higher sheen and hard finish Trim, cabinets, kitchens, bathrooms, high-traffic areas 6–8 hours to touch; 24 hours to recoat Very high; withstands scrubbing and moisture Water-Based (Latex) Acrylic resins; low odor, quick drying, easy cleanup Walls, ceilings, general interior rooms 1–2 hours to touch; 4 hours to recoat Good; resists yellowing and mild scuffs Chalk Paint Ultra-matte, highly adhesive; easy to distress for vintage look Furniture, feature walls, crafts, upcycled projects 30–60 minutes to touch; requires sealing topcoat Moderate; needs wax/sealer for best wear People Also Ask: Common Questions About Home Painting Tips What is the 80/20 rule in painting? The 80/20 rule in painting means that 80% of your results stem from 20% of your efforts—primarily surface preparation. This classic principle highlights the importance of activities like taping, patching, and sanding. When you invest most of your time in prepping walls with a cotton ball, drop cloth, and bonding primer, you’ll find the actual painting goes smoothly, and the final result looks professional. Skimping on prep can double or triple your painting workload down the road! What is the correct way to paint a house? Start by thoroughly cleaning all surfaces and repairing any damage. Apply a suitable primer, choosing water-based for general walls or oil-based for trim or high-humidity areas. Use painter’s tape for crisp edges and protect floors with drop cloths. Paint from top to bottom—ceilings, then walls, then trim—with a quality nap roller or brush, always maintaining a wet edge. Allow sufficient drying times between coats, and ventilate well throughout the project. Finish by removing tape promptly and performing final touch-ups. How do I get a perfect line between my wall and ceiling? Achieving a flawless line between wall and ceiling requires patience and the right tools. First, use painter’s tape rated for delicate surfaces and press it down firmly with a cotton ball. Apply your ceiling color first and let it dry thoroughly. Then, tape off the ceiling just above the wall to be painted, overlap slightly, and paint the wall color. Remove the tape before the paint sets to avoid peeling, and use an angled brush for precision in tight corners or along wood trim. Can I just paint over existing paint? You can often paint over existing paint if the surface is in good condition—smooth, clean, and free of flaking or peeling. For glossy or oil-based surfaces, lightly sanding and priming with a bonding primer ensures better paint adhesion. When switching between paint types (like oil to latex), proper prep, cleaning with a cotton ball, and priming prevents compatibility problems and ensures your finish coat doesn’t peel or chip prematurely. Watch this step-by-step walkthrough covering every phase of a home painting project—surface prep, priming, taping, brushing, rolling, drying, and more. See how to avoid the most common mistakes and apply these expert home painting tips for a flawless finish! Expert Quotes on Home Painting Tips "Investing in surface prep and quality paint will always reward homeowners in beauty and longevity." — Painting Contractor Frequently Asked Questions on Home Painting Tips How many coats of based paint should I apply? What's the best type of quality paint for bathrooms? Can you mix different brands when using home painting tips? How many coats of based paint should I apply? Generally, two coats of paint are standard for most projects—this ensures true color and full coverage, especially after priming. For drastic color changes or challenging surfaces, an extra coat may be needed. What's the best type of quality paint for bathrooms? Choose a water-resistant, high-sheen latex or acrylic-based paint labeled for kitchens and baths. These formulas resist mold and are easier to clean, standing up well to humidity and frequent cleaning. Can you mix different brands when using home painting tips? While you should avoid mixing brands within the same coat, you can use different brands for primer, base, and top coats—just ensure they are compatible (oil with oil, water with water). When in doubt, stick to one manufacturer’s system for best results. Key Takeaways: Avoiding Expensive Home Painting Tips Mistakes Preparation and quality paint are the foundations of successful home painting tips Always select the right based paint for the surface Maintain a wet edge and follow manufacturer directions for best results See real-world home painting tips applied by pros and DIYers alike, with commentary on what to do—and what to avoid—for a picture-perfect paint job! Ready for a Flawless Paint Job? Visit us @ www.ocalapaintingpros.com/ for Expert Home Painting Tips Don’t let another paint project turn into a costly mistake. Trust the pros for guidance, products, and tips that truly make a difference. Visit our site, ask your questions, and let’s help you paint with confidence! Conclusion Apply these essential home painting tips for results you'll be proud to show off. Preparation, quality methods, and the right products are your best tools for avoiding expensive mistakes and ensuring beautiful, lasting walls.

12.15.2025

Why Professional Painters Transform Your Space Instantly

Shocking Fact: Did you know that the average professional painter can complete a flawless paint job in one day, while the typical homeowner may take up to a week—often with imperfect results? The impact of professional painters goes far beyond speed. If you’re seeking a breathtaking transformation and lasting beauty in your home, the evidence is overwhelmingly in favor of hiring the experts. This guide unveils the reasons behind these instant makeovers and gives you the insider’s path to a stunning, 2026-ready living space. The Immediate Impact of Professional Painters: Surprising Facts & Stats 80% of homeowners say their paint job by professional painters instantly refreshed their home's look—which can boost perceived value by 5-10% overnight. Painting contractors finish projects 60% faster than DIYers, with a far lower rate of costly mistakes or do-overs. Pro painters use specialized tools and techniques, resulting in a flawless coat of paint and superior durability that DIY attempts rarely achieve. Choosing a painting contractor often means less disruption, minimal paint fumes, and guaranteed satisfaction for both interior paint and exterior paint projects. What You'll Learn from Professional Painters Why hiring a painting contractor or professional painters delivers more than just a fresh coat of paint. The true cost to paint—from single rooms to entire homes, including commercial painting and stucco house projects. How to select top-rated painting services and avoid costly mistakes. The difference professional advice makes, including paint color trends for 2026 and choosing the right type of paint. Painting Contractor Vs. DIY: Why Professional Painters Are the Smart Choice Pro painters possess advanced skills, refined over thousands of painting projects, minimizing streaks, drips, and unevenness that are common in DIY jobs. Typical DIY mistakes include improper prep work, using the wrong type of paint, and neglecting surface repairs—leading to peeling, bubbling, and the need for an expensive redo. Painting contractors use precision taping, priming, and even application. Their methods ensure every inch of your walls, ceilings, and trim receive thorough, beautiful coverage. With a painting company’s guarantee, you’re covered in case of unforeseen paint issues, and you benefit from warranties rarely seen in DIY efforts. “A single professional painter can do in a day what might take homeowners a week—minus the mess and stress.” Painting Contractors’ Process: What Sets Pro Painters Apart Step-by-step precision: Pro painters inspect, patch, sand, and prime every surface before a single drop of paint is applied, ensuring longevity and flawless results on every painting project. Efficiency & tools: From dustless sanders to high-volume sprayers and premium roller covers, painting contractors use equipment that most homeowners simply don’t have. This means your space is refreshed quickly and cleanly. Star painting standards: Every detail is managed, from color consistency to crisp lines and clean transitions, ensuring your home is not just painted—but perfectly finished for show-stopping impact. Cost to Paint: How Much Do Professional Painters Charge? Project Type Average Cost Details Small Room (10x12 ft) $350 – $700 Includes two coats, standard prep Large Room (15x20 ft) $700 – $1,200 Extra prep, premium paint optional Interior (2,000 sq ft house) $2,500 – $7,500 Multiple colors, trim, ceilings Exterior House Painting $3,500 – $12,000 Depends on material (wood, stucco house), height, prep Commercial Painting $1.50 – $4.50/sq ft Varies by commercial paint type, size, and surface Factors affecting price include surface prep needs, number of coats, accessibility (e.g., high ceilings), and paint quality. Commercial and residential painting jobs can have varying costs—commercial painting often demands higher-grade products and more intensive preparation. Commercial paint and exterior paint choices influence final costs. A stucco house or historic home may require specialty products and skilled application, increasing the investment but protecting your property for years. Painting Services Offered by Professional Painters Interior paint: Walls, ceilings, trim, doors, cabinetry, accent features, and complete room transformations for a modern, beautiful home. Exterior paint: Siding, brick, stucco house exteriors, decks, fences, and more—guaranteeing lasting curb appeal and weather resistance. Specialty painting: Decorative finishes, mural art, faux textures, and restoration projects that demand expert attention. Commercial painting: Offices, retail, warehouses, and multi-unit properties with durable, code-compliant paints for business excellence. Stucco house and advanced finishes: Expertly applied exterior coatings for enhanced protection, modern color styles, and energy efficiency. Observe professional painters prep, paint, and reveal a stunning before-and-after—evidence of what hiring experts delivers in record time. Star Painting Results: How Pro Painters Elevate a Beautiful Home Professional painters deliver dramatic before-and-after reveals that showcase their painting contractor expertise. When you see a faded exterior or tired kitchen walls instantly refreshed, you'll truly appreciate the artistry and efficiency of pro painters. From increased curb appeal to higher listing values, a fresh coat by the right painting company pays off. Realtors report that new paint can be the deciding factor for potential buyers who fall in love at first sight. Clients regularly share stories of stress-free, mess-free painting projects—testimonials that reinforce why a star painting team is worth every penny. Choosing the Right Painting Contractor: Tips from Pro Painters Ask about licensing, insurance, and years of experience. Every reputable painting contractor will provide proof, and the best offer references and reviews to showcase past successes. Look for red flags—refusal to provide a written estimate, lack of detailed contracts, or absence of key certifications for professional painters. These are signals to continue your search. “Hiring professional painters is an investment in both tranquility and lasting beauty.” Types of Paint: Expert Recommendations by Professional Painters Commercial painting often demands high-durability, low-VOC paints that stand up to heavy use. Residential painting focuses on finishes that provide both beauty and protection—think stain-resistant enamels for kitchens and spa-like finishes for bathrooms. For a beautiful home in 2026, color trends are moving toward energized pastels (mint green, blush rose, sky blue) and modern neutrals (warm taupe, soft beige). Pro painters can recommend the type of paint that resists fading, staining, and wear for each area of your home or business. See how preparation, drop cloths, trim taping, and surface repairs ensure your painting project achieves lasting beauty and durability. Hiring a Painting Contractor: What Every Homeowner Should Know Checklist for screening: Confirm licensing, insurance, recent references, and familiarity with both residential and commercial painting projects. Get a detailed, itemized quote before agreeing to any work. Planning your project: Ask about prep timelines, expected completion dates, and paint brand recommendations. Top professional painters will manage your pro experience, from consultation to clean-up, with minimal disruption to your home. FAQ: Professional Painters & Painting Services How much does a professional painter cost per room? Most professional painters charge based on room size, surface preparation, and paint selection. A standard room is typically priced at $350-$700, with factors like wall repairs or specialty finishes increasing costs. Is it worth getting professional painters? Absolutely. Professional painters not only save you time and stress, but their craftsmanship consistently produces a lasting, high-quality result that adds curb appeal and real home value. How much does it cost to paint a 12x12 room? Expect to invest $400–$800 for a 12x12 room, depending on details like whether walls need repairs, number of coats needed, and the quality of the chosen paint. What is the average cost to paint the interior of a 2000 sq ft house? For a 2,000 square foot home, interior painting typically ranges from $2,500 to $7,500. Factors like custom colors, specialty ceilings, and the quality of paints can affect your final cost. Key Takeaways: Why Professional Painters Are the Foundation of a Beautiful Home Professional painters deliver superior results, speedy transformations, and long-lasting value to any home improvement project. Choosing the right painting contractor means enjoying a stunning, durable finish—without the risk and hassle of DIY mistakes. Special painting services, from commercial paint to stucco house transformations, are best left to expert hands who understand the critical role of using the correct type of paint every time. Ready for Transformation? Trust Local Professional Painters Today Visit our website: ocalapaintingpros.com Conclusion: For a home that truly shines in 2026 and beyond, the secret is simple—experience the difference only professional painters can bring.

11.30.2025

Unlock the Magic of bathroom renovation guide—Transform Your Space

Did you know? According to a recent survey, 72% of UK homeowners say a professionally finished bathroom adds significant value to their property – and 49% said it improves daily wellbeing. Whether you’re dreaming of a soothing new bath, envisioning a full bathroom remodel, or searching for the latest bathroom trends, this comprehensive bathroom renovation guide is your essential step-by-step resource. Read on to discover how planning, design, and the right fixtures and fittings can transform even the most tired old bathroom into a rejuvenating, value-adding space you’ll love.Unlocking the Magic of Bathroom Renovation: Why a Bathroom Reno is More Important Than You ThinkIf you’ve ever considered a bathroom reno, you’ll know it’s not just about a home improvement project. A fresh and functional bathroom has the power to change your daily routine, influence your mood, and boost your property’s value. According to recent bathroom renovation statistics, updating your space is one of the most cost-effective ways to invest in your home. Enhanced bathroom design, modern wall tile choices, and smart use of room ideas can turn a neglected space into the highlight of your house—making a new bath not only a luxury but a practical upgrade. Plus, integrating new fixtures and fittings, like a walk-in shower or high-quality vanity unit, doesn’t just add style; it builds durability and convenience into your everyday life.But why is a bathroom renovation guide so crucial? Every bathroom remodel comes with unique challenges: plumbing intricacies, clever bathroom suites selection, and balancing wants versus needs. Planning is everything. A detailed bathroom reno plan ensures you avoid costly mistakes, incorporate trending yet timeless bathroom design choices, and see each step through to a flawless finish. With the right approach, turning an old bathroom into a new bathroom is less stressful than you might imagine!What You'll Learn in This Bathroom Renovation Guide:Clear planning and design strategies for your bathroom renovationStep-by-step breakdown: from removing an old bathroom to creating a new bathExpert bathroom design insights, including fixture and fittings selectionHow to set a realistic budget for your new bathroomThe latest 2024 bathroom trends and bathroom suite inspirationMust-have bathroom remodel checklists and FAQs"According to a recent survey, 72% of UK homeowners say a professionally finished bathroom adds significant value to their property – and 49% said it improves daily wellbeing."Planning Your Bathroom Renovation: The Foundation of Every Bathroom RenoEffective planning sits at the core of every successful bathroom renovation guide. Before any tile is laid or new bath fitted, a thorough assessment and design strategy will maximise space, function, and aesthetic appeal. Homeowners often underestimate the impact of good planning—taking time here streamlines labour, avoids expensive last-minute changes, and ensures the entire bathroom reno aligns with your vision and budget. Start by scrutinising your old bathroom: what works and what doesn’t? Consider how space, plumbing, and natural light influence your options.Setting a clear goal for your new bathroom renovation is vital. Do you crave a peaceful, spa-like bathroom suite, or does your busy family need robust and easy-to-clean surfaces? Balancing bathroom design ambition with practical considerations—like storage, safety, and water use—can be the difference between a bathroom remodel you love and one that feels underwhelming or dated in a few short years. Let’s break down the key steps, using proven room ideas and 2024 bathroom trends to lay the foundation for your project.Assessing the Old Bathroom: What Works and What Doesn’tStart by making a complete inventory of your old bathroom. Identify fixtures and fittings that function well, versus those that have seen better days. Is there persistent damp behind old wall tiles? Are certain floor tiles uneven or cracking? Pinpoint current issues—like insufficient lighting, lack of storage, or unreliable shower heads. This part of the bathroom renovation guide helps you avoid repeating mistakes and spot easy wins, such as keeping a rock-solid bath but updating the glass shower enclosure or replacing the vanity unit for instant impact. Make sure you note any structural limitations—window placement, plumbing access, or low ceilings—as these will shape your bathroom design options down the line.Understanding what you love and loathe about your existing room provides clarity when weighing up bathroom suites, wall and floor options, and where your budget may be best allocated. Ultimately, this process saves time, money, and disappointment along the way, ensuring your bathroom reno delivers both function and flair. Don’t skip it—your shiny new bathroom will thank you for this groundwork.Setting Realistic Goals for Your New BathroomThe best bathroom renovation guide will always recommend setting clear, realistic objectives. Before you fall in love with the latest interior design trend or a luxury freestanding new bath, define your non-negotiables. Are you maximising a small ensuite, or building a durable family bathroom? Will you need specialised fixtures and fittings for accessibility, or prefer streamlined, minimal looks? Prioritise these needs, then list your wants: dual sinks, custom bathroom suites, underfloor heating, or statement wall tile patterns.Be honest about your timeline, too—renovating a bathroom is a significant home project and may need careful coordination with electrical work, tile installers, or even temporary disruption to your daily routine. Factoring in realistic time frames will reduce last-minute stress. Above all, allocate budget for surprises. A solid plan that blends your wishes with practical realities will make your bathroom reno smoother and far more satisfying once complete.Incorporating Bathroom Trends and Room Ideas into Your Bathroom DesignIntegrating fresh room ideas and bathroom trend forecasts into your project will help your bathroom reno stay current and appealing for years to come. Consider the big picture: Do contemporary bathroom suites inspire you, or do you lean towards classic elegance? Explore trending paint colours, popular floor tile options like terrazzo, or minimalist floating vanities. The 2024 bathroom trends spotlight sustainable materials, spa-inspired layouts, and bold yet subtle wall tile designs. Personalise your bathroom design with clever storage, bespoke lighting, or standout fixtures and fittings for a space that feels uniquely yours.Consult reputable bathroom renovation guides, interior design resources, and real-world room ideas online—Pinterest boards and Houzz galleries are full of useful inspiration. Use these insights to create a digital or physical moodboard before making final decisions on bathroom suites, fixtures, and finishes. Remember: your new bathroom should balance on-trend style with timeless utility, ensuring both immediate wow-factor and decades of enjoyment.Steps to Prepare for a Successful Bathroom Reno:Evaluate existing fixtures and fittingsIdentify 'must-haves' for your new bathroomExplore bathroom suite examples and bathroom trend forecastsSample Budget Breakdown for a Bathroom Renovation Guide:ItemEstimated Cost (£)Bathroom Suite600 - 2500Tiles (Wall/Floor)300 - 1200Plumbing Works800 - 2500Labour1000 - 2500Fixtures300 - 1500Total3000 - 10200How to Design Your Dream Bathroom: Bathroom Design Tips and Room IdeasTackling a bathroom renovation guide requires more than just replacing bathroom suites and slapping on new floor tiles. It’s about creating a harmonious blend of function and beauty—optimising your space, selecting the right fixtures and fittings, and weaving in the latest bathroom trends. This section walks you through essential bathroom design choices and creative room ideas to bring your dream bathroom to life, regardless of size or budget.Whether you’re after a high-contrast modern bathroom, a timeless classic, or a soothing sanctuary, smart layout decisions and thoughtful finishing touches make all the difference. Let’s explore how to achieve maximum impact, from space-maximising floor plans to choosing the perfect vanity unit and signature wall tile details.Planning Bathroom Layouts and Maximising SpaceThe best bathroom renovation guide always begins with smart layout planning. Assess the footprint of your room and measure everything twice. Consider traffic flow—where will the bath, shower enclosure, toilet, and vanity unit best suit your needs? For smaller bathrooms, opt for wall-hung fixtures and floating vanities to create an illusion of space and improve cleaning access. Larger spaces allow for features like double vanity units, a walk-in glass shower enclosure, or even a freestanding statement bathtub. Maximise natural light by positioning mirrors opposite windows and using light-toned wall tile to brighten the room.Don’t overlook the importance of accessibility and convenience. Make sure your electrical work and plumbing align with your design choices, and factor in essentials like towel storage, easy-reach shelving, and roomy pathways. Modern bathroom suites provide integrated solutions, such as compact shower trays, concealed cisterns, and space-saving vanity units. With meticulous planning, your new bathroom layout will feel open, functional, and effortlessly stylish—no matter the size.Choosing the Perfect Bathroom Suite for Your Bathroom RenoYour choice of bathroom suite sets the tone for the entire renovation project. Today’s market features everything from budget-friendly three-piece bathroom suites to ultra-modern modular solutions. Think about your household’s lifestyle needs: Is a shower-over-bath arrangement the best option for busy mornings, or do you cherish a spa-like sanctuary with a separate walk-in shower and soak tub? Look for suites that promise longevity—ceramic and porcelain fixtures, durable coatings, and robust frames outperform cheaper alternatives in high-use areas.Don’t forget the aesthetics. Sleek, minimal designs are leading bathroom trend charts, while ‘statement’ pieces—like bold-coloured bathtubs or sculptural basins—instantly elevate your new bathroom. Consider matching your suite’s style to your wider interior design scheme for a sense of flow between rooms. Practical, well-chosen bathroom suites provide a solid foundation for every other design decision you’ll make along the way.Selecting a Stylish Vanity Unit and FittingsThe vanity unit is a central piece in most bathroom renovation guides—a place for essential storage, daily rituals, and design expression. Modern options range from floating vanities for space efficiency to statement freestanding cabinets with designer textures or colours. When selecting, take note of how much countertop and storage space you’ll need, as well as the finish: gloss white, natural wood, or the latest matt black and brass trend.Consider integrating the vanity unit with the rest of your interior design. For example, a vanity with a vessel basin looks stunning against large-format wall tile, while a sleek under-mount sink may complement a minimal, classic scheme. The right fixtures and fittings—think elegant taps, soft-close drawers, and integrated lighting—turn a practical item into a focal point. Your bathroom reno will truly shine with a thoughtfully chosen vanity unit."A well-chosen vanity unit is often the centrepiece of an inspiring bathroom renovation guide." — Jane Smith, Interior DesignerPicking Fixtures and Fittings: Taps, Showers, and MoreHigh-quality fixtures and fittings are the unsung heroes of bathroom renovation. Taps, shower heads, towel rails, and even the toilet flush handle all play their part in both performance and style. For a cohesive look, select fixtures within a single finish style—matt black, brushed brass, or polished chrome are the top 2024 bathroom trend options. Consider water-saving taps, rain-style shower heads, and thermostatic valves for extra safety and efficiency.Don’t skimp here—cheap fixtures may look fine initially but often wear quickly and are more prone to leaks or mechanical failure. Invest in trusted brands and ensure your fittings work harmoniously with your chosen bathroom suite and overall interior design. The right fixtures take your new bath or shower enclosure from ‘standard’ to ‘superb’.Exploring Current Bathroom Trends for 2024Staying up to date with the latest bathroom trends ensures your space feels fresh and inviting for years to come. The 2024 bathroom trend highlights include sustainable materials, such as recycled glass wall tile, eco-friendly paint colours, and upcycled wooden vanities. Walk-in showers, large-format floor tiles, and spa-inspired bathroom suites have become a popular choice for modern homes.Consider splashing out on custom storage and statement pieces, like full-length mirrors or feature lighting. Personalising your bathroom renovation guide with bold tile textures, pops of earth tones, and greenery also brings a restorative, wellness-inspired feel. According to interior design experts, the best bathroom remodels carefully balance trend-appeal with lasting utility. Don’t just follow the crowd; pick the elements that resonate most with your own room ideas and lifestyle.Popular Trends in 2024 Bathroom Design:Sustainable materialsStatement wall tileWalk-in showersCustom storage solutionsSpa-like bathroom suitesQuick Reference: Top Bathroom Reno Room IdeasFeatureDesign Trend (2024)Floor TilesTerrazzo and porcelainWall TileLarge-format ceramicsVanity UnitFloating & minimalistFixtures/FittingsMatt black & brassBathtubFreestanding statementFrom Old Bathroom to New Bath: Removing Your Existing Bathroom SuiteBefore any shiny new fixtures are installed, your bathroom renovation guide begins with removing the old bathroom suite. Safety is paramount—always isolate your water supply at the main stopcock before commencing. Removing fixtures and fittings, such as the old bath or vanity unit, often reveals hidden issues—damaged pipework, unexpected water damage, or outdated electrical wiring—that may need attention as part of your bathroom reno.A methodical approach avoids costly delays or accidents. Take photos before and after each stage, especially when dealing with complex plumbing or electrical work. Removal is also a great opportunity to rethink the location of your sink, bath, or shower head to maximise your new bathroom’s potential. With thoughtful preparation, you’ll clear the way for a smooth, trouble-free fit-out—bringing your bathroom project ever closer to completion.Step-by-Step: How to Safely Remove Fixtures and FittingsStart by shutting off both hot and cold water supplies and unplugging any electrical appliances from the immediate area. Remove moveable items first—shelves, mirrors, towel rails—then tackle larger installations like the old bath or glass shower enclosure. Loosen pipe connections gently and keep a bucket handy for any residual water left in the pipes. With large fittings, enlist a second pair of hands to avoid personal injury or damage to walls and floor tiles.Be mindful of disposal regulations—ceramic toilets, for example, require specialist handling. Salvage undamaged fixtures or tiles where useful for upcycling projects or emergency spares. Taking a step-by-step, safety-first approach prevents damage and forms an efficient, reliable starting point for the next stage of your bathroom renovation guide.Dealing with Plumbing and Pipework AdjustmentsUpdating the plumbing and pipework is often the most challenging—and costly—part of renovating a bathroom. You might need to reroute waste pipes, add new supplies for separate shower heads, or simply make sure that everything from the toilet to the sink flows properly. Begin by mapping out the intended locations for each key fixture and checking existing pipe runs. Where possible, keep new installations close to current supply and waste lines for efficiency and reduced costs.Major adjustments require a qualified plumber. If you’re updating electrical work as part of your new bathroom suite, employ a registered electrician to ensure your project meets building regulations. Plumbing works are not the place to cut corners—quality here ensures your bathroom reno stays problem-free for years to come. Remember: safety first, always."Always isolate the water supply before starting any bathroom renovation project—safety first!"Preparing Walls and Floors: The Key to Longevity in Bathroom Reno ProjectsYour bathroom’s walls and floor are constantly exposed to steam, splashes, and high foot traffic. Correct preparation is fundamental to any bathroom renovation guide: it guarantees the longevity and performance of every surface, from underfloor heating to the latest wall tile designs. Start by stripping away old adhesives and fixing any underlying damp, cracks, or weakness in the substrate. Apply a suitable primer and a dedicated bathroom waterproofing membrane before laying new tiles or installing fixtures and fittings.This proactive approach guards against leaks, mould, and long-term deterioration. Take time to make sure walls and floor are properly levelled—especially if you’re planning feature wall tiles or large-format porcelain floor tiles. Smart investments here secure both style and durability for your new bathroom, making it a pleasure to use for years to come.Wall and Floor Tile Selection: Function Meets StyleChoosing the right wall and floor tile means balancing style, slip-resistance, and long-term wear. Porcelain and ceramic remain the most popular choice for bathroom design in the UK due to their resilience, versatility, and attractiveness. 2024’s bathroom trend points to large-format tiles or terrazzo-inspired patterns for walls and floors, which create a seamless, visually spacious effect. If your room ideas include bold colour or statement tile, consider an accent wall in contrast with softer floor tiles.Look for tiles with a textured finish in wet zones for safety, and confirm that your chosen adhesive and grout are recommended for bathrooms. Remember that wall and floor installations may need different thicknesses and finishing trims—speak to your tile supplier or bathroom renovation guide for tailored advice. Finally, opt for tile types that are easy to clean and won’t show water spots or soap residue easily—factors as important as looks in a busy new bathroom.Waterproofing, Levelling, and Underfloor Heating BasicsWaterproofing is critical to bathroom reno success. Use specialist products to treat not just the shower enclosure or bath area but all wall and floor junctions, as well as under any new bathroom suite fixtures. Levelling compounds create a flat, durable base for both floor tiles and underfloor heating—now a premium feature in new bathrooms seeking added luxury and comfort. Installing underfloor heating mats or pipes involves preparation and should always be completed ahead of tiling to prevent rework or uneven surfaces.It’s worth investing in best-practice tools and techniques—or a professional fitter—at this stage. Proper groundwork now will pay dividends further down the line, keeping your bathroom renovation guide on course and safeguarding against leaks, cracks, or tile movement. Double-check substrate suitability for your chosen tile and make sure waterproofing extends well up the wall, especially in walk-in showers or “wet room” layouts.Preparation Checklist:Remove all debrisInspect for hidden dampApply primer and waterproofingConfirm substrate suitability for new tiles and flooringVideo Walkthrough:Tiling and Installation: Bringing Your Bathroom Renovation Guide to LifeThis phase is where your vision comes together. From aligning statement wall tile to laying durable floor tiles and installing bathroom suite elements, careful attention to detail sets a high-quality bathroom reno apart. Always check the manufacturer’s advice on tile setting and curing times—and follow a logical order: wall tiling before floor, fixtures after full tile curing. Don’t rush, especially if you’re working with large-format tiles—a small correction now can save costly repairs later.Whether you opt for traditional or contemporary layouts, use laser levels, spacers, and clean, consistent grout lines for a professional finish. With patience and diligence, your new bathroom will soon be ready for its final transformation.Wall Tile Installation: Patterns, Trends, and Mistakes to AvoidWall tiles are the real design statement in most bathroom remodels. Large-format ceramics continue to trend—providing a low-maintenance, luxurious look and fewer grout lines to clean. Consider stacking vertically to elongate the room, or herringbone patterns for architectural interest. Use a tile levelling system to avoid unsightly lippage, and remember to plan for any feature walls or niches ahead of time, as cutting large tiles to fit afterwards may compromise the look.One common mistake in wall tile installation is skipping the all-important layout ‘dry run’. Lay tiles out on the floor to double-check final look, making sure cut tiles end up in less-noticeable areas. As with all fixtures and fittings, it’s well worth consulting your bathroom renovation guide or a professional tiler to ensure best results, especially when using trending patterns or materials.Floor Tiles: From Classic to Contemporary Bathroom DesignStrong, beautiful floor tiles ground your new bathroom—and selecting the right finish can enhance light, flow, and room scale. Terrazzo and porcelain are leading bathroom trend favourites, delivering a superior mix of style and practicality. A common pitfall is using wall tile on floors; always check your tile’s slip rating before committing. A lighter colour palette can make smaller bathrooms look larger, while bolder shades and patterns add drama to bigger spaces.Consider using electric underfloor heating to add luxurious comfort and to dry excess moisture efficiently. Carefully align your floor tiles to suit any room ideas or fixture placements—misaligned patterns can quickly stand out, especially in rooms with natural light or open floor space. Seal porous tiles after installation and maintain grout lines for best long-term performance. Modern floor tiles are available in an array of stylish, hard-wearing options—ideal for busy family bathrooms or serene spa-inspired suites alike.Installing Bathroom Suite Elements: Tubs, Showers, and Vanity UnitsOnce tiles are set and cured, the most exciting stage of your bathroom reno begins: installing the new bath, shower enclosure, toilet, and vanity unit. Accurately measure the placement for all plumbing connections and double-check levels for sinks and baths. Modern freestanding tubs and walk-in showers are a popular choice in 2024’s bathroom trends, creating a feeling of openness and hotel-style luxury.When it comes to hanging mirrors, towel rails, and the final fixtures and fittings, always use specialist fixings designed for tiled walls. If you’re unsure about any structural or plumbing aspects, consult a professional. Your new bathroom is almost complete—now it’s time to see all your careful planning, design, and room ideas brought to life.Upgrading Fixtures and Fittings for Your New BathroomUpgrade your bathroom’s functionality and energy efficiency with smart, cohesive fixtures and fittings. Swap tired shower heads for rainfall or multi-function models, and look for water-saving taps and flush valves for environmental peace of mind. Choose lighting that enhances both safety and mood—mirror-mounted LEDs, dimmable spots, or sensor-activated under-cabinet lights elevate the daily experience in your new bathroom.Factor in thoughtful finishing touches: hooks, shelves, and towel warmers complete the new bath ambience. The right fixtures don’t just update looks—they guarantee easier cleaning, longer lifespan, and even reduced utility bills. Investing in quality fixtures and fittings is one of the most cost-effective moves in any bathroom renovation guide.The Final Stages: Bathroom Remodel Checks and Finishing TouchesAs your bathroom renovation guide nears completion, the last step is a thorough inspection and styling session. Look for perfect grout lines, quality sealing around the bath and shower head, and flawless functioning of every outlet. Test lighting, electrical work, and all fixtures and fittings—catching any issues now saves headaches later. A meticulous final inspection gives you confidence that your bathroom reno has met every expectation for style, performance, and comfort.Final Bathroom Renovation Guide Inspection: What to CheckTake a methodical walk-through, checking each aspect of your new bathroom in good light. Investigate every join and surface for leaks, loose tiles, or unfinished mastic. Test every water outlet, check for smooth drainage, and ensure electrical work (like extractor fans or mirror lighting) functions smoothly. Confirm all fixtures and fittings are securely mounted—including the shower enclosure and vanity unit. Addressing small snags now avoids trouble in the future and guarantees you get optimal value and enjoyment from your bathroom remodel for years to come.Styling Your Bathroom: Room Ideas for Ambience and ComfortPersonalise your space with accessories and thoughtful décor touches that complement your chosen paint colours and fixture styles. Fresh towels, decorative storage baskets, and greenery help soften harder surfaces and bring warmth and personality to your new bath. Consider adding subtle lighting—sconces or under-cabinet strips—for spa-like ambiance. The finishing touches, from premium soap dispensers to standout mirrors, transform the functionality of your bathroom reno into a daily pleasure and boost your home’s overall interior design appeal.Final Steps Checklist for Every Bathroom Reno:Inspect sealing and grout linesTest all water outletsClean and polish new fixturesAdd decor and storage solutionsPeople Also Ask: Your Top Bathroom Renovation Guide Questions AnsweredIn what order should you renovate a bathroom?Answer: The optimal order for a bathroom renovation typically follows these phases: planning/design, removal of the old bathroom suite, plumbing/electrical preparation, wall and floor prep (including waterproofing), installation of tiles, fitting the new bathroom suite and vanity unit, then finishing with final fixes and styling.What is a reasonable budget for a bathroom remodel?Answer: A typical UK bathroom renovation guide budget ranges between £3,000 and £10,000, influenced by the specification of the bathroom suite, wall/floor tile quality, room size, fixtures, fittings, and labour costs.What is the most expensive part of renovating a bathroom?Answer: The most expensive aspect of renovating a bathroom is usually plumbing/pipework modifications, followed by a new bathroom suite and premium wall or floor tiles.What are the steps when renovating a bathroom?Answer: Core steps: remove old bathroom, adjust plumbing/electrics, prep walls and floors, install tiles, fit bathroom suite and fittings, add finishing details.Frequently Asked Questions About Your Bathroom Renovation GuideHow do I choose the right bathroom design style?Select a bathroom design that aligns with your personal taste and your home’s overall style. Consider how you use the space—for relaxing, family routines, or quick morning starts. View design galleries online, create a moodboard, and factor in practical needs (storage, accessibility) before settling on a style. Blend timeless features with current bathroom trends for best results.Which materials last longest in a busy family bathroom?Porcelain and ceramic are the most durable choices for wall tile and floor tiles. Solid-surface or quartz vanity units and brass or stainless steel fixtures provide longevity and resist wear. Always choose waterproofed materials for wet zones and confirm product warranties. Quality materials mean less maintenance and longer life for your new bathroom.How can I minimise disruption during my bathroom reno?Plan your project in advance—work out a timeline, seek alternative bathing options during the disruption, and discuss logistics with your installer. If possible, keep one bathroom operational while renovating the other. Order materials and fixtures early to avoid delays and have all decisions made before work begins.What should I check before signing off on my new bath?Inspect for leaks, poor drainage, snags in electrical work, and loose fixtures and fittings. Ensure compliance with building regulations, check that all warranties and certificates are received, and confirm your new bathroom has been cleaned and finished to your standards before making the final payment.Key Takeaways from the Bathroom Renovation GuideMeticulous planning is crucial to a successful bathroom renoChoose durable fixtures and appropriate bathroom suitesBudget wisely – factor in installation and unforeseen adjustmentsDon’t overlook latest bathroom trends for a fresh lookWork with trusted professionals for peace of mindYour Next Steps: Start Your Bathroom Renovation with Expert Help"Transform your everyday routine and add value to your home with a well-executed bathroom renovation guide."Thinking About Renovating? Call Plumbrite today on 07933830316 or email: sales@plumbrite.org.ukStart your journey today—download this bathroom renovation guide and begin transforming your space with confidence and expert support from the Plumbrite team! Plumbrite, Battlehill Road, Portadown, Craigavon.

Terms of Service

Privacy Policy

Core Modal Title

Sorry, no results found

You Might Find These Articles Interesting

T
Please Check Your Email
We Will Be Following Up Shortly
*
*
*