Add Row
Add Element
UPDATE
Add Element

Your guide to modern living—every day.

  • Home
  • Categories
    • Wellness
    • Home and Garden
    • Work and Life
    • Travel
    • People and Style
    • Living Spaces
March 26.2026
1 Minute Read

Struggling with basement room addition planning? Here's Help

Startling Fact: Did you know that a well-planned basement room addition can increase your property’s usable living space by up to 50%? Yet, most homeowners underestimate the complexities involved, risking budget overruns and unmet expectations. This eye-opening fact underscores why strategic basement room addition planning is crucial from the very beginning.

"Did you know that a well-planned basement room addition can increase your property's usable living space by up to 50%? Yet, most homeowners underestimate the complexities involved, risking budget overruns and unmet expectations."

Modern cozy basement transformation with inviting family scene demonstrating successful basement room addition planning and extra space usefulness

Why Basement Room Addition Planning Sets the Stage for Successful Remodels

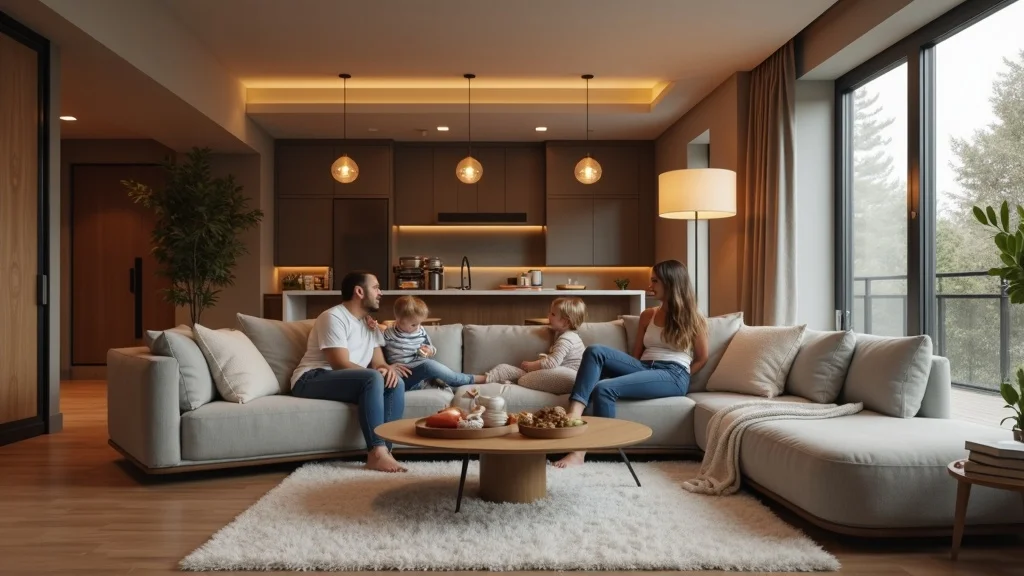
At Banner Construction, every incredible finished basement starts with a comprehensive plan. Whether you're envisioning a lively recreation area, an airy home gym, or a cozy home office, basement room addition planning is what sets leading remodel projects apart from the rest. Homeowners often dive into remodeling projects with excitement, only to face costly delays or discover their dream space doesn't meet local building codes or comfort requirements. Strategic planning not only maximizes your home's extra space, but also ensures your remodel stays on track—avoiding unpleasant surprises with structural needs or legal hurdles.

By focusing on details like basement floor plan optimization, natural light strategies, and ensuring all room addition elements are up to code, you set the groundwork for a seamless construction process. The result: a stunning and practical room addition that increases both your property value and daily enjoyment. Let’s take a closer look at why detailed planning is the foundation for a successful transformation.

What You’ll Learn in This Basement Room Addition Planning Guide

  • How detailed basement room addition planning paves the way for a seamless remodeling project

  • Insights into legal, structural, and design challenges unique to basement additions

  • Pitfalls to avoid during your basement remodel journey

  • Inspiring basement floor plan options for maximizing extra space

  • Expert advice from Banner Construction on successful room addition outcomes

Understanding the Essentials of Basement Room Addition Planning

What Makes Basement Addition Planning Unique?

Unlike other home additions, finishing a basement is uniquely challenging—and rewarding. Basements often start as blank slates, yet they also present issues like low ceilings, limited natural light, concerns about moisture, and strict building code requirements. Effective basement addition planning anticipates these hurdles, weaving in solutions from the start. Considering how your future extra space—be it a wet bar, home gym, or even a wine cellar—will integrate with your home means thinking about access, lighting, and usage patterns long before construction begins.

By working with professionals like Banner Construction, you gain the benefit of experience in remodeling projects that demand specialized knowledge. The right team brings proven methods for water management, structural adaptations, and creative design to the table. This foresight protects your investment, making sure your new room functions, feels, and looks amazing for years to come.

Assessing Your Existing Basement Floor and Structural Requirements

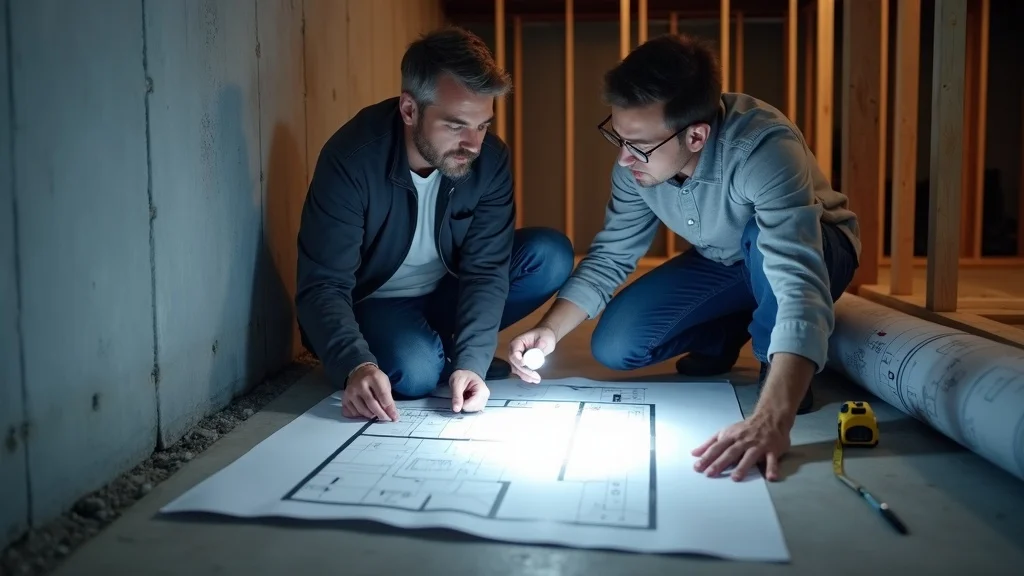
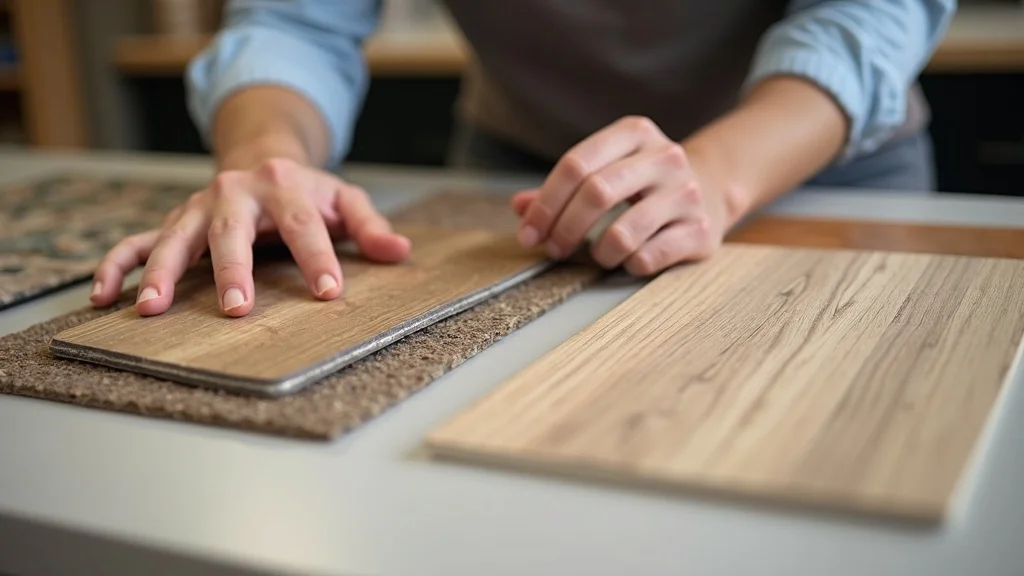
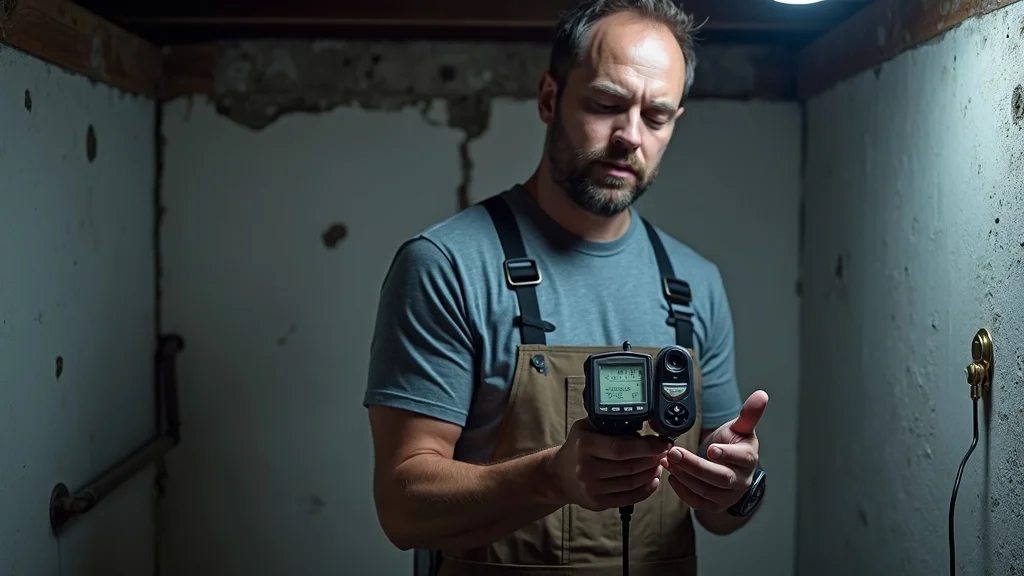
The foundation of every successful basement remodel is a thorough assessment of the basement floor and surrounding structure. Professionals will inspect your foundation walls, joists, and concrete for signs of water intrusion, settling, or damage. This critical step ensures your remodeling project doesn't encounter costly surprises—such as the need for additional reinforcement or moisture mitigation. Flooring choices like vinyl plank, ceramic tile, or even rubber flooring for a home gym depend on the existing condition and elevation of your basement floor.

A detailed inspection maps out where new walls, egress windows, or staircases will go, ensuring your final floor plan makes the most of every square foot. Banner Construction emphasizes this phase, recognizing that addressing structural and water management issues up front saves substantial costs and headaches later.

Detailed basement floor assessment for room addition planning with homeowner and contractor reviewing blueprints and structural requirements

Benefits of Professional Basement Remodeling Project Management

Managing a basement remodeling project is a full-time commitment. Entrusting this task to seasoned professionals ensures open communication, predictable timelines, and a cohesive vision from design through build. An expert project manager like those at Banner Construction coordinates all aspects—from obtaining permits and managing inspections, to synchronizing contractors and managing material deliveries. This level of oversight is especially essential in room addition projects beneath ground, where complexity increases exponentially.

Professional management means fewer delays, minimized risk of overlooked code requirements, and constant updates on your project’s status. Banner Construction’s decades of experience translates to peace of mind for discerning homeowners, letting you focus on the excitement of envisioning your upgraded space.

Legal Considerations: Navigating Building Codes for Basement Addition and Room Addition Projects

Ensuring a Legal Bedroom: Basement Addition Egress, Lighting, and Ventilation Standards

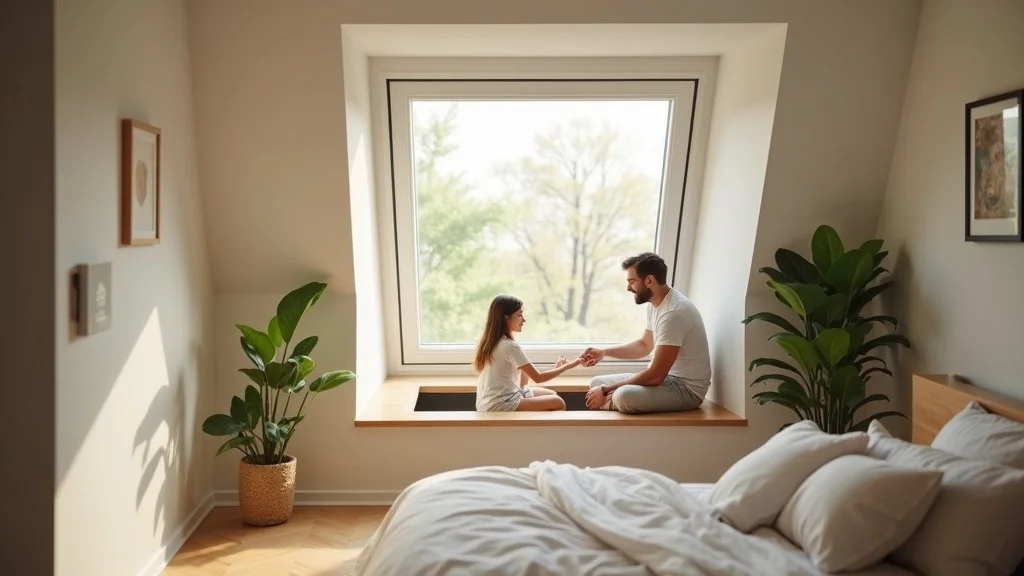
If your basement addition includes a bedroom, you must adhere to strict building code rules—primarily concerning egress windows, ventilation, and natural light. A compliant egress window enables safe escape in emergencies and incorporates the minimum width and height requirements dictated by your local building authority. Additionally, proper ingress of natural light and adequate ventilation transform the space from dark and stuffy to livable and inviting. Mechanical ventilation systems or increased window area may be required to meet code.

Planning for these essentials early on prevents costly last-minute changes. Banner Construction’s approach ensures every room addition—from basement bedroom to home office—meets or exceeds requirements, passing inspections and creating rooms your family (and future buyers) will love.

Safe and stylish basement egress window for legal basement bedroom addition, with natural light and effective ventilation

Dealing with Permits and Inspections for a Safe Basement Remodel

Every remodeling project requires the right permits before work begins. Navigating the local permit process for a basement addition or room addition involves submitting detailed plans, scheduling inspections, and ensuring all construction phases comply with code. Skipping steps or neglecting documentation can halt your basement remodel and may even require tearing out finished work.

Experienced firms like Banner Construction have established rapport with local building inspectors, guiding your project confidently through each checkpoint. This built-in expertise keeps your project progressing smoothly, while protecting your investment against potential legal pitfalls.

Designing Your Dream: Basement Floor Plan, Natural Light & Popular Room Addition Ideas

Basement Floor Plan Essentials: Maximizing Usable and Extra Space

Creating a functional and beautiful basement floor plan is both an art and a science. Begin by evaluating your household's needs: Do you crave a dedicated home gym? A private home office? Or a welcoming recreation area and wet bar for entertaining? Smart basement room addition planning configures walls, doorways, and lighting to support your vision, while leaving space open and inviting.

Today's top basement design strategies emphasize open concepts, flexible zones, and clever integration of natural light—even with basement-level limitations. Utilizing glass doors, mirrored surfaces, and well-placed light fixtures can make the space feel welcoming and expansive. By proactively mapping out furniture, storage, and pathways, you’ll create a floor plan that elegantly merges form and function.

Inspiring basement floor plan consultation, designer sharing open layout ideas with homeowners to maximize extra space and usability

Creative Basement Design Solutions for a Home Office, Gym, or Wet Bar

Basements offer incredible potential for specialty rooms that enhance your lifestyle. A glass-walled home office combines privacy with connectivity; rubber flooring and mirrored walls convert unused corners into a motivating home gym. Looking to entertain? Consider a custom wet bar with storage for a prized wine collection, or a game room that doubles as a cozy home theater. These basement ideas are becoming increasingly popular with clients seeking flexible, future-proof spaces.

Banner Construction’s expertise helps you select finishes—like plush carpeting, luxury vinyl plank, or durable ceramic tile—tailored to each function. Integrate built-in shelving, ambient lighting, and modern color palettes to make the space feel inviting and harmonious. Whether you prioritize work, play, or relaxation, thoughtful basement design transforms extra space into something uniquely yours.

Comparison Table: Pros and Cons of Different Basement Remodel Room Functions

Room Function

Pros

Cons

Home Office

Quiet; private; customizable lighting; increases home value

May need added ventilation and egress; concerns about natural light

Home Gym

Convenient; safe; flooring can be customized (rubber, vinyl plank); saves gym fees

May require reinforcement for equipment weight; needs soundproofing

Bedroom

Increases usable space for guests or family; adds potential resale value

Strict egress and lighting regulations; may need additional insulation

Wet Bar

Perfect for entertaining; can include wine cellar or game room; enhances aesthetics

Needs plumbing; may not be practical for all families

Recreation Area

Flexible use; ideal for home theater, family game nights, or playroom

Open floor plan needed for versatility; needs lighting and noise control

Key Budget Strategies for Basement Room Addition Planning

Breaking Down the Basement Remodeling Project: Its Costs, the 30% Rule, and Where to Save or Splurge

Savvy homeowners know that successful basement room addition planning also means setting a smart, realistic budget. The “30% rule” is a useful baseline: don’t spend more than 30% of your home’s appraised value on any addition or significant remodeling project. From there, allocate your funds based on must-haves (structural upgrades, waterproofing, egress windows), nice-to-haves (high-end lighting, custom built-ins), and future upgrades (a wet bar or high-tech home theater).

Material selection adds another layer of opportunity to balance cost and style. Choose durable, moisture-resistant options for your basement floor—like vinyl plank for durability and value, or ceramic tile for polished luxury. Banner Construction recommends budgeting in phases: focus first on structural and safety features, then finishing, and finally custom enhancements. Planning out these phases, and knowing where to save or splurge, ensures you’ll never need to cut corners or compromise on your vision.

  • Material selection tips for cost-effective remodeling

  • Project phases: finishing the basement floor, lighting upgrades, optimizing floor plan

Thoughtful material selection for cost-effective basement remodeling, homeowner considering flooring options including vinyl plank and ceramic tile

Steps for a Successful Basement Remodeling Project: From Blueprint to Finished Space

Working with Professionals: Why Banner Construction Excels at Basement Addition Planning

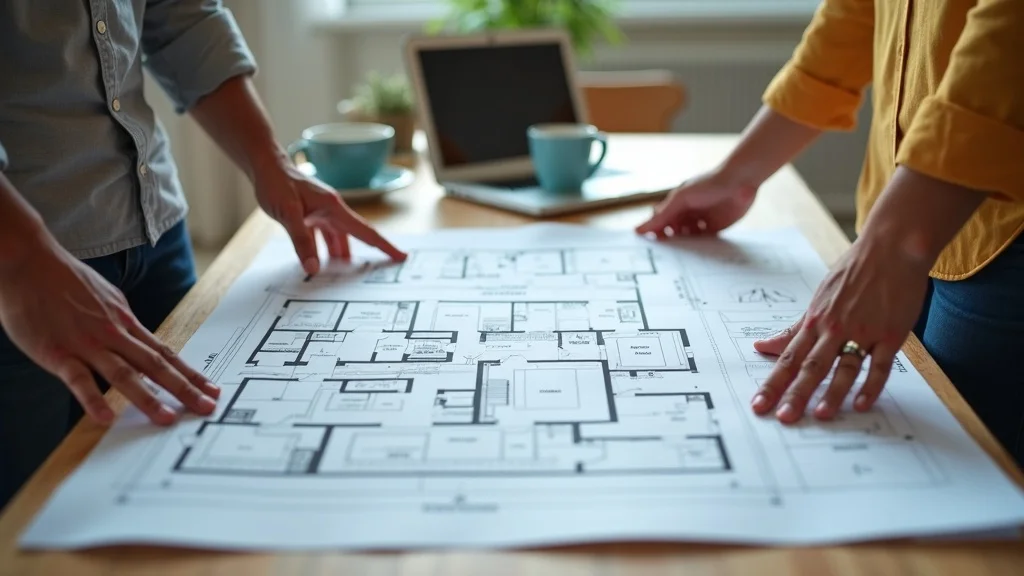
From initial basement floor plan consultation to final walkthrough, partnering with Banner Construction means you have experienced guides at every stage. Professional insight ensures your design ideas fit both your needs and the realities of your home’s structure and code requirements. Clients often remark on Banner’s attention to detail—from capturing your vision in detailed architectural plans to translating them into finished spaces that deliver luxury, functionality, and long-term value.

A collaborative process means you’re never in the dark about timelines, milestones, or decisions. Expect clear communication about the reasons behind each proposed floor plan, materials recommendation, and project adjustment—ensuring your remodel journey is smooth, transparent, and enjoyable.

Timeline and Milestones for a Room Addition or Basement Remodeling Project

A professional remodeling project follows a sequence of milestones. Kickoff starts with design consultation and feasibility checks, followed by planning and permitting. Construction—from framing and insulation to flooring and finishes—progresses according to a detailed schedule. Inspections are integrated throughout, and Banner Construction keeps you updated every step of the way.

Realistic timelines help you plan family schedules, protect your investment, and avoid major disruptions. From blueprint to reveal, expect most basement addition projects to run an average of several weeks to a few months, depending on complexity and customization.

People Also Ask: Essential Questions About Basement Room Addition Planning

What is the 30% rule in remodeling?

The 30% rule advises that you should not spend more than 30% of your home's current value on a remodeling project, including a basement addition. This guideline helps keep your investment aligned with expected returns and protects against overspending in relation to your home’s market value.

How much does it cost to build a 12x12 room in a basement?

Costs for building a 12x12 basement room can vary widely, depending on materials, finishes, and whether you need structural upgrades or special features like an egress window. Consulting professionals ensures accurate pricing based on your basement’s condition and code requirements.

Is it legal to put a bedroom in a basement?

Yes, but only if the bedroom meets strict building code standards—especially relating to egress, ventilation, and natural light. Properly planned and permitted room addition projects ensure your finished basement bedroom is safe, legal, and comfortable.

How much does it cost to do a basement addition?

The cost of a basement addition depends on project scope, the condition of the existing basement floor and walls, and the quality of finishes you choose. Professional guidance from a company like Banner Construction gives you a clear breakdown tailored to your needs.

Common Basement Room Addition Planning Mistakes to Avoid

  • Neglecting detailed floor plan preparation

  • Failing to address moisture control in the basement floor

  • Ignoring local codes in your basement addition or remodeling project

  • Overlooking natural light solutions

  • Underestimating renovation timelines and costs

Basement planning mistakes to avoid, contractor using moisture detection tools on damp basement floor during room addition planning

Top Trends in Basement Room Addition Planning and Basement Remodel Design

Innovative Materials and Technology in Basement Floor and Extra Space Design

Homeowners are increasingly drawn to modern materials that offer both style and superior function—like luxury vinyl plank flooring for water resistance, or advanced lighting solutions that mimic daylight, making below-grade room addition spaces bright and inviting. Home automation systems and soundproofing materials turn even a lower-level game room or home theater into a high-tech haven. Durable finishes cater to busy family life while maintaining sophisticated aesthetics.

Innovations continue to emerge—thermally insulated flooring systems, eco-friendly wall panels, and multi-zone HVAC designed specifically for basement additions. These upgrades support comfort, energy savings, and resale value for discerning homeowners.

Flexible Basement Floor Plans for Changing Family Needs

Flexibility stands out as a major trend in basement room addition planning. Multi-functional spaces—where a home office converts to a guest room, or a recreation area transforms into a yoga studio—let families adapt as needs change. Features like movable partitions, custom shelving, and convertible furniture help maximize the long-term value of your Extra Space.

Banner Construction’s design team emphasizes the importance of planning for future lifestyle shifts when developing any basement floor plan. Whether accommodating growing children, visiting relatives, or remote work, a flexible design framework future-proofs your room addition.

"Our clients increasingly ask for multi-functional basements—family spaces by day, guest suites by night. Planning is the cornerstone." — Banner Construction Design Team

FAQs About Basement Room Addition Planning

  • What are the first steps in planning a basement remodel?
    Assess your basement’s condition, research local building codes, set your project goals, and partner with professionals like Banner Construction for expert planning.

  • How can I maximize extra space in my basement floor plan?
    Use open-concept layouts, strategic lighting, and multi-functional rooms to get the most out of every square foot.

  • Does my basement addition need a separate HVAC system?
    Often, yes. Consult with HVAC specialists to ensure proper temperature control and air quality in your new space.

  • What permits are required for a basement addition?
    Most projects need building, electrical, and plumbing permits. Banner Construction can guide you through each step.

  • How does basement design affect resale value?
    A thoughtful, code-compliant design, created with professional help, can add significant value by increasing livable space and appeal to prospective buyers.

Key Takeaways: The Benefits of Expert-Guided Basement Room Addition Planning

  • Detailed basement room addition planning prevents costly mistakes and ensures your space meets legal, safety, and aesthetic standards

  • Collaboration with experienced remodeling professionals, like Banner Construction, helps you maximize your investment and personal satisfaction

  • Smart room addition and floor plan choices can transform your basement into a true extension of your lifestyle

Ready to Start Your Basement Room Addition Planning? Call Us Today at (314) 648-2368

Transform your basement into the living space of your dreams. Contact us at Banner Construction to start planning your expert-guided basement room addition today!

Home and Garden

0 Comments

Write A Comment

*
*
Please complete the captcha to submit your comment.
Related Posts All Posts
03.22.2026

From Gray to Warm Neutrals: The Emotional Shift in Home Design

Update Moving Beyond Gray: Crafting Warm and Inviting Spaces For over a decade, the interior design world was dominated by an aesthetic referred to as the 'all-gray era.' This trend featured cool gray tones on cabinetry, walls, and flooring, appealing to a broad audience looking for a sleek, modern look. However, as lifestyles evolve, so do the preferences in home aesthetics. Today, more and more homeowners are turning away from stark grays, leaning into warmer color palettes that evoke comfort and personal expression. The Rise and Reign of Gray The emergence of gray in home design can be traced back to the early 2010s. In the aftermath of the recession, builders and homeowners gravitated toward cooler monochromatic tones for their versatility and broad appeal. The gray palette surpassed beige, which had been the neutral favorite of the early 2000s. With a clean, modern feel, gray was the darling of home renovation television shows and social media platforms alike. Its clean lines and ability to accommodate a variety of styles made it an attractive choice for many developers. The Shift to Warm Neutrals As time progressed and especially during the COVID-19 pandemic, people began longing for environments that felt more comforting and personalized. This desire has catalyzed a distinctive departure from cold, gray spaces to those filled with warmth. Designers are reporting an increased preference for cozy color schemes that include soft taupes, creamy whites, and earthy undertones. These hues not only fulfill a functional purpose but also trigger emotional and psychological comfort, as numerous studies in environmental psychology have suggested. The Intent Behind Warm Palettes Many design professionals are now embracing warm neutrals as a means of setting the emotional tone within spaces. Charlotte and Angus Buchanan of Buchanan Studio advocate that warm neutrals should not merely serve as backgrounds but as intentional frameworks that guide the atmosphere of a room. By layering textures and materials, they emphasize that even a muted color scheme can be rich and multifaceted, allowing for creativity and authenticity to shine through. Textures play a pivotal role in achieving depth and interest in warm neutral designs. Elements like wood accents, natural stones, and varied fabrics add visual interest, while soft metals can introduce a touch of elegance without disrupting the serene color scheme. This nuanced approach encourages homeowners to think about how each element can contribute to a soothing environment. Layering Techniques for an Enticing Neutral Scheme When designing with warm neutrals, strategizing how different shades play against each other becomes essential. Experts from Spacejoy highlight the importance of starting with a neutral base, adding warm accents, and ensuring that various textures blend harmoniously. Lighting, too, cannot be overlooked; soft, warm lighting illuminates these neutral shades beautifully, enhancing the overall cozy ambiance. How To Embrace the Trend Homeowners looking to transition from gray to warm neutrals can employ several strategies. Starting with walls in shades of creamy beige or soft taupe sets a solid foundation. From there, integrating furniture in wood or muted metallic can create an inviting atmosphere. Layering different materials such as lace, wool, and textured fabrics warms up any living space, making it feel distinctly personalized and welcoming. Conclusion: A Return to Comfort As the design community embraces this shift, it invites everyone to reconsider the spaces they inhabit. With the feel of home evolving to encompass warmth, richness, and personalization, it's a wonderful time to reinvent living spaces. Moving from cooler tones to warmer neutrals not only enhances aesthetic appeal but also nurtures emotional well-being. As we advance toward 2025, there is immense promise in exploring how warm neutrals can become a cornerstone of modern living.

03.13.2026

How to Pigtail Electrical Wires: Step-by-Step Guide for Safe Home Wiring

Opening Inquiry: Why Is Knowing How to Pigtail Electrical Wires Crucial for Homeowners?Have you ever flicked a light switch and noticed the lights flicker—or worse, lost power to half your room when an outlet failed? Electrical issues often hide behind the walls, but one essential skill—knowing how to pigtail electrical wires—can help prevent these problems from spiraling into hazards. Whether you’re renovating, upgrading outlets or switches, or simply ensuring your home wiring is up to code, mastering the electrical pigtail process brings safety, reliability, and peace of mind that every homeowner needs."Hey good morning and hey howdy we're here today and we're going to do some pigtailing." – James Adams, Master ElectricianWhat You'll Learn in This Guide on How to Pigtail Electrical WiresDefinition and basics of electrical pigtail connectionsWhy you should make an electrical pigtail for outlets or switchesPreparation, tools, and essential safety checksStep-by-step instructions for making an electrical pigtailCommon mistakes and code compliance tips from a master electricianHow pigtailing ensures safety, longevity, and reliability in home wiringWhat Is an Electrical Pigtail? Understanding How to Pigtail Electrical Wires"So pig tailing is when we have a device and... we're adding another set of wires and... not enough spaces to add all those wires." – James Adams, Master ElectricianAn electrical pigtail is a fundamental wiring technique used when you need to connect several wires to a single outlet or switch, but the device’s terminals don't allow for multiple conductors. The process involves taking short lengths of wire—called pigtails—and using a wire nut to join them with the existing grouped wires in the electrical box. The pigtail then connects individually to the device. This method is common in both new construction and when repairing older homes, helping distribute power safely and ensuring each connection remains secure and code-compliant.If, for example, you’re adding a device to your electrical circuit and quickly discover that there aren’t enough terminal screws on the outlet or switch, or if you notice doubled or overloaded terminals while replacing an outlet, pigtailing is the right solution. James Adams explains, "You'll see wires doubled up under screws, which is wrong. . . stuff forced into the back end that’s too large. " By creating an electrical pigtail, you bypass these common mistakes—making your wiring safer and easier for future troubleshooting.Why and When to Make an Electrical PigtailUse pigtails when outlets or switches have more wires than their terminals can safely handle.Address overloaded terminals or multiple conductors under a single screw—a violation of the National Electrical Code (NEC).Examples include adding a new device, correcting doubled wires under screws, or ensuring circuit continuity in older wiring.Pigtailing is not just a matter of convenience—it’s about code compliance and safety. The electrical code prohibits attaching more than one wire to a single terminal, and using wire nuts to make fresh connections with short pigtail wires ensures nothing gets crowded. This is especially important when you upgrade an outlet or switch (like installing a GFCI), or when previous DIY repairs leave tangled or doubled-up black or white wires. The result is a tidy, professional installation that enhances circuit reliability throughout your home.How Does Making an Electrical Pigtail Work?Short pigtail wires are twisted together with existing black, white, or ground conductors using a new wire nut, then attached as single wires to device screws.Pigtails allow circuits to remain continuous—if the outlet or switch fails, power still flows on to other outlets or switches downstream.Pigtail connections prevent voltage drop and loose connections that can cause flickering lights or dangerous overheating.When you make an electrical pigtail, you effectively give each device its own dedicated connection to the shared black (hot), white (neutral), or green/bare (ground) wires. This avoids the risk of loose connections that can occur if too many wires are backstabbed or doubled under one screw. With exposed copper strands properly twisted and secured under a quality wire nut, you get a fail-safe junction that’s easy to check, retighten, or replace as needed. Properly made pigtails ensure that when you push the grouped wires back into the electrical box and later need to install a new outlet or switch, everything stays organized and safe.Benefits of Pigtailing Outlets or Switches"If you have an older house a lot of times pig tailing will get rid of loose connections and voltage drop." – James Adams, Master ElectricianEliminates flickering or intermittent power caused by loose connections in outlets or switchesMeets NEC and local electrical code requirements by separating conductors and ensuring safe, single-wire connectionsPrevents a single failed outlet from cutting off power to devices downstream in the circuitProper pigtailing means fewer flickering lights and surprise outages. As Adams describes, “When you use the plug to hold the wires, if the plug fails then everything that's going out of this box will drop. . . [but with] pigtails with wire nuts, even if this plug fails the worst that's going to happen is this plug will go dead but everything that goes out of here will stay on. ” This alone makes it invaluable for both older homes and new installations—ensuring not just code compliance but peace of mind for every homeowner.Preparation and Essential Safety: How to Pigtail Electrical Wires Safely"I advise you... once you take off your plug... take a meter and let's make sure we have no power." – James Adams, Master ElectricianTurn off power to the circuit at the breaker panel; always verify with a voltage tester.Use a multimeter or non-contact voltage tester to check for live wires before touching anything.Gather all necessary tools: wire strippers, pliers, wire nuts, voltage tester, and correctly sized wires for your pigtails.Cut your pigtail wires to the recommended length (typically 6” or longer) and ensure they match the existing wiring’s gauge and insulation.Trim, strip back the ends, and align all wires evenly for a neat, safe connection.Safety cannot be overstated when working with electrical wiring. “Once you take off your plug and you’re going to do this, take a meter and let’s make sure we have no power. . . I’m not going to kill myself today at least not on video,” says Adams. Double-checking ensures you’re not at risk of electric shock, especially in boxes where previous repairs or junctions may have left live wires connected. Always make fresh connections whenever possible, never reuse old wire nuts, and ensure grouped wires are twisted securely before capping.Complying with Code and Ensuring Strong ConnectionsElectrical code requires at least 6” of wire extending from the front edge of the electrical box for safe hookup.Never reuse old or damaged wire nuts; always use a fresh, appropriately sized nut rated for the gauge and number of wires in your pigtail.Ensure all wire bundles are tightly twisted and the copper is fully covered by the wire nut for a secure, reliable connection that will not loosen over time.A code-compliant electrical pigtail depends on neatness and secure connectors. "By code, we're supposed to have at least six inches outside the front of the box. . . you want as much as you can get comfortably," Adams stresses. Equally important is the quality of every connection: “Don’t reuse old wire nuts—you’re going to cause future problems. " When in doubt, replace questionable materials and strive for bundles that are tight but not overstressed, with no exposed copper visible beyond the wire nut.Common Tools and Materials for Making an Electrical PigtailTool/MaterialPurpose/UseWire strippersRemoving insulation from wiresPliersTwisting wires togetherWire nutsSecuring the pigtail junctionVoltage testerConfirming power is offAppropriate gauge wireCompliant with circuit amperageGathering the right tools—like quality wire strippers for stripping back the ends, sturdy pliers to twist the wires, and appropriately rated wire nuts—ensures your connections are strong. Make every electrical pigtail as solid and safe as possible, with tools ready and tested for reliability.Step-by-Step Instructions: How to Pigtail Electrical Wires"So this is pig tailing we've taken three three wires and then we added the tail the pigtail there you go so the ground is now pigtailed okay." – James Adams, Master ElectricianPrepare the work area: Turn off power and verify with a tester no longer showing voltage.Trim and strip back the ends of existing wires for a fresh, even starting point.Twist together all ground (bare copper or green) wires, then add a ground pigtail lead and secure with a new wire nut.Repeat for neutral (white) wires and hot (black) wires, aligning insulation and exposed copper for a tidy bundle. Use a separate pigtail for each type.Trim pigtails to the proper length (at least 6”), ensuring they’ll fit neatly onto device screws without excess slack or tension.Carefully loop each pigtail lead clockwise around the device terminal screws (outlet or switch), so tightening the screw draws the wire in securely.Finish by neatly folding or pushing the grouped wires back into the electrical box, securing devices, and checking for neatness and tightness throughout."You want to do it in tight enough so that your wires and your bundle start to twist with it to that point it's tight enough it's not going anywhere okay." – James Adams, Master ElectricianEvery step of making an electrical pigtail is about dependable connections. Start by killing power and checking with your voltage tester—never skip this safety step. As Adams notes, “We’re going to cut these off. . . make my own connections, don’t be lazy. . . You need to learn how to strip wire. " Align your black and white wires, trim the ends for fresh contact, then twist the grouped wires with pliers until they’re firmly bound. Cap each with a new wire nut and tug gently to check for tightness. After looping the pigtails onto device screws, tuck the bundled wires back into the electrical box for a professional finish.Detailed Tips and Troubleshooting from a Master ElectricianAvoid backstabbing wires into devices—particularly #12 gauge wire, which is not code-compliant and can loosen over time.Check that wire bundles are neat, even, and free of stray copper to reduce risk of shorts or unreliable power.Always tighten any unused terminal screws on outlets or switches to keep them from accidentally contacting loose wires inside the box.Attentive, neat workmanship is crucial. Adams emphasizes correcting mistakes rather than settling for poor connections: “So instead of just mashing a wire nut on it and hoping it stays connected. . . we’re going to do it again. ” Always double-check your twists, keep the connections tight, and when you’re ready to install a new outlet or switch, make sure everything is lined up and back the ends into the box carefully. Good habits now will prevent hours of troubleshooting later.Applications and Variations: Where to Make an Electrical PigtailSwitch boxes: For adding switches, switch legs, or new lights, pigtailing the neutrals or hots keeps wiring neat and code-compliant.Outlets: Use pigtails to correct doubled conductors under screws, to install GFCI outlets, or for daisy chaining multiple outlets together safely.Panels and junction boxes: Ensures circuit continuity and allows future devices to be added without disturbing existing wiring."The pig tailing saves a lot of future problems and it makes sure even on new construction it makes sure that your power is continuous all the way through okay." – James Adams, Master ElectricianProperly installed pigtails make adding or moving devices easy, allowing you to make fresh connections whenever an upgrade is needed—without risking code violations or the trouble of losing power in rooms downstream if a single device fails. This versatility is essential for both DIYers and professionals aiming to make an electrical pigtail that stands the test of time.People Also Ask: Expert Answers on How to Pigtail Electrical WiresHow long should pigtail wires be?Electrical code typically requires a minimum of 6 inches extending from the box, but pigtails should be long enough to attach easily to terminals without excessive slack.For best practice, each pigtail wire should be at least 6 inches long—enough to install comfortably but not so long as to create a tangle inside the box. This length ensures compliance with the NEC and leaves enough wire for future work if an outlet or switch needs replacing.Do you have to pigtail outlets by code?NEC requires that wires are not doubled (more than one conductor) under a single terminal screw. Pigtailing outlets ensures code compliance by creating separate, safe connections.Pigtailing is no longer just a best practice—it’s a code issue. Modern outlets and switches only allow one wire per terminal, so making an electrical pigtail is not only safer, but required to prevent code violations and potential insurance issues in the event of a fire or electrical failure.Can I pigtail a neutral wire?Yes, neutral wires can be pigtailed, especially when multiple circuits or devices share a junction. Always use a wire nut rated for the number and gauge of wires.Pigtailing neutral (white) wires is recommended when connecting multiple outlets, switches, or fixtures. Just ensure the wire nut is sized correctly to handle the grouped wires back and securely covers all exposed copper.How to make a pigtail for an electrical outlet?Cut a short piece of wire (matching gauge), strip ends, twist with existing wires, and secure with a wire nut. Attach the pigtail lead to the outlet terminal.The steps are easy: cut and strip a length of same-gauge wire, twist it together with existing black, white, or ground wires, cap with a fresh wire nut, loop the lead around its terminal, and you’re ready to install your outlet or switch.Frequently Asked Questions on How to Pigtail Electrical WiresIs aluminum wiring safe for pigtailing?How do I choose wire nut size for pigtails?What are signs of a bad pigtail connection?Can you mix wire gauges in a pigtail?How do you secure multiple grounds in a metal box?If you’re dealing with aluminum wiring, you’ll need special connectors and anti-oxidant paste—consult a licensed electrician. Always match your wire nut to the gauge and number of wires in the bundle (the packaging will specify), and check for signs of bad pigtails such as loose outlets, flickering lights, or heat at the wire nut. Mixing wire gauges in a pigtail can be risky; stick to same-gauge where possible, or use a nut specifically rated for mixed sizes. For multiple grounds in a metal box, always bond the ground pigtail securely to the box before attaching the outlet or switch for maximum safety.Summary: Key Takeaways on How to Pigtail Electrical WiresAlways turn off power and verify safety before starting any wiring work.Pigtailing prevents code violations, loose connections, and downstream power loss.Use proper tools, correct wire gauge, and approved wire nuts on every electrical pigtail.Neat workmanship and tight connections ensure dependable, long-lasting electrical wiring.Next Steps: Safely Upgrade Your Home Wiring—Contact a Licensed Electrician for How to Pigtail Electrical WiresIf you’re uncertain about making an electrical pigtail or your project involves aluminum, old, or complex wiring, don’t take chances—reach out to a licensed electrician. Solomon advice: Make safe home wiring your priority.

03.10.2026

Transform Your Basement into a Space for Craft and Creativity in DC

Update Revolutionizing Basements: From Forgotten Space to Functional Artistry Basements often linger as the most neglected area of homes, particularly in cities like Washington, DC, where space is always at a premium. Traditionally viewed as storage areas or dark dungeons filled with forgotten boxes, these spaces are now being recognized as untapped potential for living. One such transformation can be seen in a recent project undertaken in an architectural gem of a home in the heart of DC. Understanding the Basement Renovation Journey The homeowners, seeking to convert their basement from a forgotten zone into a vibrant extension of their home, faced several challenges: low ceilings, limited natural light, and a stairway that made access difficult. They envisioned a multifunctional space that would serve as a bedroom, a family lounge, and a special dedicated area for crafts and creativity. Partnering with designer Lisa Magee, the BOWA team embarked on a transformation that would reimagine how they utilized their basement. Key Renovation Strategies for Success One of the most critical strategies was undermining the existing foundation to create full ceiling height. This step unlocked the space, allowing it to feel less like a basement and more like an integrated part of the home. Additionally, larger windows were incorporated to flood the area with natural light, while mechanical systems were reconfigured to improve access and flow. The result? A bright and welcoming environment that was both functional and visually appealing. The Heart of Creativity: A Dedicated Craft Room At the very heart of this renovation lies a spacious craft room, designed for inspiration and productivity. With semi-custom cabinetry and a large central island, the space is organized for optimal workflow, complete with ample storage for materials and tools. Such purposeful design fosters an environment where creativity can flourish, resonating with a growing trend of making home spaces not just functional but also inspirational. Beyond a Craft Room: Multifunctional Living Spaces Beyond creativity, the renovated basement includes features to enrich family life. The addition of a new bedroom with egress and a full bathroom elevates the basement's functionality, accommodating guests or providing private space for family members. The lounge area, furnished with comfortable seating and aesthetic finishes, encourages family gatherings and casual hangouts. Financial Sense: The Benefits of Renovation Investing in a basement renovation not only enhances daily living but also adds significant value to the property. Industry data suggests that a well-executed basement remodel can recoup 60-70% of its costs during resale. This is particularly true in competitive neighborhoods like Capitol Hill, where buyers appreciate additional livable space. As residents increasingly seek flexible layouts to accommodate modern lifestyles, a finished basement can provide the extra square footage that families need without costly expansions. Learning from Successful Transformations Transforming basements into usable spaces is not just a personal endeavor; it's part of a broader trend where urban homeowners maximize their property potential. Real-life examples, such as the trendy English basements emerging in DC, show that dedicated living quarters—like home theaters, guest suites, or playrooms—can elevate family functioning while keeping aesthetics in check. These spaces promote harmony and creativity in the home, supporting various activities that reflect the evolving needs of families. Common Challenges and How to Overcome Them While undertaking a basement renovation, several key challenges must be addressed. Moisture and ventilation are common issues; ensuring proper drainage and installing high-efficiency exhaust systems are vital to maintaining a healthy environment. Moreover, obtaining the necessary permits is crucial—especially in a regulated area like Washington, DC where local compliance mandates can impact a project’s success. Conclusion: Your Basement Awaits For homeowners in Washington, DC, the opportunity to transform basements into functional artistic spaces is not just feasible; it’s a reality that many are embracing. Whether you’re looking to create a haven for creativity or simply enhance your living space, considering a basement remodel could lead to the most rewarding investment in your home. If you are inspired by what you’ve read, take the next step and consult with an expert to start your basement transformation journey today.

Terms of Service

Privacy Policy

Core Modal Title

Sorry, no results found

You Might Find These Articles Interesting

T
Please Check Your Email
We Will Be Following Up Shortly
*
*
*