Add Row
Add Element
UPDATE
Add Element

Your guide to modern living—every day.

  • Home
  • Categories
    • Wellness
    • Home and Garden
    • Work and Life
    • Travel
    • People and Style
    • Living Spaces
March 27.2026
1 Minute Read

How to prevent mold growth after a flood event?

Did you know that the real danger after flooding isn’t what you can see—but what you can’t? When water invades your home, the risk of a mold outbreak rises dramatically, threatening your belongings, air quality, and long-term health. Even minor floods can spark a hidden crisis, turning safe spaces hazardous in just a few days. Don't let mold take over—discover how to proactively prevent mold growth after a flood and safeguard your home and your family with proven strategies and expert guidance.

Unlocking the Mystery: Why Mold Growth After a Flood Demands Immediate Action

Whenever your home experiences a flood, whether from a burst pipe, heavy rain, or storm surge, the threat of mold growth after a flood becomes urgent and real. Mold only needs moisture, warmth, and a food source—all readily present in damp, water-damaged environments—to begin thriving. Ignoring the early signs or delaying action may lead to a swift mold outbreak, complicating cleanup and causing persistent health problems for those exposed to mold spores in your living space. Mold not only damages property but jeopardizes the respiratory health of everyone, especially those with compromised immune systems.

Acting fast is crucial. Within as little as 24-48 hours, mold can establish colonies on wet materials, making rapid response the best way to prevent mold from spreading throughout your home. The Environmental Protection Agency (EPA) suggests removing moisture and starting the cleanup process right away. Failure to address moisture content promptly invites not only unpleasant odors but also hidden mold or mold lurking behind walls or under flooring. Understanding these dangers motivates homeowners to act quickly and even call for professional mold remediation if the situation gets out of hand.

Worried homeowners inspecting water-damaged living room after a flood, observing for mold growth

What You'll Learn in This Guide to Mold Growth After a Flood

  • The science behind mold growth after a flood
  • Step-by-step actions to take immediately after flooding
  • Tools and products to prevent a mold outbreak
  • Common mistakes to avoid when handling water-damaged areas
  • How to spot the 10 warning signs of mold toxicity
  • When professional help is needed

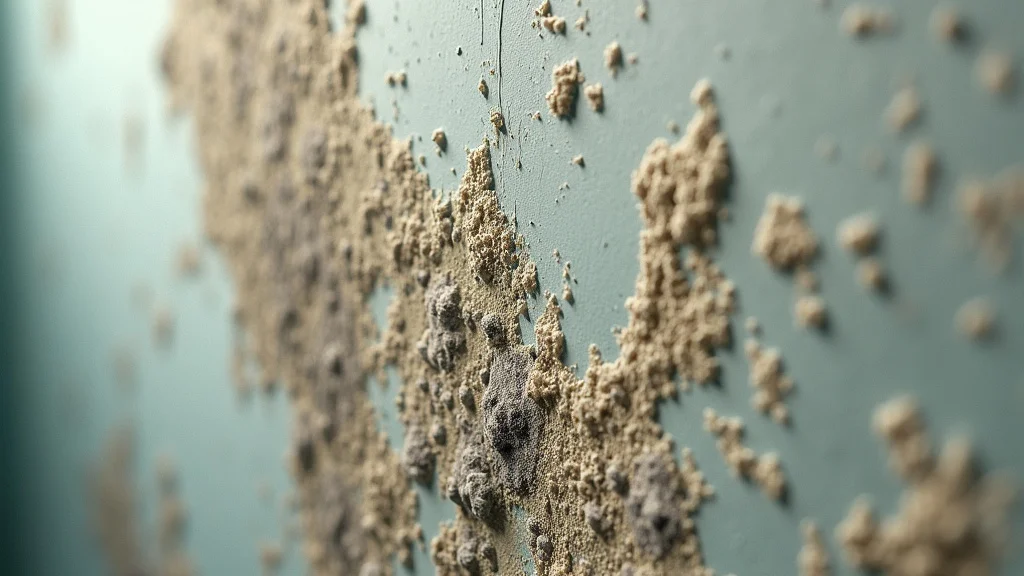
Understanding the Basics: What Causes Mold Growth After a Flood?

After a flood, your home becomes the perfect habitat for mold outbreaks. The ingredients are simple: excess moisture, moderate warmth, and organic material like wood, drywall, or carpet. Once wet, these surfaces become breeding grounds for mold as spores—tiny, invisible particles—drift in and settle. Damp indoor air, lack of airflow, and slow drying all contribute to exponential mold growth after a flood. Mold spores are present almost everywhere, but it’s robust moisture content and stagnant air that allow them to flourish in your home after water intrusion.

The EPA recommends tackling wet areas immediately since the longer you wait, the greater the risk for a serious mold outbreak. Don’t forget: water can penetrate deeply, seeping into wall cavities and subfloors. When examining water-affected areas, use caution and ensure you’re wearing goggles and a dust mask to avoid accidental exposure while handling materials that may already be contaminated. Mistakes like leaving windows closed, running your HVAC system before thorough drying, or failing to inspect behind walls can foster undetected mold outbreaks that potentially damage your home and affect your health for months or even years to come.

Key Conditions for Mold Outbreaks Post-Flood

"Mold only needs moisture, warmth, and a food source to start thriving—even after minor flooding." – Bob Villa

Macro view of mold colonies growing on a damp wall after a flood, highlighting potential for mold outbreak

A perfect storm for mold starts with high moisture content and a lack of ventilation. If wet conditions persist beyond 24-48 hours, mold spores multiply rapidly, feeding on porous items such as drywall, insulation, and carpet. Homeowners often underestimate hidden trouble spots: behind cabinets, inside basements, and within HVAC systems, where mold can propagate unseen. Wearing goggles and a dust mask is crucial if you must enter these areas. According to the Environmental Protection Agency, prompt action remains the single most important step to suppress mold outbreaks post-flood. Even when visible water appears gone, lingering dampness can still promote a dangerous mold outbreak that impacts air quality and triggers respiratory problems.

While understanding the basics of mold growth is essential, it's equally important to recognize the early warning signs of water damage that often precede a mold outbreak. For a detailed overview of what to look for, explore the most common water damage warning signs that can help you take action before mold becomes a serious issue.

Immediate Steps: How to Stop Mold Growth After a Flood

Your first hours post-flood are vital for staving off a mold outbreak. The EPA suggests immediate moisture removal is your top priority. Here’s how homeowners should structure their flood cleanup:

  1. Ensure Safety First: Wear goggles, dust mask, and gloves. Protect yourself from potential electric hazards and exposure to mold or mold spores lingering in the air.
  2. Remove Standing Water: Use a pump or wet/dry vacuum to eliminate all standing water. The longer it sits, the higher the risk of a mold outbreak. The EPA recommends working as fast as possible.
  3. Promote Ventilation: Open windows and use fans to circulate air. Increasing ventilation is critical to remove excess humidity and slow the spread of mold spores throughout the home and HVAC system.
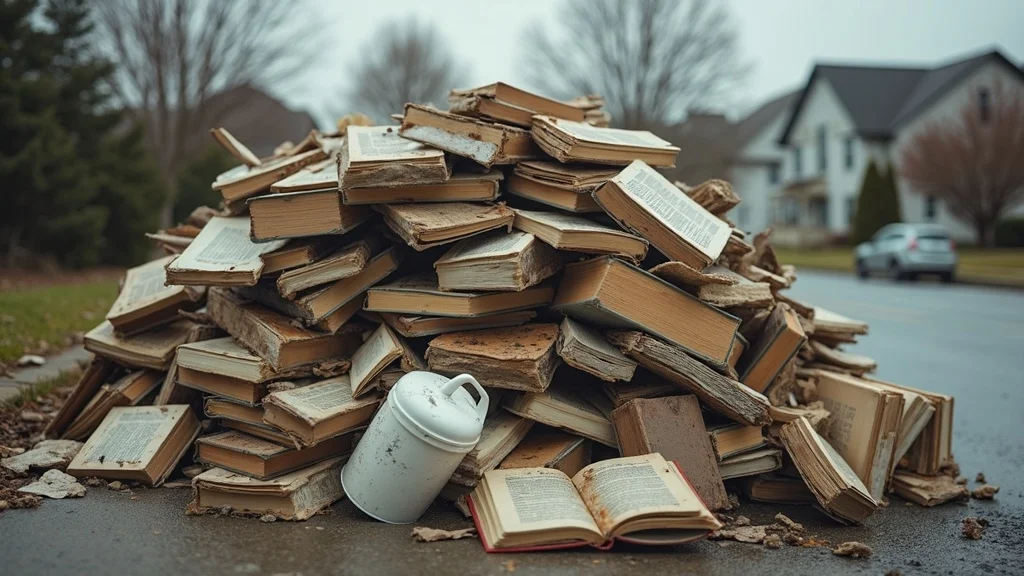
  4. Remove Wet Materials: Bag and discard porous items like carpets, insulation, and upholstered furniture that can harbor mold. These moldy items cannot always be salvaged—if in doubt, EPA guidelines recommend removal.
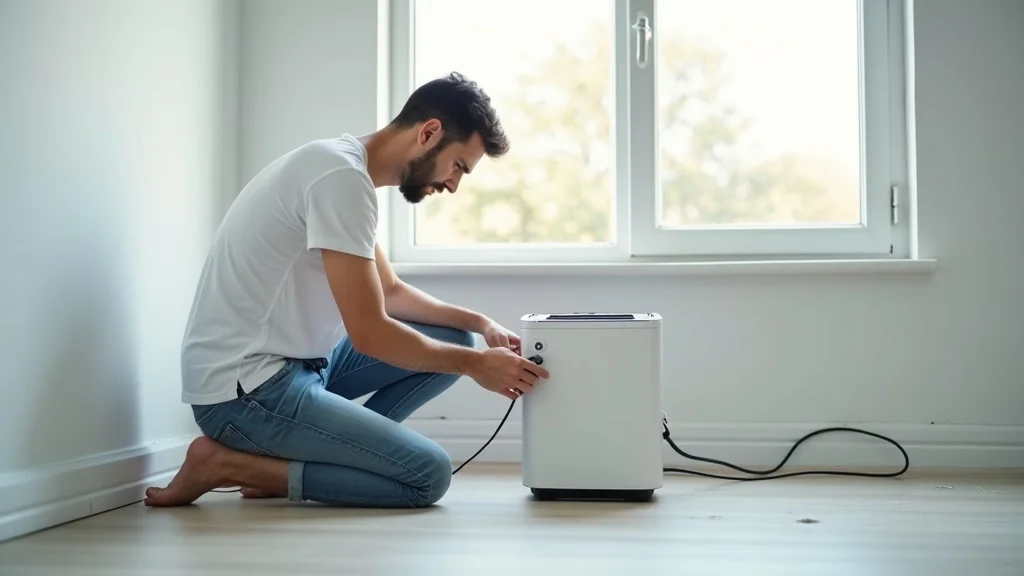
  5. Begin Drying and Dehumidification: Arrange dehumidifiers to actively draw out moisture from the air. Keep them running non-stop until all dampness has cleared. Monitor progress to ensure every affected surface is fully dry.

Using personal protective equipment is non-negotiable when handling flood cleanup and removal of mold spores. The Environmental Protection Agency and experts like Bob Villa advise the use of goggles and dust masks to prevent respiratory exposure. Mold can hide in areas you least expect—check HVAC system vents and behind baseboards carefully to stop overpaying on your monthly expenses with costly repairs later.

Table: Quick Checklist to Prevent Mold Growth After a Flood

Step Required Tools Timeframe Outcome
Remove Standing Water Pump, Wet/Dry Vacuum ASAP Lower humidity & prevent mold
Increase Ventilation Fans, Open Windows Within hours Air circulation
Remove Wet Materials Bags, Gloves <24 hours Eradicate food sources
Dehumidify Dehumidifier 1–2 days Maintain dryness

Prevention Tactics: Proven Methods to Minimize Mold Growth After a Flood

Once immediate cleanup is underway, targeted prevention techniques are necessary to suppress further mold outbreaks. Use high-efficiency dehumidifiers to reduce air moisture levels rapidly. These tools are especially effective in closed spaces or basements, where natural airflow is restricted. Pairing a dehumidifier with constant monitoring is a top tip from experts to protect your home from recurrent mold outbreaks. The EPA recommends maintaining indoor humidity below 60% to prevent mold in your home from recurring after a flood cleanup.

  • Use high-efficiency dehumidifiers
  • Apply antimicrobial treatments
  • Inspect hidden areas (behind drywall, under flooring)
  • Regular humidity monitoring

Don’t hesitate to apply antimicrobial sprays to disinfect surfaces. Antimicrobials kill leftover mold spores and create a protective barrier against new colonies. Inspect all hidden spots—inside walls, behind layers of flooring, inside closets, and around your HVAC system. Even if things look dry on the outside, additional drying and treatment prevent lingering mold or mold. Smart consumers track their home’s humidity with affordable sensors, while consulting consumer reports and recommended guidelines to stop overpaying on your monthly expenses tied to chronic water damage repairs. The right prevention plan is your best bill negotiator, avoiding huge restoration costs and safeguarding your well-being.

Homeowner setting up a dehumidifier to prevent mold growth after a flood in a modern water-damaged room

Recognizing a Mold Outbreak: 10 Warning Signs of Mold Toxicity

Quick detection is key—exposure to mold, especially after a flood, can trigger a cascade of health problems ranging from mild discomfort to chronic illness. Mold spores floating in the air may go unnoticed, but your body’s reactions are often a telltale sign of a mold outbreak. If you or your loved ones experience new or worsening health symptoms in the days following a flood cleanup, don’t dismiss them. Many consumer reports and even the Environmental Protection Agency highlight the dangers of ignoring these signals.

  1. Persistent coughing or wheezing
  2. Eye, nose, and throat irritation
  3. Musty odors
  4. Skin rashes
  5. Headaches
  6. Fatigue
  7. Difficulty concentrating
  8. Nausea
  9. Sinus congestion
  10. Unexplained dizziness

A musty smell can be the first clue that something’s wrong, even before you see visible mold or moldy items. The Environmental Protection Agency (EPA) suggests that if these symptoms persist—especially in young children, the elderly, or those with sensitive immune systems—immediate remediation is critical. Proper flood cleanup and removal of contaminated porous items is non-negotiable for lasting recovery. If you smell mold or identify any of these signs, take action to address a possible mold outbreak before it escalates.

Woman exhibiting discomfort and possible mold toxicity symptoms in a flood-affected home

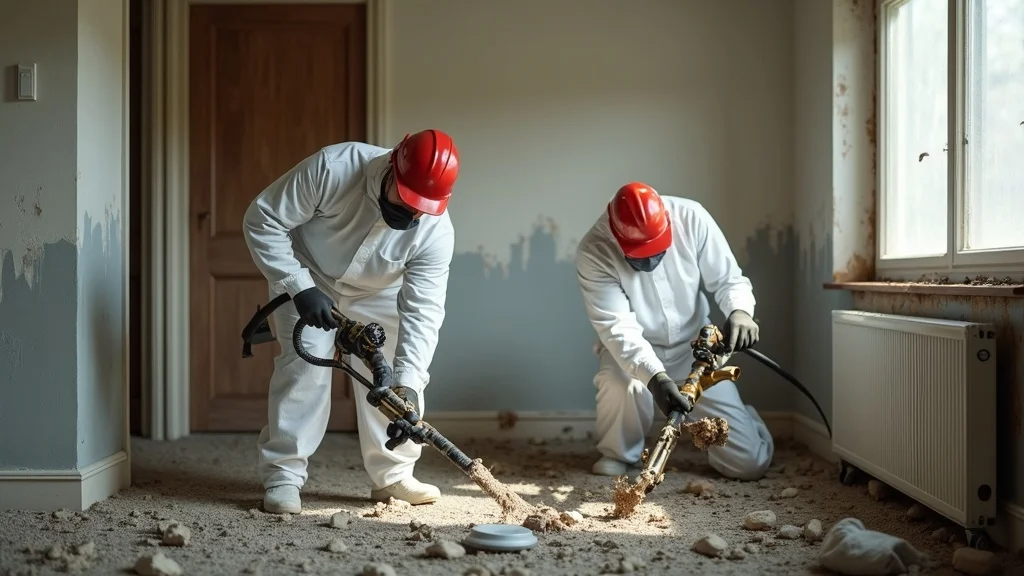
Expert Insights: When to Call for Professional Help With Mold Growth After a Flood

"If you're unsure whether mold is lurking out of sight, don't take chances—consult a certified expert right away."

While DIY flood cleanup and preventive efforts work for minor incidents, certain conditions demand professional intervention. If the area of mold or mold damage exceeds 10 square feet, or if your HVAC system has been affected, the EPA strongly urges homeowners to seek certified mold remediation experts. Professionals have specialized dust masks, goggles, protective suits, and advanced equipment to identify, contain, and safely remove mold outbreaks without endangering household members. A senior editor at Consumer Reports emphasizes using certified services to avoid recurring costs and stop overpaying on your monthly expenses due to improper cleanup.

Professionals implement industry-backed protocols that restore indoor air quality and safety while ensuring your property is clear of hidden moisture and mold spores. Trusting your family’s health and peace of mind to expert help can be the wisest bill negotiator in a stressful flood recovery situation. Remember, missteps in DIY mold remediation may void insurance or complicate claims against environmental protection guidelines. Investing in an expert now ensures fewer health problems, better peace of mind, and potentially lower monthly expenses long-term.

Professional mold remediation team working after a flood to prevent mold outbreaks in a water-damaged room

How Soon Does Mold Grow After a Flood?

Mold can begin to grow within 24-48 hours following a flood. Immediate action is crucial to stop the spread and limit property damage.

How to Stop Mold from Growing After a Flood?

Removing standing water, drying affected areas thoroughly, and using dehumidifiers are essential steps to halt mold growth after a flood. Dispose of contaminated materials and apply antimicrobial sprays to affected surfaces.

What Are the 10 Warning Signs of Mold Toxicity?

The key signs include respiratory symptoms, skin reactions, musty odors, chronic headaches, and other health issues outlined above. Persistent exposure can exacerbate these symptoms.

Can Hashimoto's Cause Mold Exposure?

Hashimoto’s does not cause mold exposure, but individuals with autoimmune conditions like Hashimoto’s may be more sensitive to mold toxins and should be especially vigilant in flood recovery.

FAQs About Mold Growth After a Flood

  • How do I know if my home is safe after a flood?
    Once you’ve removed all water, thoroughly dried every affected surface, and checked for musty smells or visible mold, your home is on the path to recovery. Consider hiring professionals if there are hidden or hard-to-reach areas, or if symptoms persist.
  • Should I test for mold after every flood?
    If you suspect a mold outbreak, see discoloration, or smell mold, testing can be beneficial—especially if vulnerable individuals are present. However, if you follow EPA guidelines and complete full remediation, routine testing isn’t always required.
  • What household items should always be discarded after a flood?
    Porous items such as carpets, mattresses, pillows, and upholstered furniture should be thrown away once soaked, as they cannot be adequately decontaminated. Moldy items that retain moisture are health hazards and should not be kept.
  • Are there eco-friendly ways to fight mold growth after a flood?
    Opt for natural antimicrobials like vinegar or baking soda solutions, open windows to increase ventilation, and use HEPA filters in your HVAC system. However, persistent mold outbreaks might necessitate professional or chemical treatment for complete removal.

Water-damaged household items piled for disposal after a flood to prevent mold growth

Key Takeaways for Preventing Mold Growth After a Flood

  • Act quickly—timing is critical after a flood
  • Remove all moisture sources
  • Use professional resources when in doubt
  • Monitor your health and indoor air quality

Ready for Recovery? Take the Next Step Against Mold Growth After a Flood

Call Gold Coast Flood Restorations at (619) 449-9611 to reclaim your home and peace of mind

A walkthrough of a professional flood cleanup process, detailing each stage from water removal to antimicrobial treatment, all focused on residential recovery and mold prevention.

Act immediately and don’t let a mold outbreak jeopardize your home or health. For peace of mind and expert results, call the professionals who know how to tackle minor mold—and major emergencies—with care.

If you’re committed to protecting your home from future disasters, expanding your knowledge about water damage is a smart next step. Our comprehensive archive on water damage warning signs offers valuable insights into early detection, prevention strategies, and expert tips for maintaining a safe, healthy environment year-round. By staying informed and proactive, you’ll be better equipped to handle not just mold, but any water-related challenge that comes your way. Explore these resources to gain confidence and peace of mind as you safeguard your property and loved ones from the unexpected.

To further enhance your understanding of mold prevention after flooding, consider exploring the following authoritative resources: The Environmental Protection Agency’s (EPA) guide, Floods and Mold Growth, offers comprehensive strategies for addressing mold issues post-flooding, emphasizing the importance of prompt moisture removal and proper cleaning techniques. The Centers for Disease Control and Prevention (CDC) provides a detailed resource titled After the Storm – Mold and Moisture: What Can I Do to Prevent Mold Growth After the Flood Waters Are Gone? A Guide for Residents, which outlines practical steps for homeowners to mitigate mold risks following flood events. If you’re serious about safeguarding your home and health from mold after a flood, these resources will equip you with the necessary knowledge and actionable steps to effectively prevent mold growth.

Home and Garden

0 Comments

Write A Comment

*
*
Please complete the captcha to submit your comment.
Related Posts All Posts
03.26.2026

Struggling with basement room addition planning? Here's Help

Startling Fact: Did you know that a well-planned basement room addition can increase your property’s usable living space by up to 50%? Yet, most homeowners underestimate the complexities involved, risking budget overruns and unmet expectations. This eye-opening fact underscores why strategic basement room addition planning is crucial from the very beginning."Did you know that a well-planned basement room addition can increase your property's usable living space by up to 50%? Yet, most homeowners underestimate the complexities involved, risking budget overruns and unmet expectations."Why Basement Room Addition Planning Sets the Stage for Successful RemodelsAt Banner Construction, every incredible finished basement starts with a comprehensive plan. Whether you're envisioning a lively recreation area, an airy home gym, or a cozy home office, basement room addition planning is what sets leading remodel projects apart from the rest. Homeowners often dive into remodeling projects with excitement, only to face costly delays or discover their dream space doesn't meet local building codes or comfort requirements. Strategic planning not only maximizes your home's extra space, but also ensures your remodel stays on track—avoiding unpleasant surprises with structural needs or legal hurdles.By focusing on details like basement floor plan optimization, natural light strategies, and ensuring all room addition elements are up to code, you set the groundwork for a seamless construction process. The result: a stunning and practical room addition that increases both your property value and daily enjoyment. Let’s take a closer look at why detailed planning is the foundation for a successful transformation.What You’ll Learn in This Basement Room Addition Planning GuideHow detailed basement room addition planning paves the way for a seamless remodeling projectInsights into legal, structural, and design challenges unique to basement additionsPitfalls to avoid during your basement remodel journeyInspiring basement floor plan options for maximizing extra spaceExpert advice from Banner Construction on successful room addition outcomesUnderstanding the Essentials of Basement Room Addition PlanningWhat Makes Basement Addition Planning Unique?Unlike other home additions, finishing a basement is uniquely challenging—and rewarding. Basements often start as blank slates, yet they also present issues like low ceilings, limited natural light, concerns about moisture, and strict building code requirements. Effective basement addition planning anticipates these hurdles, weaving in solutions from the start. Considering how your future extra space—be it a wet bar, home gym, or even a wine cellar—will integrate with your home means thinking about access, lighting, and usage patterns long before construction begins.By working with professionals like Banner Construction, you gain the benefit of experience in remodeling projects that demand specialized knowledge. The right team brings proven methods for water management, structural adaptations, and creative design to the table. This foresight protects your investment, making sure your new room functions, feels, and looks amazing for years to come.Assessing Your Existing Basement Floor and Structural RequirementsThe foundation of every successful basement remodel is a thorough assessment of the basement floor and surrounding structure. Professionals will inspect your foundation walls, joists, and concrete for signs of water intrusion, settling, or damage. This critical step ensures your remodeling project doesn't encounter costly surprises—such as the need for additional reinforcement or moisture mitigation. Flooring choices like vinyl plank, ceramic tile, or even rubber flooring for a home gym depend on the existing condition and elevation of your basement floor.A detailed inspection maps out where new walls, egress windows, or staircases will go, ensuring your final floor plan makes the most of every square foot. Banner Construction emphasizes this phase, recognizing that addressing structural and water management issues up front saves substantial costs and headaches later.Benefits of Professional Basement Remodeling Project ManagementManaging a basement remodeling project is a full-time commitment. Entrusting this task to seasoned professionals ensures open communication, predictable timelines, and a cohesive vision from design through build. An expert project manager like those at Banner Construction coordinates all aspects—from obtaining permits and managing inspections, to synchronizing contractors and managing material deliveries. This level of oversight is especially essential in room addition projects beneath ground, where complexity increases exponentially.Professional management means fewer delays, minimized risk of overlooked code requirements, and constant updates on your project’s status. Banner Construction’s decades of experience translates to peace of mind for discerning homeowners, letting you focus on the excitement of envisioning your upgraded space.Legal Considerations: Navigating Building Codes for Basement Addition and Room Addition ProjectsEnsuring a Legal Bedroom: Basement Addition Egress, Lighting, and Ventilation StandardsIf your basement addition includes a bedroom, you must adhere to strict building code rules—primarily concerning egress windows, ventilation, and natural light. A compliant egress window enables safe escape in emergencies and incorporates the minimum width and height requirements dictated by your local building authority. Additionally, proper ingress of natural light and adequate ventilation transform the space from dark and stuffy to livable and inviting. Mechanical ventilation systems or increased window area may be required to meet code.Planning for these essentials early on prevents costly last-minute changes. Banner Construction’s approach ensures every room addition—from basement bedroom to home office—meets or exceeds requirements, passing inspections and creating rooms your family (and future buyers) will love.Dealing with Permits and Inspections for a Safe Basement RemodelEvery remodeling project requires the right permits before work begins. Navigating the local permit process for a basement addition or room addition involves submitting detailed plans, scheduling inspections, and ensuring all construction phases comply with code. Skipping steps or neglecting documentation can halt your basement remodel and may even require tearing out finished work.Experienced firms like Banner Construction have established rapport with local building inspectors, guiding your project confidently through each checkpoint. This built-in expertise keeps your project progressing smoothly, while protecting your investment against potential legal pitfalls.Designing Your Dream: Basement Floor Plan, Natural Light & Popular Room Addition IdeasBasement Floor Plan Essentials: Maximizing Usable and Extra SpaceCreating a functional and beautiful basement floor plan is both an art and a science. Begin by evaluating your household's needs: Do you crave a dedicated home gym? A private home office? Or a welcoming recreation area and wet bar for entertaining? Smart basement room addition planning configures walls, doorways, and lighting to support your vision, while leaving space open and inviting.Today's top basement design strategies emphasize open concepts, flexible zones, and clever integration of natural light—even with basement-level limitations. Utilizing glass doors, mirrored surfaces, and well-placed light fixtures can make the space feel welcoming and expansive. By proactively mapping out furniture, storage, and pathways, you’ll create a floor plan that elegantly merges form and function.Creative Basement Design Solutions for a Home Office, Gym, or Wet BarBasements offer incredible potential for specialty rooms that enhance your lifestyle. A glass-walled home office combines privacy with connectivity; rubber flooring and mirrored walls convert unused corners into a motivating home gym. Looking to entertain? Consider a custom wet bar with storage for a prized wine collection, or a game room that doubles as a cozy home theater. These basement ideas are becoming increasingly popular with clients seeking flexible, future-proof spaces.Banner Construction’s expertise helps you select finishes—like plush carpeting, luxury vinyl plank, or durable ceramic tile—tailored to each function. Integrate built-in shelving, ambient lighting, and modern color palettes to make the space feel inviting and harmonious. Whether you prioritize work, play, or relaxation, thoughtful basement design transforms extra space into something uniquely yours.Comparison Table: Pros and Cons of Different Basement Remodel Room FunctionsRoom FunctionProsConsHome OfficeQuiet; private; customizable lighting; increases home valueMay need added ventilation and egress; concerns about natural lightHome GymConvenient; safe; flooring can be customized (rubber, vinyl plank); saves gym feesMay require reinforcement for equipment weight; needs soundproofingBedroomIncreases usable space for guests or family; adds potential resale valueStrict egress and lighting regulations; may need additional insulationWet BarPerfect for entertaining; can include wine cellar or game room; enhances aestheticsNeeds plumbing; may not be practical for all familiesRecreation AreaFlexible use; ideal for home theater, family game nights, or playroomOpen floor plan needed for versatility; needs lighting and noise controlKey Budget Strategies for Basement Room Addition PlanningBreaking Down the Basement Remodeling Project: Its Costs, the 30% Rule, and Where to Save or SplurgeSavvy homeowners know that successful basement room addition planning also means setting a smart, realistic budget. The “30% rule” is a useful baseline: don’t spend more than 30% of your home’s appraised value on any addition or significant remodeling project. From there, allocate your funds based on must-haves (structural upgrades, waterproofing, egress windows), nice-to-haves (high-end lighting, custom built-ins), and future upgrades (a wet bar or high-tech home theater).Material selection adds another layer of opportunity to balance cost and style. Choose durable, moisture-resistant options for your basement floor—like vinyl plank for durability and value, or ceramic tile for polished luxury. Banner Construction recommends budgeting in phases: focus first on structural and safety features, then finishing, and finally custom enhancements. Planning out these phases, and knowing where to save or splurge, ensures you’ll never need to cut corners or compromise on your vision.Material selection tips for cost-effective remodelingProject phases: finishing the basement floor, lighting upgrades, optimizing floor planSteps for a Successful Basement Remodeling Project: From Blueprint to Finished SpaceWorking with Professionals: Why Banner Construction Excels at Basement Addition PlanningFrom initial basement floor plan consultation to final walkthrough, partnering with Banner Construction means you have experienced guides at every stage. Professional insight ensures your design ideas fit both your needs and the realities of your home’s structure and code requirements. Clients often remark on Banner’s attention to detail—from capturing your vision in detailed architectural plans to translating them into finished spaces that deliver luxury, functionality, and long-term value.A collaborative process means you’re never in the dark about timelines, milestones, or decisions. Expect clear communication about the reasons behind each proposed floor plan, materials recommendation, and project adjustment—ensuring your remodel journey is smooth, transparent, and enjoyable.Timeline and Milestones for a Room Addition or Basement Remodeling ProjectA professional remodeling project follows a sequence of milestones. Kickoff starts with design consultation and feasibility checks, followed by planning and permitting. Construction—from framing and insulation to flooring and finishes—progresses according to a detailed schedule. Inspections are integrated throughout, and Banner Construction keeps you updated every step of the way.Realistic timelines help you plan family schedules, protect your investment, and avoid major disruptions. From blueprint to reveal, expect most basement addition projects to run an average of several weeks to a few months, depending on complexity and customization.People Also Ask: Essential Questions About Basement Room Addition PlanningWhat is the 30% rule in remodeling?The 30% rule advises that you should not spend more than 30% of your home's current value on a remodeling project, including a basement addition. This guideline helps keep your investment aligned with expected returns and protects against overspending in relation to your home’s market value.How much does it cost to build a 12x12 room in a basement?Costs for building a 12x12 basement room can vary widely, depending on materials, finishes, and whether you need structural upgrades or special features like an egress window. Consulting professionals ensures accurate pricing based on your basement’s condition and code requirements.Is it legal to put a bedroom in a basement?Yes, but only if the bedroom meets strict building code standards—especially relating to egress, ventilation, and natural light. Properly planned and permitted room addition projects ensure your finished basement bedroom is safe, legal, and comfortable.How much does it cost to do a basement addition?The cost of a basement addition depends on project scope, the condition of the existing basement floor and walls, and the quality of finishes you choose. Professional guidance from a company like Banner Construction gives you a clear breakdown tailored to your needs.Common Basement Room Addition Planning Mistakes to AvoidNeglecting detailed floor plan preparationFailing to address moisture control in the basement floorIgnoring local codes in your basement addition or remodeling projectOverlooking natural light solutionsUnderestimating renovation timelines and costsTop Trends in Basement Room Addition Planning and Basement Remodel DesignInnovative Materials and Technology in Basement Floor and Extra Space DesignHomeowners are increasingly drawn to modern materials that offer both style and superior function—like luxury vinyl plank flooring for water resistance, or advanced lighting solutions that mimic daylight, making below-grade room addition spaces bright and inviting. Home automation systems and soundproofing materials turn even a lower-level game room or home theater into a high-tech haven. Durable finishes cater to busy family life while maintaining sophisticated aesthetics.Innovations continue to emerge—thermally insulated flooring systems, eco-friendly wall panels, and multi-zone HVAC designed specifically for basement additions. These upgrades support comfort, energy savings, and resale value for discerning homeowners.Flexible Basement Floor Plans for Changing Family NeedsFlexibility stands out as a major trend in basement room addition planning. Multi-functional spaces—where a home office converts to a guest room, or a recreation area transforms into a yoga studio—let families adapt as needs change. Features like movable partitions, custom shelving, and convertible furniture help maximize the long-term value of your Extra Space.Banner Construction’s design team emphasizes the importance of planning for future lifestyle shifts when developing any basement floor plan. Whether accommodating growing children, visiting relatives, or remote work, a flexible design framework future-proofs your room addition."Our clients increasingly ask for multi-functional basements—family spaces by day, guest suites by night. Planning is the cornerstone." — Banner Construction Design TeamFAQs About Basement Room Addition PlanningWhat are the first steps in planning a basement remodel?Assess your basement’s condition, research local building codes, set your project goals, and partner with professionals like Banner Construction for expert planning.How can I maximize extra space in my basement floor plan?Use open-concept layouts, strategic lighting, and multi-functional rooms to get the most out of every square foot.Does my basement addition need a separate HVAC system?Often, yes. Consult with HVAC specialists to ensure proper temperature control and air quality in your new space.What permits are required for a basement addition?Most projects need building, electrical, and plumbing permits. Banner Construction can guide you through each step.How does basement design affect resale value?A thoughtful, code-compliant design, created with professional help, can add significant value by increasing livable space and appeal to prospective buyers.Key Takeaways: The Benefits of Expert-Guided Basement Room Addition PlanningDetailed basement room addition planning prevents costly mistakes and ensures your space meets legal, safety, and aesthetic standardsCollaboration with experienced remodeling professionals, like Banner Construction, helps you maximize your investment and personal satisfactionSmart room addition and floor plan choices can transform your basement into a true extension of your lifestyleReady to Start Your Basement Room Addition Planning? Call Us Today at (314) 648-2368Transform your basement into the living space of your dreams. Contact us at Banner Construction to start planning your expert-guided basement room addition today!

03.22.2026

From Gray to Warm Neutrals: The Emotional Shift in Home Design

Update Moving Beyond Gray: Crafting Warm and Inviting Spaces For over a decade, the interior design world was dominated by an aesthetic referred to as the 'all-gray era.' This trend featured cool gray tones on cabinetry, walls, and flooring, appealing to a broad audience looking for a sleek, modern look. However, as lifestyles evolve, so do the preferences in home aesthetics. Today, more and more homeowners are turning away from stark grays, leaning into warmer color palettes that evoke comfort and personal expression. The Rise and Reign of Gray The emergence of gray in home design can be traced back to the early 2010s. In the aftermath of the recession, builders and homeowners gravitated toward cooler monochromatic tones for their versatility and broad appeal. The gray palette surpassed beige, which had been the neutral favorite of the early 2000s. With a clean, modern feel, gray was the darling of home renovation television shows and social media platforms alike. Its clean lines and ability to accommodate a variety of styles made it an attractive choice for many developers. The Shift to Warm Neutrals As time progressed and especially during the COVID-19 pandemic, people began longing for environments that felt more comforting and personalized. This desire has catalyzed a distinctive departure from cold, gray spaces to those filled with warmth. Designers are reporting an increased preference for cozy color schemes that include soft taupes, creamy whites, and earthy undertones. These hues not only fulfill a functional purpose but also trigger emotional and psychological comfort, as numerous studies in environmental psychology have suggested. The Intent Behind Warm Palettes Many design professionals are now embracing warm neutrals as a means of setting the emotional tone within spaces. Charlotte and Angus Buchanan of Buchanan Studio advocate that warm neutrals should not merely serve as backgrounds but as intentional frameworks that guide the atmosphere of a room. By layering textures and materials, they emphasize that even a muted color scheme can be rich and multifaceted, allowing for creativity and authenticity to shine through. Textures play a pivotal role in achieving depth and interest in warm neutral designs. Elements like wood accents, natural stones, and varied fabrics add visual interest, while soft metals can introduce a touch of elegance without disrupting the serene color scheme. This nuanced approach encourages homeowners to think about how each element can contribute to a soothing environment. Layering Techniques for an Enticing Neutral Scheme When designing with warm neutrals, strategizing how different shades play against each other becomes essential. Experts from Spacejoy highlight the importance of starting with a neutral base, adding warm accents, and ensuring that various textures blend harmoniously. Lighting, too, cannot be overlooked; soft, warm lighting illuminates these neutral shades beautifully, enhancing the overall cozy ambiance. How To Embrace the Trend Homeowners looking to transition from gray to warm neutrals can employ several strategies. Starting with walls in shades of creamy beige or soft taupe sets a solid foundation. From there, integrating furniture in wood or muted metallic can create an inviting atmosphere. Layering different materials such as lace, wool, and textured fabrics warms up any living space, making it feel distinctly personalized and welcoming. Conclusion: A Return to Comfort As the design community embraces this shift, it invites everyone to reconsider the spaces they inhabit. With the feel of home evolving to encompass warmth, richness, and personalization, it's a wonderful time to reinvent living spaces. Moving from cooler tones to warmer neutrals not only enhances aesthetic appeal but also nurtures emotional well-being. As we advance toward 2025, there is immense promise in exploring how warm neutrals can become a cornerstone of modern living.

03.13.2026

How to Pigtail Electrical Wires: Step-by-Step Guide for Safe Home Wiring

Opening Inquiry: Why Is Knowing How to Pigtail Electrical Wires Crucial for Homeowners?Have you ever flicked a light switch and noticed the lights flicker—or worse, lost power to half your room when an outlet failed? Electrical issues often hide behind the walls, but one essential skill—knowing how to pigtail electrical wires—can help prevent these problems from spiraling into hazards. Whether you’re renovating, upgrading outlets or switches, or simply ensuring your home wiring is up to code, mastering the electrical pigtail process brings safety, reliability, and peace of mind that every homeowner needs."Hey good morning and hey howdy we're here today and we're going to do some pigtailing." – James Adams, Master ElectricianWhat You'll Learn in This Guide on How to Pigtail Electrical WiresDefinition and basics of electrical pigtail connectionsWhy you should make an electrical pigtail for outlets or switchesPreparation, tools, and essential safety checksStep-by-step instructions for making an electrical pigtailCommon mistakes and code compliance tips from a master electricianHow pigtailing ensures safety, longevity, and reliability in home wiringWhat Is an Electrical Pigtail? Understanding How to Pigtail Electrical Wires"So pig tailing is when we have a device and... we're adding another set of wires and... not enough spaces to add all those wires." – James Adams, Master ElectricianAn electrical pigtail is a fundamental wiring technique used when you need to connect several wires to a single outlet or switch, but the device’s terminals don't allow for multiple conductors. The process involves taking short lengths of wire—called pigtails—and using a wire nut to join them with the existing grouped wires in the electrical box. The pigtail then connects individually to the device. This method is common in both new construction and when repairing older homes, helping distribute power safely and ensuring each connection remains secure and code-compliant.If, for example, you’re adding a device to your electrical circuit and quickly discover that there aren’t enough terminal screws on the outlet or switch, or if you notice doubled or overloaded terminals while replacing an outlet, pigtailing is the right solution. James Adams explains, "You'll see wires doubled up under screws, which is wrong. . . stuff forced into the back end that’s too large. " By creating an electrical pigtail, you bypass these common mistakes—making your wiring safer and easier for future troubleshooting.Why and When to Make an Electrical PigtailUse pigtails when outlets or switches have more wires than their terminals can safely handle.Address overloaded terminals or multiple conductors under a single screw—a violation of the National Electrical Code (NEC).Examples include adding a new device, correcting doubled wires under screws, or ensuring circuit continuity in older wiring.Pigtailing is not just a matter of convenience—it’s about code compliance and safety. The electrical code prohibits attaching more than one wire to a single terminal, and using wire nuts to make fresh connections with short pigtail wires ensures nothing gets crowded. This is especially important when you upgrade an outlet or switch (like installing a GFCI), or when previous DIY repairs leave tangled or doubled-up black or white wires. The result is a tidy, professional installation that enhances circuit reliability throughout your home.How Does Making an Electrical Pigtail Work?Short pigtail wires are twisted together with existing black, white, or ground conductors using a new wire nut, then attached as single wires to device screws.Pigtails allow circuits to remain continuous—if the outlet or switch fails, power still flows on to other outlets or switches downstream.Pigtail connections prevent voltage drop and loose connections that can cause flickering lights or dangerous overheating.When you make an electrical pigtail, you effectively give each device its own dedicated connection to the shared black (hot), white (neutral), or green/bare (ground) wires. This avoids the risk of loose connections that can occur if too many wires are backstabbed or doubled under one screw. With exposed copper strands properly twisted and secured under a quality wire nut, you get a fail-safe junction that’s easy to check, retighten, or replace as needed. Properly made pigtails ensure that when you push the grouped wires back into the electrical box and later need to install a new outlet or switch, everything stays organized and safe.Benefits of Pigtailing Outlets or Switches"If you have an older house a lot of times pig tailing will get rid of loose connections and voltage drop." – James Adams, Master ElectricianEliminates flickering or intermittent power caused by loose connections in outlets or switchesMeets NEC and local electrical code requirements by separating conductors and ensuring safe, single-wire connectionsPrevents a single failed outlet from cutting off power to devices downstream in the circuitProper pigtailing means fewer flickering lights and surprise outages. As Adams describes, “When you use the plug to hold the wires, if the plug fails then everything that's going out of this box will drop. . . [but with] pigtails with wire nuts, even if this plug fails the worst that's going to happen is this plug will go dead but everything that goes out of here will stay on. ” This alone makes it invaluable for both older homes and new installations—ensuring not just code compliance but peace of mind for every homeowner.Preparation and Essential Safety: How to Pigtail Electrical Wires Safely"I advise you... once you take off your plug... take a meter and let's make sure we have no power." – James Adams, Master ElectricianTurn off power to the circuit at the breaker panel; always verify with a voltage tester.Use a multimeter or non-contact voltage tester to check for live wires before touching anything.Gather all necessary tools: wire strippers, pliers, wire nuts, voltage tester, and correctly sized wires for your pigtails.Cut your pigtail wires to the recommended length (typically 6” or longer) and ensure they match the existing wiring’s gauge and insulation.Trim, strip back the ends, and align all wires evenly for a neat, safe connection.Safety cannot be overstated when working with electrical wiring. “Once you take off your plug and you’re going to do this, take a meter and let’s make sure we have no power. . . I’m not going to kill myself today at least not on video,” says Adams. Double-checking ensures you’re not at risk of electric shock, especially in boxes where previous repairs or junctions may have left live wires connected. Always make fresh connections whenever possible, never reuse old wire nuts, and ensure grouped wires are twisted securely before capping.Complying with Code and Ensuring Strong ConnectionsElectrical code requires at least 6” of wire extending from the front edge of the electrical box for safe hookup.Never reuse old or damaged wire nuts; always use a fresh, appropriately sized nut rated for the gauge and number of wires in your pigtail.Ensure all wire bundles are tightly twisted and the copper is fully covered by the wire nut for a secure, reliable connection that will not loosen over time.A code-compliant electrical pigtail depends on neatness and secure connectors. "By code, we're supposed to have at least six inches outside the front of the box. . . you want as much as you can get comfortably," Adams stresses. Equally important is the quality of every connection: “Don’t reuse old wire nuts—you’re going to cause future problems. " When in doubt, replace questionable materials and strive for bundles that are tight but not overstressed, with no exposed copper visible beyond the wire nut.Common Tools and Materials for Making an Electrical PigtailTool/MaterialPurpose/UseWire strippersRemoving insulation from wiresPliersTwisting wires togetherWire nutsSecuring the pigtail junctionVoltage testerConfirming power is offAppropriate gauge wireCompliant with circuit amperageGathering the right tools—like quality wire strippers for stripping back the ends, sturdy pliers to twist the wires, and appropriately rated wire nuts—ensures your connections are strong. Make every electrical pigtail as solid and safe as possible, with tools ready and tested for reliability.Step-by-Step Instructions: How to Pigtail Electrical Wires"So this is pig tailing we've taken three three wires and then we added the tail the pigtail there you go so the ground is now pigtailed okay." – James Adams, Master ElectricianPrepare the work area: Turn off power and verify with a tester no longer showing voltage.Trim and strip back the ends of existing wires for a fresh, even starting point.Twist together all ground (bare copper or green) wires, then add a ground pigtail lead and secure with a new wire nut.Repeat for neutral (white) wires and hot (black) wires, aligning insulation and exposed copper for a tidy bundle. Use a separate pigtail for each type.Trim pigtails to the proper length (at least 6”), ensuring they’ll fit neatly onto device screws without excess slack or tension.Carefully loop each pigtail lead clockwise around the device terminal screws (outlet or switch), so tightening the screw draws the wire in securely.Finish by neatly folding or pushing the grouped wires back into the electrical box, securing devices, and checking for neatness and tightness throughout."You want to do it in tight enough so that your wires and your bundle start to twist with it to that point it's tight enough it's not going anywhere okay." – James Adams, Master ElectricianEvery step of making an electrical pigtail is about dependable connections. Start by killing power and checking with your voltage tester—never skip this safety step. As Adams notes, “We’re going to cut these off. . . make my own connections, don’t be lazy. . . You need to learn how to strip wire. " Align your black and white wires, trim the ends for fresh contact, then twist the grouped wires with pliers until they’re firmly bound. Cap each with a new wire nut and tug gently to check for tightness. After looping the pigtails onto device screws, tuck the bundled wires back into the electrical box for a professional finish.Detailed Tips and Troubleshooting from a Master ElectricianAvoid backstabbing wires into devices—particularly #12 gauge wire, which is not code-compliant and can loosen over time.Check that wire bundles are neat, even, and free of stray copper to reduce risk of shorts or unreliable power.Always tighten any unused terminal screws on outlets or switches to keep them from accidentally contacting loose wires inside the box.Attentive, neat workmanship is crucial. Adams emphasizes correcting mistakes rather than settling for poor connections: “So instead of just mashing a wire nut on it and hoping it stays connected. . . we’re going to do it again. ” Always double-check your twists, keep the connections tight, and when you’re ready to install a new outlet or switch, make sure everything is lined up and back the ends into the box carefully. Good habits now will prevent hours of troubleshooting later.Applications and Variations: Where to Make an Electrical PigtailSwitch boxes: For adding switches, switch legs, or new lights, pigtailing the neutrals or hots keeps wiring neat and code-compliant.Outlets: Use pigtails to correct doubled conductors under screws, to install GFCI outlets, or for daisy chaining multiple outlets together safely.Panels and junction boxes: Ensures circuit continuity and allows future devices to be added without disturbing existing wiring."The pig tailing saves a lot of future problems and it makes sure even on new construction it makes sure that your power is continuous all the way through okay." – James Adams, Master ElectricianProperly installed pigtails make adding or moving devices easy, allowing you to make fresh connections whenever an upgrade is needed—without risking code violations or the trouble of losing power in rooms downstream if a single device fails. This versatility is essential for both DIYers and professionals aiming to make an electrical pigtail that stands the test of time.People Also Ask: Expert Answers on How to Pigtail Electrical WiresHow long should pigtail wires be?Electrical code typically requires a minimum of 6 inches extending from the box, but pigtails should be long enough to attach easily to terminals without excessive slack.For best practice, each pigtail wire should be at least 6 inches long—enough to install comfortably but not so long as to create a tangle inside the box. This length ensures compliance with the NEC and leaves enough wire for future work if an outlet or switch needs replacing.Do you have to pigtail outlets by code?NEC requires that wires are not doubled (more than one conductor) under a single terminal screw. Pigtailing outlets ensures code compliance by creating separate, safe connections.Pigtailing is no longer just a best practice—it’s a code issue. Modern outlets and switches only allow one wire per terminal, so making an electrical pigtail is not only safer, but required to prevent code violations and potential insurance issues in the event of a fire or electrical failure.Can I pigtail a neutral wire?Yes, neutral wires can be pigtailed, especially when multiple circuits or devices share a junction. Always use a wire nut rated for the number and gauge of wires.Pigtailing neutral (white) wires is recommended when connecting multiple outlets, switches, or fixtures. Just ensure the wire nut is sized correctly to handle the grouped wires back and securely covers all exposed copper.How to make a pigtail for an electrical outlet?Cut a short piece of wire (matching gauge), strip ends, twist with existing wires, and secure with a wire nut. Attach the pigtail lead to the outlet terminal.The steps are easy: cut and strip a length of same-gauge wire, twist it together with existing black, white, or ground wires, cap with a fresh wire nut, loop the lead around its terminal, and you’re ready to install your outlet or switch.Frequently Asked Questions on How to Pigtail Electrical WiresIs aluminum wiring safe for pigtailing?How do I choose wire nut size for pigtails?What are signs of a bad pigtail connection?Can you mix wire gauges in a pigtail?How do you secure multiple grounds in a metal box?If you’re dealing with aluminum wiring, you’ll need special connectors and anti-oxidant paste—consult a licensed electrician. Always match your wire nut to the gauge and number of wires in the bundle (the packaging will specify), and check for signs of bad pigtails such as loose outlets, flickering lights, or heat at the wire nut. Mixing wire gauges in a pigtail can be risky; stick to same-gauge where possible, or use a nut specifically rated for mixed sizes. For multiple grounds in a metal box, always bond the ground pigtail securely to the box before attaching the outlet or switch for maximum safety.Summary: Key Takeaways on How to Pigtail Electrical WiresAlways turn off power and verify safety before starting any wiring work.Pigtailing prevents code violations, loose connections, and downstream power loss.Use proper tools, correct wire gauge, and approved wire nuts on every electrical pigtail.Neat workmanship and tight connections ensure dependable, long-lasting electrical wiring.Next Steps: Safely Upgrade Your Home Wiring—Contact a Licensed Electrician for How to Pigtail Electrical WiresIf you’re uncertain about making an electrical pigtail or your project involves aluminum, old, or complex wiring, don’t take chances—reach out to a licensed electrician. Solomon advice: Make safe home wiring your priority.

Terms of Service

Privacy Policy

Core Modal Title

Sorry, no results found

You Might Find These Articles Interesting

T
Please Check Your Email
We Will Be Following Up Shortly
*
*
*