Add Row
Add Element
UPDATE
Add Element

Your guide to modern living—every day.

  • Home
  • Categories
    • Wellness
    • Home and Garden
    • Work and Life
    • Travel
    • People and Style
    • Living Spaces
November 07.2025
1 Minute Read

Boilers break in winter—Here’s how to stop it happening to yours

Did you know that your chance of a boiler breakdown rises by up to 20% as temperatures drop? Sudden boiler failure during a frosty snap puts families in crisis mode—without heat, without hot water, and stuck waiting for help. Yet most breakdowns are preventable. Drawing on Plumbrite’s trusted expertise, this comprehensive guide unpacks the real reasons boilers break in winter for a reason—here’s how to stop it happening to yours, and shares step-by-step strategies to keep your home warm even when winter bites hardest.

A Startling Fact: Why Boiler Breakdowns Surge in Cold Weather

"Research shows that as temperatures drop, the rate of boiler breakdowns can increase by up to 20%." – Plumbrite Technical Operations Lead

Each year, the first big freeze leads to a flood of panicked calls for boiler repair. The cold weather isn’t just a backdrop—it’s a major player in why boiler breakdown rates spike so dramatically. When outside temperatures plunge, heating systems run longer and harder, which means boilers face more demand at higher intensity than at any other time of the year. This relentless workload exposes weak points in central heating systems, especially if maintenance has been overlooked or small issues ignored. Add in the risk of frozen condensate pipes—a notorious problem for UK homes with modern gas boilers—and you get a recipe for mechanical failure right when you need heat most.
Plumbrite’s engineers routinely see the same patterns: freezing temperatures push boilers beyond their limits, and neglecting annual boiler service means tiny faults grow into winter disasters. Fortunately, with insight, awareness, and regular care, these breakdowns can be stopped before they start.

Residential boiler room with frosted pipes and a worried homeowner inspecting the display – boilers break in winter for a reason

What You'll Learn About Boilers Break in Winter for a Reason—Here’s How to Stop It Happening to Yours

  • The main causes behind boiler break and breakdowns in winter
  • Preventative steps to avoid a broken boiler during cold weather
  • How to respond if your boiler breaks
  • When to seek boiler repair or cover
  • Plumbrite’s expert guidance on boiler servicing

Understanding Boiler Breaks: Why Do Boilers Break in Winter?

Cold Weather and Boiler Break: The Science Explained

When winter hits, boilers become the lifeblood of home comfort—but cold weather brings hidden risks. The low temperature outside causes water in exposed pipes to cool rapidly, increasing viscosity and putting strain on your central heating system. This extra work is compounded by faucets running hot more often, radiators working overtime, and the heating staying on for longer periods. Even the most reliable gas boiler can be pushed to its limits.
In colder months, internal components expand and contract rapidly, seals become brittle, and electronic sensors are bombarded with condensation and temperature swings. Small, ignored cracks or limescale build-ups become aggravated failures. Plumbrite’s registered engineers emphasise that these unique winter stresses make it essential to have your boiler serviced annually. Without this check-up, micro-faults grow into breakdowns—often just when you need your heating most.

Cutaway view of home boiler in winter – technical details, visible steam and glowing control lights, showing why boilers break in cold weather

Frozen Condensate Pipe and Boiler Breakdowns

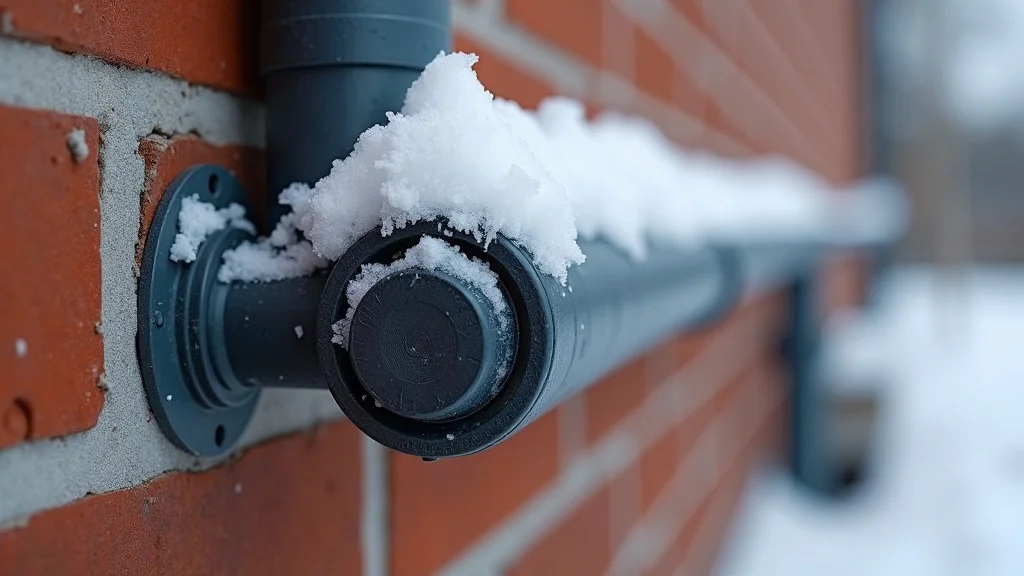
One of the leading reasons boilers break in winter is the humble condensate pipe. Modern condensing boilers expel acidic waste water through this pipe to the drain outside. But as soon as the temperature dips below freezing, any exposed section of pipe can freeze solid. This blockage triggers a shutdown: your boiler may display an error code, refuse to fire, or worst of all, overflow internally, causing water leaks or electronic failures.
Plumbrite’s professional advice is to insulate the condensate pipe wherever it runs outdoors, using foam lagging thick enough to withstand British winter nights. If you hear strange gurgling or see dripping from the boiler, check the pipe for ice—or watch for the telltale error code on the display. Ensuring your boiler installation is done by a Gas Safe registered engineer helps guarantee external pipes are positioned for maximum protection. If your pipe has already frozen, follow safe de-icing methods or call in the experts.

Boiler Pressure Issues in Colder Months

Pressure drops are another winter-specific culprit of the infamous boiler break. As radiators work overtime, tiny leaks in valves or the system’s pressure relief components are worsened, causing the needle to drop. If boiler pressure gets too low, a modern gas appliance will automatically shut down to protect itself—leaving you without heat or hot water. Alternatively, over-pressurisation from expansion can trip safety valves or damage parts, especially after a sudden freeze.
Always keep an eye on the pressure gauge, especially if your home has experienced recent radiator bleeding, or you notice water under the boiler install. Plumbrite’s annual boiler service includes a full system pressure check. At home, you can learn to safely top up pressure or read the user guide—if in doubt, get professional help fast to head off a looming boiler breakdown.

Common Signs Your Boiler Is about to Break During Winter

  • No heat or hot water
  • Unusual noises: banging, gurgling, whistling
  • Loss of pilot light
  • Low boiler pressure
  • Error codes or warning lights

Concerned couple with mugs and space heater in a cold living room – signs of broken boiler in winter

Major Causes Behind Boiler Breakdown in Winter

Condensate Pipe Freezing and How to Prevent It

The freeze-prone condensate pipe is public enemy number one for boiler breakdown in the UK’s cold snaps. Running externally, even briefly, it’s often overlooked during boiler install. When overnight temperatures dip, water inside can quickly freeze, leading your boiler may lock out and leaving you without heat. Insulate all visible outdoor condensate pipes using pipe foam or proprietary lagging sleeves; in extreme cases, discuss rerouting or fitting a trace heating cable with your registered engineer. Always check for leaks or drips after a thaw, and test the runoff is clear before the next storm hits.

The Role of Infrequent Boiler Serviced Schedules

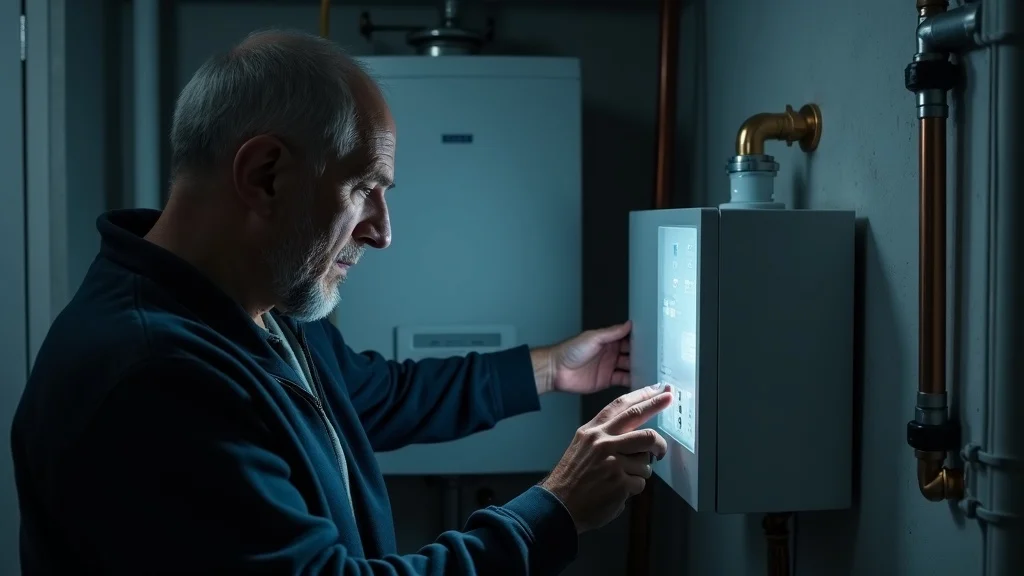
Skipping or delaying your annual boiler serviced appointment is risky—especially before winter begins. Small faults, like worn seals or a weak ignition, won’t fix themselves. When the system is forced to run at full tilt in the cold, worn or dirty components are more likely to fail. Plumbrite’s gas safe register engineers catch such issues in advance, cleaning, tightening, and recalibrating as needed. Their detailed multi-point inspection, including efficiency checks and carbon monoxide testing, is the best defence against boiler breakdown.

Heating engineer with digital tool performing a boiler service, ensuring reliability in winter

Faulty Boiler Pressure and Component Wear

Components inside your boiler—pressure sensors, fans, igniters—are engineered to last for years, but only with maintenance. In winter, enormous swings between hot and cold can accelerate wear and tear. If you notice your radiators aren’t heating evenly, or your boiler is cycling on and off erratically, pressure regulation failure or a failing pump could be to blame. Catching these problems during a boiler service ensures parts are replaced before total breakdown sets in, keeping your central heating system running smoothly through winter’s worst.

Comparing Key Reasons for Boiler Breaks in Cold Weather
Cause What Happens Prevention
Frozen Condensate Pipe Error codes, shutdown, leaks Insulate pipe, expert installation
Low Boiler Pressure No hot water, pilot light loss Monitor, top up, annual boiler service
Lack of Service Component failure, loss of output Yearly professional boiler service

Proactive Steps: How to Stop Boiler Breaks Before They Start

Importance of Regular Boiler Servicing and What It Covers

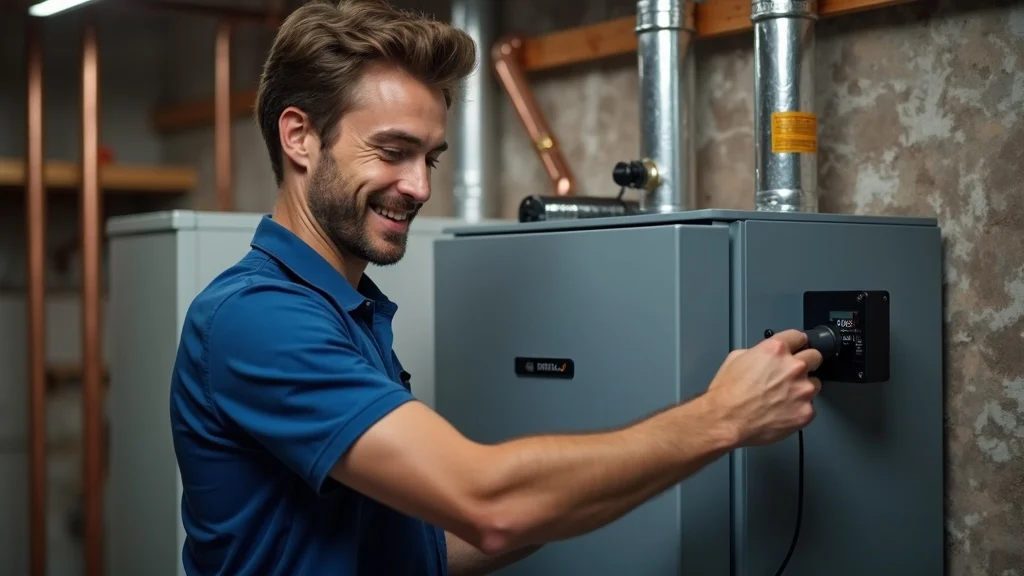
Getting your boiler serviced annually by a Gas Safe registered engineer is the single best way to avoid winter breakdown. Plumbrite’s experts perform a complete system examination: cleaning burners, checking venting and flues, tightening loose electrical connections, and meticulously testing for gas leaks. Regular checks keep your appliance efficient and safe, and many manufacturers require proof of service for warranty coverage. An annual boiler serviced also provides peace of mind, allowing small issues to be fixed before the cold exposes them. Book early, before the first frost hits.

Insulating and Protecting Your Condensate Pipe

Insulate every inch of the condensate pipe running outdoors to prevent winter freezes. You can use thick foam lagging, available at hardware shops, and secure it neatly around the pipe—cover bends, joints, and exposed sections carefully. For pipes with a history of freezing, ask Plumbrite about fitting a low-wattage heat trace or rerouting internally. Insulating your condensate pipe is a straightforward, cost-effective step, and ensures your heating won’t give out during an icy spell.

Closeup of outdoor condensate pipe wrapped in thick insulation to prevent boiler breakdown in winter

Monitoring Boiler Pressure in Freezing Temperatures

Keep a close eye on your boiler’s pressure gauge all winter long. Most systems run best between 1.0 and 1.5 bar. If you see the needle dipping, consult your user manual to safely repressurise, or call a Gas Safe registered engineer if pressure loss persists. After bleeding radiators, always check the gauge. Preventing low pressure preserves your heating and stops safety features from switching your boiler off. Regular boiler service appointments include pressure checks and top-ups by a registered engineer.

Why Boiler Cover Saves You from Winter Woes

Boiler cover provides instant access to repairs in the event of a breakdown. With competitive plans from Plumbrite, you won’t be left in the cold, panicking about the next step. Cover plans typically include annual servicing, priority callouts, and labour costs—making budgeting for boiler repair predictable and stress-free. Especially in unpredictable British winters, boiler cover means your home will never go without heat for long.

How to Perform Basic Boiler Pressure Checks

Emergency Actions: What to Do When Boilers Break

  1. Check for common issues (pilot light, pressure, error codes)
  2. Reset your boiler according to manufacturer’s instructions
  3. Call Plumbrite for rapid boiler repair

People Also Ask: Boilers Break in Winter

Why do boilers always break in winter?

Cold weather causes additional strain on boilers, increases demand, and can freeze external pipes, leading to more frequent boiler breakdowns.

How long can you be left with a broken boiler?

It depends on the responsiveness of your service provider. With Plumbrite, emergency boiler repairs are typically attended to within 24 hours.

What is the biggest cause of boiler breakdown?

Frozen condensate pipes and lack of regular boiler servicing are leading causes, especially during winter.

How to keep a house warm when the boiler breaks?

Use electric heaters, close curtains, insulate doors, and place towels at the bottoms of doors for draft protection while awaiting boiler repair.

Expert Boiler Tips from Plumbrite

  • Schedule boiler serviced annually before winter
  • Insulate exposed condensate pipes
  • Monitor and maintain boiler pressure
  • Consider comprehensive boiler cover for peace of mind

Friendly engineer explaining winter boiler tips to a homeowner in a bright kitchen
"An ounce of prevention can save you a winter’s worth of headaches and freezing nights." – Plumbrite Engineer

FAQs on Boilers Break in Winter for a Reason—Here’s How to Stop It Happening to Yours

  • How can I tell if my condensate pipe is frozen?
    Look outside for icy build-up on the pipe. If the boiler is showing an error code, or you notice gurgling, check the pipe for blockages at bends or the outlet where it drains.
  • Do I need boiler cover if my boiler is new?
    Even new boilers can break if unforeseen conditions arise. Boiler cover provides peace of mind—especially in winter—covering emergencies and annual servicing.
  • Is DIY boiler repair safe?
    No—always call a Gas Safe registered engineer for any boiler repair. DIY attempts risk safety, legal compliance, and voiding insurance policies.
  • How often should a gas boiler be serviced?
    Gas boilers should be professionally serviced once a year, ideally before winter, to identify and repair small issues before they cause winter breakdowns.

Key Takeaways for Preventing Boiler Breakdown

  • Boilers break in winter for a reason, mainly cold weather and neglect
  • Regular servicing, practical precautions, and quick response are vital
  • Plumbrite provides trusted, expert assistance all season long

For Fast, Trusted Boiler Repair—Give Plumbrite a Call. Details Are in the Description.

Home and Garden

0 Comments

Write A Comment

*
*
Please complete the captcha to submit your comment.
Related Posts All Posts
03.13.2026

How to Pigtail Electrical Wires: Step-by-Step Guide for Safe Home Wiring

Opening Inquiry: Why Is Knowing How to Pigtail Electrical Wires Crucial for Homeowners?Have you ever flicked a light switch and noticed the lights flicker—or worse, lost power to half your room when an outlet failed? Electrical issues often hide behind the walls, but one essential skill—knowing how to pigtail electrical wires—can help prevent these problems from spiraling into hazards. Whether you’re renovating, upgrading outlets or switches, or simply ensuring your home wiring is up to code, mastering the electrical pigtail process brings safety, reliability, and peace of mind that every homeowner needs."Hey good morning and hey howdy we're here today and we're going to do some pigtailing." – James Adams, Master ElectricianWhat You'll Learn in This Guide on How to Pigtail Electrical WiresDefinition and basics of electrical pigtail connectionsWhy you should make an electrical pigtail for outlets or switchesPreparation, tools, and essential safety checksStep-by-step instructions for making an electrical pigtailCommon mistakes and code compliance tips from a master electricianHow pigtailing ensures safety, longevity, and reliability in home wiringWhat Is an Electrical Pigtail? Understanding How to Pigtail Electrical Wires"So pig tailing is when we have a device and... we're adding another set of wires and... not enough spaces to add all those wires." – James Adams, Master ElectricianAn electrical pigtail is a fundamental wiring technique used when you need to connect several wires to a single outlet or switch, but the device’s terminals don't allow for multiple conductors. The process involves taking short lengths of wire—called pigtails—and using a wire nut to join them with the existing grouped wires in the electrical box. The pigtail then connects individually to the device. This method is common in both new construction and when repairing older homes, helping distribute power safely and ensuring each connection remains secure and code-compliant.If, for example, you’re adding a device to your electrical circuit and quickly discover that there aren’t enough terminal screws on the outlet or switch, or if you notice doubled or overloaded terminals while replacing an outlet, pigtailing is the right solution. James Adams explains, "You'll see wires doubled up under screws, which is wrong. . . stuff forced into the back end that’s too large. " By creating an electrical pigtail, you bypass these common mistakes—making your wiring safer and easier for future troubleshooting.Why and When to Make an Electrical PigtailUse pigtails when outlets or switches have more wires than their terminals can safely handle.Address overloaded terminals or multiple conductors under a single screw—a violation of the National Electrical Code (NEC).Examples include adding a new device, correcting doubled wires under screws, or ensuring circuit continuity in older wiring.Pigtailing is not just a matter of convenience—it’s about code compliance and safety. The electrical code prohibits attaching more than one wire to a single terminal, and using wire nuts to make fresh connections with short pigtail wires ensures nothing gets crowded. This is especially important when you upgrade an outlet or switch (like installing a GFCI), or when previous DIY repairs leave tangled or doubled-up black or white wires. The result is a tidy, professional installation that enhances circuit reliability throughout your home.How Does Making an Electrical Pigtail Work?Short pigtail wires are twisted together with existing black, white, or ground conductors using a new wire nut, then attached as single wires to device screws.Pigtails allow circuits to remain continuous—if the outlet or switch fails, power still flows on to other outlets or switches downstream.Pigtail connections prevent voltage drop and loose connections that can cause flickering lights or dangerous overheating.When you make an electrical pigtail, you effectively give each device its own dedicated connection to the shared black (hot), white (neutral), or green/bare (ground) wires. This avoids the risk of loose connections that can occur if too many wires are backstabbed or doubled under one screw. With exposed copper strands properly twisted and secured under a quality wire nut, you get a fail-safe junction that’s easy to check, retighten, or replace as needed. Properly made pigtails ensure that when you push the grouped wires back into the electrical box and later need to install a new outlet or switch, everything stays organized and safe.Benefits of Pigtailing Outlets or Switches"If you have an older house a lot of times pig tailing will get rid of loose connections and voltage drop." – James Adams, Master ElectricianEliminates flickering or intermittent power caused by loose connections in outlets or switchesMeets NEC and local electrical code requirements by separating conductors and ensuring safe, single-wire connectionsPrevents a single failed outlet from cutting off power to devices downstream in the circuitProper pigtailing means fewer flickering lights and surprise outages. As Adams describes, “When you use the plug to hold the wires, if the plug fails then everything that's going out of this box will drop. . . [but with] pigtails with wire nuts, even if this plug fails the worst that's going to happen is this plug will go dead but everything that goes out of here will stay on. ” This alone makes it invaluable for both older homes and new installations—ensuring not just code compliance but peace of mind for every homeowner.Preparation and Essential Safety: How to Pigtail Electrical Wires Safely"I advise you... once you take off your plug... take a meter and let's make sure we have no power." – James Adams, Master ElectricianTurn off power to the circuit at the breaker panel; always verify with a voltage tester.Use a multimeter or non-contact voltage tester to check for live wires before touching anything.Gather all necessary tools: wire strippers, pliers, wire nuts, voltage tester, and correctly sized wires for your pigtails.Cut your pigtail wires to the recommended length (typically 6” or longer) and ensure they match the existing wiring’s gauge and insulation.Trim, strip back the ends, and align all wires evenly for a neat, safe connection.Safety cannot be overstated when working with electrical wiring. “Once you take off your plug and you’re going to do this, take a meter and let’s make sure we have no power. . . I’m not going to kill myself today at least not on video,” says Adams. Double-checking ensures you’re not at risk of electric shock, especially in boxes where previous repairs or junctions may have left live wires connected. Always make fresh connections whenever possible, never reuse old wire nuts, and ensure grouped wires are twisted securely before capping.Complying with Code and Ensuring Strong ConnectionsElectrical code requires at least 6” of wire extending from the front edge of the electrical box for safe hookup.Never reuse old or damaged wire nuts; always use a fresh, appropriately sized nut rated for the gauge and number of wires in your pigtail.Ensure all wire bundles are tightly twisted and the copper is fully covered by the wire nut for a secure, reliable connection that will not loosen over time.A code-compliant electrical pigtail depends on neatness and secure connectors. "By code, we're supposed to have at least six inches outside the front of the box. . . you want as much as you can get comfortably," Adams stresses. Equally important is the quality of every connection: “Don’t reuse old wire nuts—you’re going to cause future problems. " When in doubt, replace questionable materials and strive for bundles that are tight but not overstressed, with no exposed copper visible beyond the wire nut.Common Tools and Materials for Making an Electrical PigtailTool/MaterialPurpose/UseWire strippersRemoving insulation from wiresPliersTwisting wires togetherWire nutsSecuring the pigtail junctionVoltage testerConfirming power is offAppropriate gauge wireCompliant with circuit amperageGathering the right tools—like quality wire strippers for stripping back the ends, sturdy pliers to twist the wires, and appropriately rated wire nuts—ensures your connections are strong. Make every electrical pigtail as solid and safe as possible, with tools ready and tested for reliability.Step-by-Step Instructions: How to Pigtail Electrical Wires"So this is pig tailing we've taken three three wires and then we added the tail the pigtail there you go so the ground is now pigtailed okay." – James Adams, Master ElectricianPrepare the work area: Turn off power and verify with a tester no longer showing voltage.Trim and strip back the ends of existing wires for a fresh, even starting point.Twist together all ground (bare copper or green) wires, then add a ground pigtail lead and secure with a new wire nut.Repeat for neutral (white) wires and hot (black) wires, aligning insulation and exposed copper for a tidy bundle. Use a separate pigtail for each type.Trim pigtails to the proper length (at least 6”), ensuring they’ll fit neatly onto device screws without excess slack or tension.Carefully loop each pigtail lead clockwise around the device terminal screws (outlet or switch), so tightening the screw draws the wire in securely.Finish by neatly folding or pushing the grouped wires back into the electrical box, securing devices, and checking for neatness and tightness throughout."You want to do it in tight enough so that your wires and your bundle start to twist with it to that point it's tight enough it's not going anywhere okay." – James Adams, Master ElectricianEvery step of making an electrical pigtail is about dependable connections. Start by killing power and checking with your voltage tester—never skip this safety step. As Adams notes, “We’re going to cut these off. . . make my own connections, don’t be lazy. . . You need to learn how to strip wire. " Align your black and white wires, trim the ends for fresh contact, then twist the grouped wires with pliers until they’re firmly bound. Cap each with a new wire nut and tug gently to check for tightness. After looping the pigtails onto device screws, tuck the bundled wires back into the electrical box for a professional finish.Detailed Tips and Troubleshooting from a Master ElectricianAvoid backstabbing wires into devices—particularly #12 gauge wire, which is not code-compliant and can loosen over time.Check that wire bundles are neat, even, and free of stray copper to reduce risk of shorts or unreliable power.Always tighten any unused terminal screws on outlets or switches to keep them from accidentally contacting loose wires inside the box.Attentive, neat workmanship is crucial. Adams emphasizes correcting mistakes rather than settling for poor connections: “So instead of just mashing a wire nut on it and hoping it stays connected. . . we’re going to do it again. ” Always double-check your twists, keep the connections tight, and when you’re ready to install a new outlet or switch, make sure everything is lined up and back the ends into the box carefully. Good habits now will prevent hours of troubleshooting later.Applications and Variations: Where to Make an Electrical PigtailSwitch boxes: For adding switches, switch legs, or new lights, pigtailing the neutrals or hots keeps wiring neat and code-compliant.Outlets: Use pigtails to correct doubled conductors under screws, to install GFCI outlets, or for daisy chaining multiple outlets together safely.Panels and junction boxes: Ensures circuit continuity and allows future devices to be added without disturbing existing wiring."The pig tailing saves a lot of future problems and it makes sure even on new construction it makes sure that your power is continuous all the way through okay." – James Adams, Master ElectricianProperly installed pigtails make adding or moving devices easy, allowing you to make fresh connections whenever an upgrade is needed—without risking code violations or the trouble of losing power in rooms downstream if a single device fails. This versatility is essential for both DIYers and professionals aiming to make an electrical pigtail that stands the test of time.People Also Ask: Expert Answers on How to Pigtail Electrical WiresHow long should pigtail wires be?Electrical code typically requires a minimum of 6 inches extending from the box, but pigtails should be long enough to attach easily to terminals without excessive slack.For best practice, each pigtail wire should be at least 6 inches long—enough to install comfortably but not so long as to create a tangle inside the box. This length ensures compliance with the NEC and leaves enough wire for future work if an outlet or switch needs replacing.Do you have to pigtail outlets by code?NEC requires that wires are not doubled (more than one conductor) under a single terminal screw. Pigtailing outlets ensures code compliance by creating separate, safe connections.Pigtailing is no longer just a best practice—it’s a code issue. Modern outlets and switches only allow one wire per terminal, so making an electrical pigtail is not only safer, but required to prevent code violations and potential insurance issues in the event of a fire or electrical failure.Can I pigtail a neutral wire?Yes, neutral wires can be pigtailed, especially when multiple circuits or devices share a junction. Always use a wire nut rated for the number and gauge of wires.Pigtailing neutral (white) wires is recommended when connecting multiple outlets, switches, or fixtures. Just ensure the wire nut is sized correctly to handle the grouped wires back and securely covers all exposed copper.How to make a pigtail for an electrical outlet?Cut a short piece of wire (matching gauge), strip ends, twist with existing wires, and secure with a wire nut. Attach the pigtail lead to the outlet terminal.The steps are easy: cut and strip a length of same-gauge wire, twist it together with existing black, white, or ground wires, cap with a fresh wire nut, loop the lead around its terminal, and you’re ready to install your outlet or switch.Frequently Asked Questions on How to Pigtail Electrical WiresIs aluminum wiring safe for pigtailing?How do I choose wire nut size for pigtails?What are signs of a bad pigtail connection?Can you mix wire gauges in a pigtail?How do you secure multiple grounds in a metal box?If you’re dealing with aluminum wiring, you’ll need special connectors and anti-oxidant paste—consult a licensed electrician. Always match your wire nut to the gauge and number of wires in the bundle (the packaging will specify), and check for signs of bad pigtails such as loose outlets, flickering lights, or heat at the wire nut. Mixing wire gauges in a pigtail can be risky; stick to same-gauge where possible, or use a nut specifically rated for mixed sizes. For multiple grounds in a metal box, always bond the ground pigtail securely to the box before attaching the outlet or switch for maximum safety.Summary: Key Takeaways on How to Pigtail Electrical WiresAlways turn off power and verify safety before starting any wiring work.Pigtailing prevents code violations, loose connections, and downstream power loss.Use proper tools, correct wire gauge, and approved wire nuts on every electrical pigtail.Neat workmanship and tight connections ensure dependable, long-lasting electrical wiring.Next Steps: Safely Upgrade Your Home Wiring—Contact a Licensed Electrician for How to Pigtail Electrical WiresIf you’re uncertain about making an electrical pigtail or your project involves aluminum, old, or complex wiring, don’t take chances—reach out to a licensed electrician. Solomon advice: Make safe home wiring your priority.

03.10.2026

Transform Your Basement into a Space for Craft and Creativity in DC

Update Revolutionizing Basements: From Forgotten Space to Functional Artistry Basements often linger as the most neglected area of homes, particularly in cities like Washington, DC, where space is always at a premium. Traditionally viewed as storage areas or dark dungeons filled with forgotten boxes, these spaces are now being recognized as untapped potential for living. One such transformation can be seen in a recent project undertaken in an architectural gem of a home in the heart of DC. Understanding the Basement Renovation Journey The homeowners, seeking to convert their basement from a forgotten zone into a vibrant extension of their home, faced several challenges: low ceilings, limited natural light, and a stairway that made access difficult. They envisioned a multifunctional space that would serve as a bedroom, a family lounge, and a special dedicated area for crafts and creativity. Partnering with designer Lisa Magee, the BOWA team embarked on a transformation that would reimagine how they utilized their basement. Key Renovation Strategies for Success One of the most critical strategies was undermining the existing foundation to create full ceiling height. This step unlocked the space, allowing it to feel less like a basement and more like an integrated part of the home. Additionally, larger windows were incorporated to flood the area with natural light, while mechanical systems were reconfigured to improve access and flow. The result? A bright and welcoming environment that was both functional and visually appealing. The Heart of Creativity: A Dedicated Craft Room At the very heart of this renovation lies a spacious craft room, designed for inspiration and productivity. With semi-custom cabinetry and a large central island, the space is organized for optimal workflow, complete with ample storage for materials and tools. Such purposeful design fosters an environment where creativity can flourish, resonating with a growing trend of making home spaces not just functional but also inspirational. Beyond a Craft Room: Multifunctional Living Spaces Beyond creativity, the renovated basement includes features to enrich family life. The addition of a new bedroom with egress and a full bathroom elevates the basement's functionality, accommodating guests or providing private space for family members. The lounge area, furnished with comfortable seating and aesthetic finishes, encourages family gatherings and casual hangouts. Financial Sense: The Benefits of Renovation Investing in a basement renovation not only enhances daily living but also adds significant value to the property. Industry data suggests that a well-executed basement remodel can recoup 60-70% of its costs during resale. This is particularly true in competitive neighborhoods like Capitol Hill, where buyers appreciate additional livable space. As residents increasingly seek flexible layouts to accommodate modern lifestyles, a finished basement can provide the extra square footage that families need without costly expansions. Learning from Successful Transformations Transforming basements into usable spaces is not just a personal endeavor; it's part of a broader trend where urban homeowners maximize their property potential. Real-life examples, such as the trendy English basements emerging in DC, show that dedicated living quarters—like home theaters, guest suites, or playrooms—can elevate family functioning while keeping aesthetics in check. These spaces promote harmony and creativity in the home, supporting various activities that reflect the evolving needs of families. Common Challenges and How to Overcome Them While undertaking a basement renovation, several key challenges must be addressed. Moisture and ventilation are common issues; ensuring proper drainage and installing high-efficiency exhaust systems are vital to maintaining a healthy environment. Moreover, obtaining the necessary permits is crucial—especially in a regulated area like Washington, DC where local compliance mandates can impact a project’s success. Conclusion: Your Basement Awaits For homeowners in Washington, DC, the opportunity to transform basements into functional artistic spaces is not just feasible; it’s a reality that many are embracing. Whether you’re looking to create a haven for creativity or simply enhance your living space, considering a basement remodel could lead to the most rewarding investment in your home. If you are inspired by what you’ve read, take the next step and consult with an expert to start your basement transformation journey today.

03.10.2026

Discover the Exciting Remodeling Trends for Spring 2026 You Can't Miss

Update Emerging Remodeling Trends for Spring 2026: A Personal Touch As we welcome Spring 2026, the way we approach home remodeling is shifting significantly. Designers and homeowners alike are searching for ways to make their living spaces more personal and functional. This year, the focus is on creating environments that reflect individuality, passions, and the joys of daily life. Layered, Collected Interiors: Moving Beyond Minimalism The minimalist trends that dominated previous years are fading as homeowners begin to crave richer, more layered interior designs. The look of perfection is being replaced with an emphasis on texture and a curated collection of meaningful items. Incorporating statement lighting, patterned textiles, and unique finishes create spaces that tell stories and express personality. This mirrors a broader theme emphasized in the lifestyle sector, where a move toward unique personal style is becoming a defining characteristic of modern design. Interior designers agree that homes should feel lived-in and reflective of the owner's tastes, straying away from the overly curated look. Spaces Designed for Passions: Making Room for Hobbies A notable design trend in 2026 is the prioritization of spaces dedicated to personal interests. Whether it’s a craft room, home gym, or music studio, homeowners are seeking to incorporate areas specifically tailored for their hobbies. These dedicated spaces do not only enhance the home’s functionality but also contribute to the well-being of the wearer by allowing them to engage in activities they love. This reflects a larger societal trend toward wellness and mental health, where having designated spaces for hobbies contributes to a balanced lifestyle. The integration of personal interests into home design can invigorate daily routines, making home life more enjoyable. Bold Statement Materials: A Dramatic Shift in Design The materials chosen for home renovations are evolving as well. Rather than opting for understated finishes, designers in 2026 are leaning toward bold stone surfaces and richly textured cabinetry that command attention. These statement materials act as focal points, adding depth and character to kitchens and living spaces. This trend towards timeless yet striking materials aligns with a growing appreciation for craftsmanship, as homeowners seek to invest in quality pieces that enhance their overall aesthetic. By spotlighting these unique materials, designers are not only creating visual interest but also honoring the art of skilled workmanship. Enhancing Natural Light: A Bright Idea Efforts to increase natural light intake in homes have become a major renovation focus. Expanding windows, adding doors, and maximizing sightlines are essential to creating brighter, more open spaces that feel welcoming. This strategy does not solely improve aesthetics but also contributes to a healthier living environment, maximizing the benefits of natural light for residents. The correlation between light-filled rooms and mood enhancement resonates with ongoing discussions about the importance of mental and physical health at home. The architectural community is prioritizing this aspect to ensure that homes not only look appealing but foster well-being. Outdoor Living: Extending Spaces Beyond Walls As the weather warms, outdoor spaces are being redesigned to seamlessly connect with interiors. Outdoor kitchens, covered patios, and inviting lounge areas are becoming essential features in home renovations, allowing homeowners to enjoy nature's beauty while enjoying the comforts found inside. Bringing outdoor elements into home design reflects a lifestyle choice that encourages relaxation and social interaction, aligning with broader wellness trends. These thoughtfully designed spaces aim to blur the lines between indoor and outdoor living, lessening the barriers often associated with seasonal activities. Conclusion: Designing a Home That Reflects You With these Spring 2026 remodeling trends, homeowners can create spaces that reflect their unique tastes, current lifestyle, and emotional needs. By moving away from rigid, impersonal design aesthetics, individuals are finding value in personal expression and a connection to their environments. As you contemplate renovation or design projects this spring, consider how these trends can enhance your home and overall lifestyle. Choose to create spaces that bring you joy, comfort, and a sense of belonging.

Terms of Service

Privacy Policy

Core Modal Title

Sorry, no results found

You Might Find These Articles Interesting

T
Please Check Your Email
We Will Be Following Up Shortly
*
*
*